Mock API Response
Overview
The Yappes Mock API Response feature allows you to create simulated API endpoints that return predefined responses without connecting to actual backend services, so you can accelerate API development and testing cycles.
This powerful gateway policy enables you to prototype APIs before backend implementation is complete, test client applications against consistent responses, and demonstrate API functionality without exposing production systems.
The mocking capability integrates seamlessly into the Yappes API management workflow, offering flexible configuration options for request matching and response definition. You can create mock responses in two convenient ways: during the initial API onboarding process or directly from the gateway policy page.
This dual approach ensures that whether you're setting up a new API or enhancing an existing one, you can quickly implement mock responses that match your exact specifications. By leveraging Yappes mocking features, development teams can work in parallel - frontend developers can proceed with integration while backend services are still being developed, QA teams can test against predictable responses, and stakeholders can review API behavior through live demonstrations.
Prerequisites
Before implementing Mock API Responses on the Yappes platform, ensure you have:
-
Access Requirements
-
Valid Yappes platform account with
API Manager access. - Appropriate permissions to
create and manage gateway policies. -
Rights to
onboard and configure APIs. -
Preliminary Setup
-
At least one API ready for onboarding (if using the onboarding method).
API hostnameandhost informationconfigured.Base pathconfigurationDomain preferences(custom or default)
Custom error and message
For error scenarios, you can override the default HTTP status code, error code, and message. See Custom Error and Message.
Step-by-Step Implementation
Method 1: Creating Mock API Response During API Onboarding
Step 1: Navigate to API Manager
- Click on
Manage APIsin the main dashboard. - Select
My APIsfrom the submenu. - You should now see your API management interface.
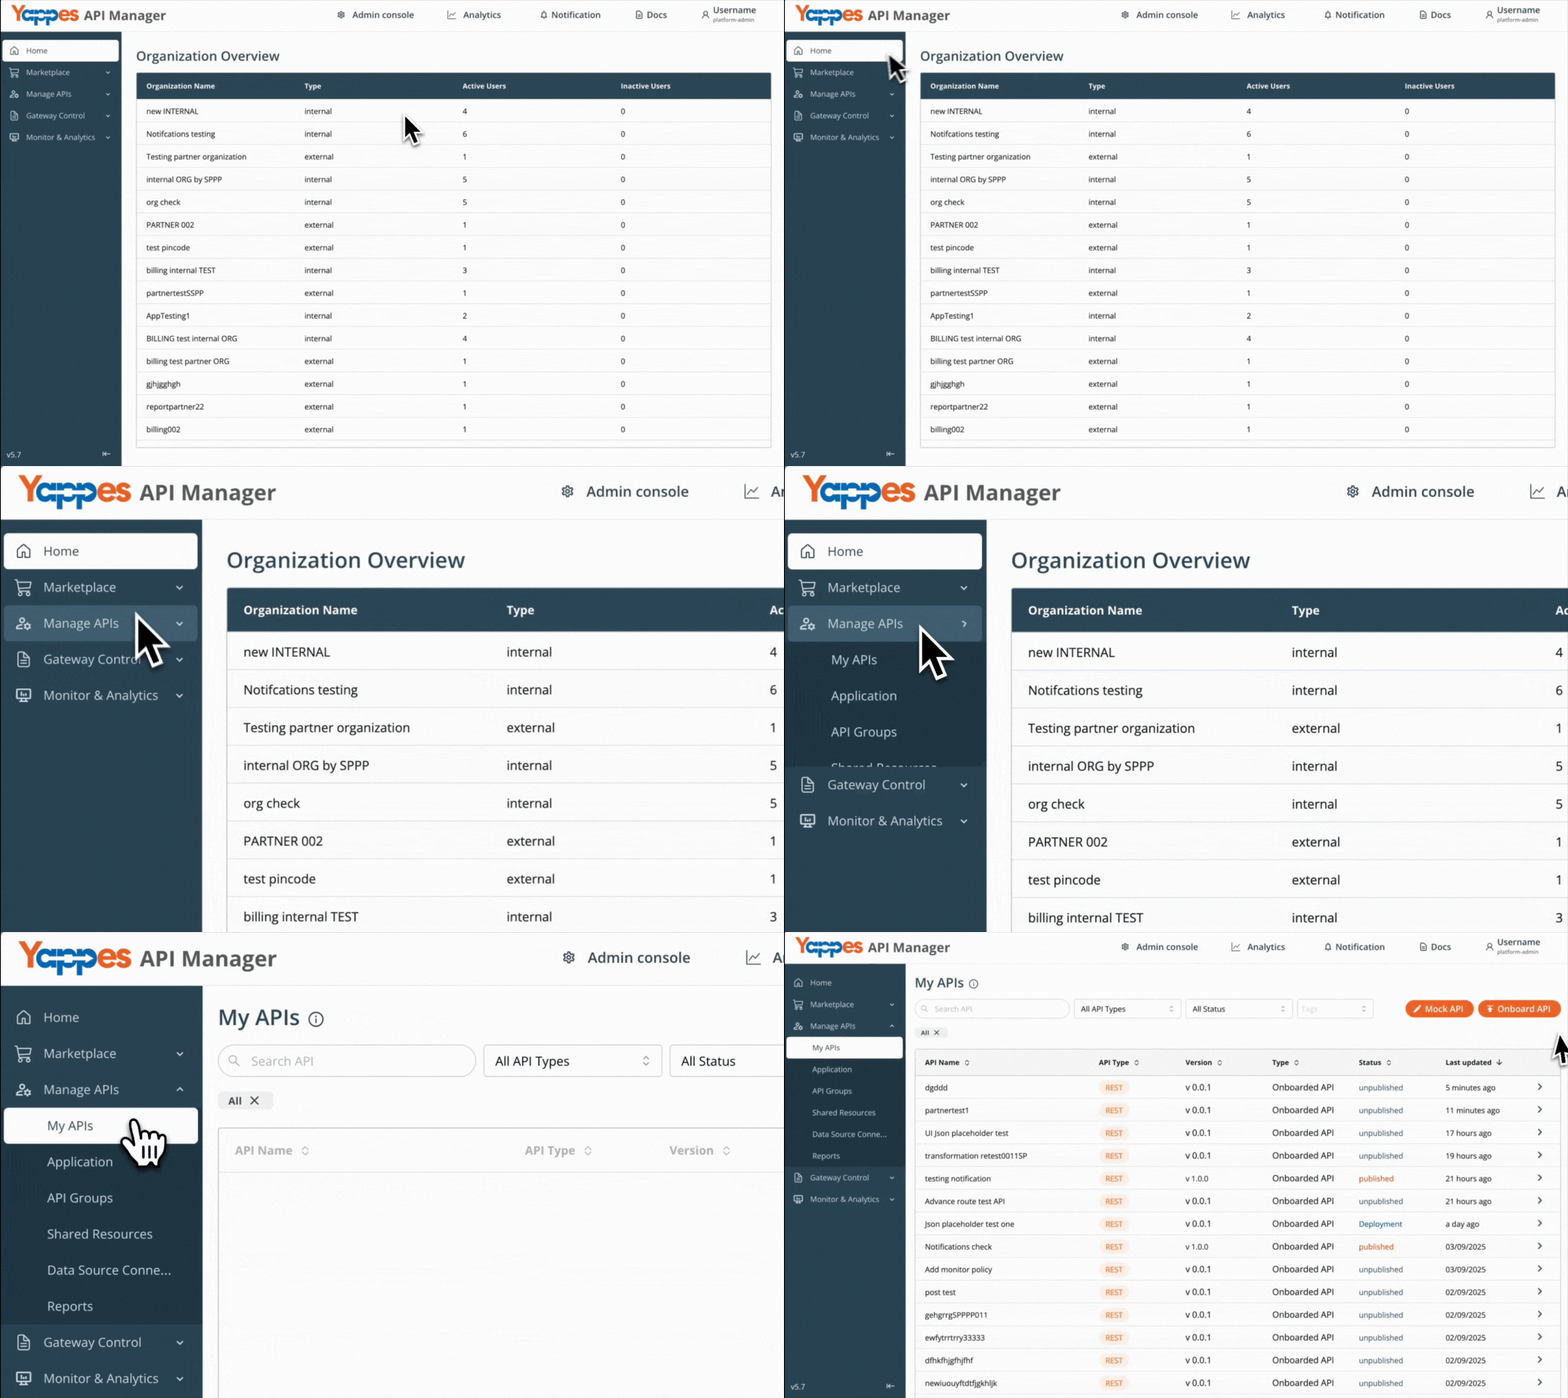
Step 2: Initiate API Onboarding
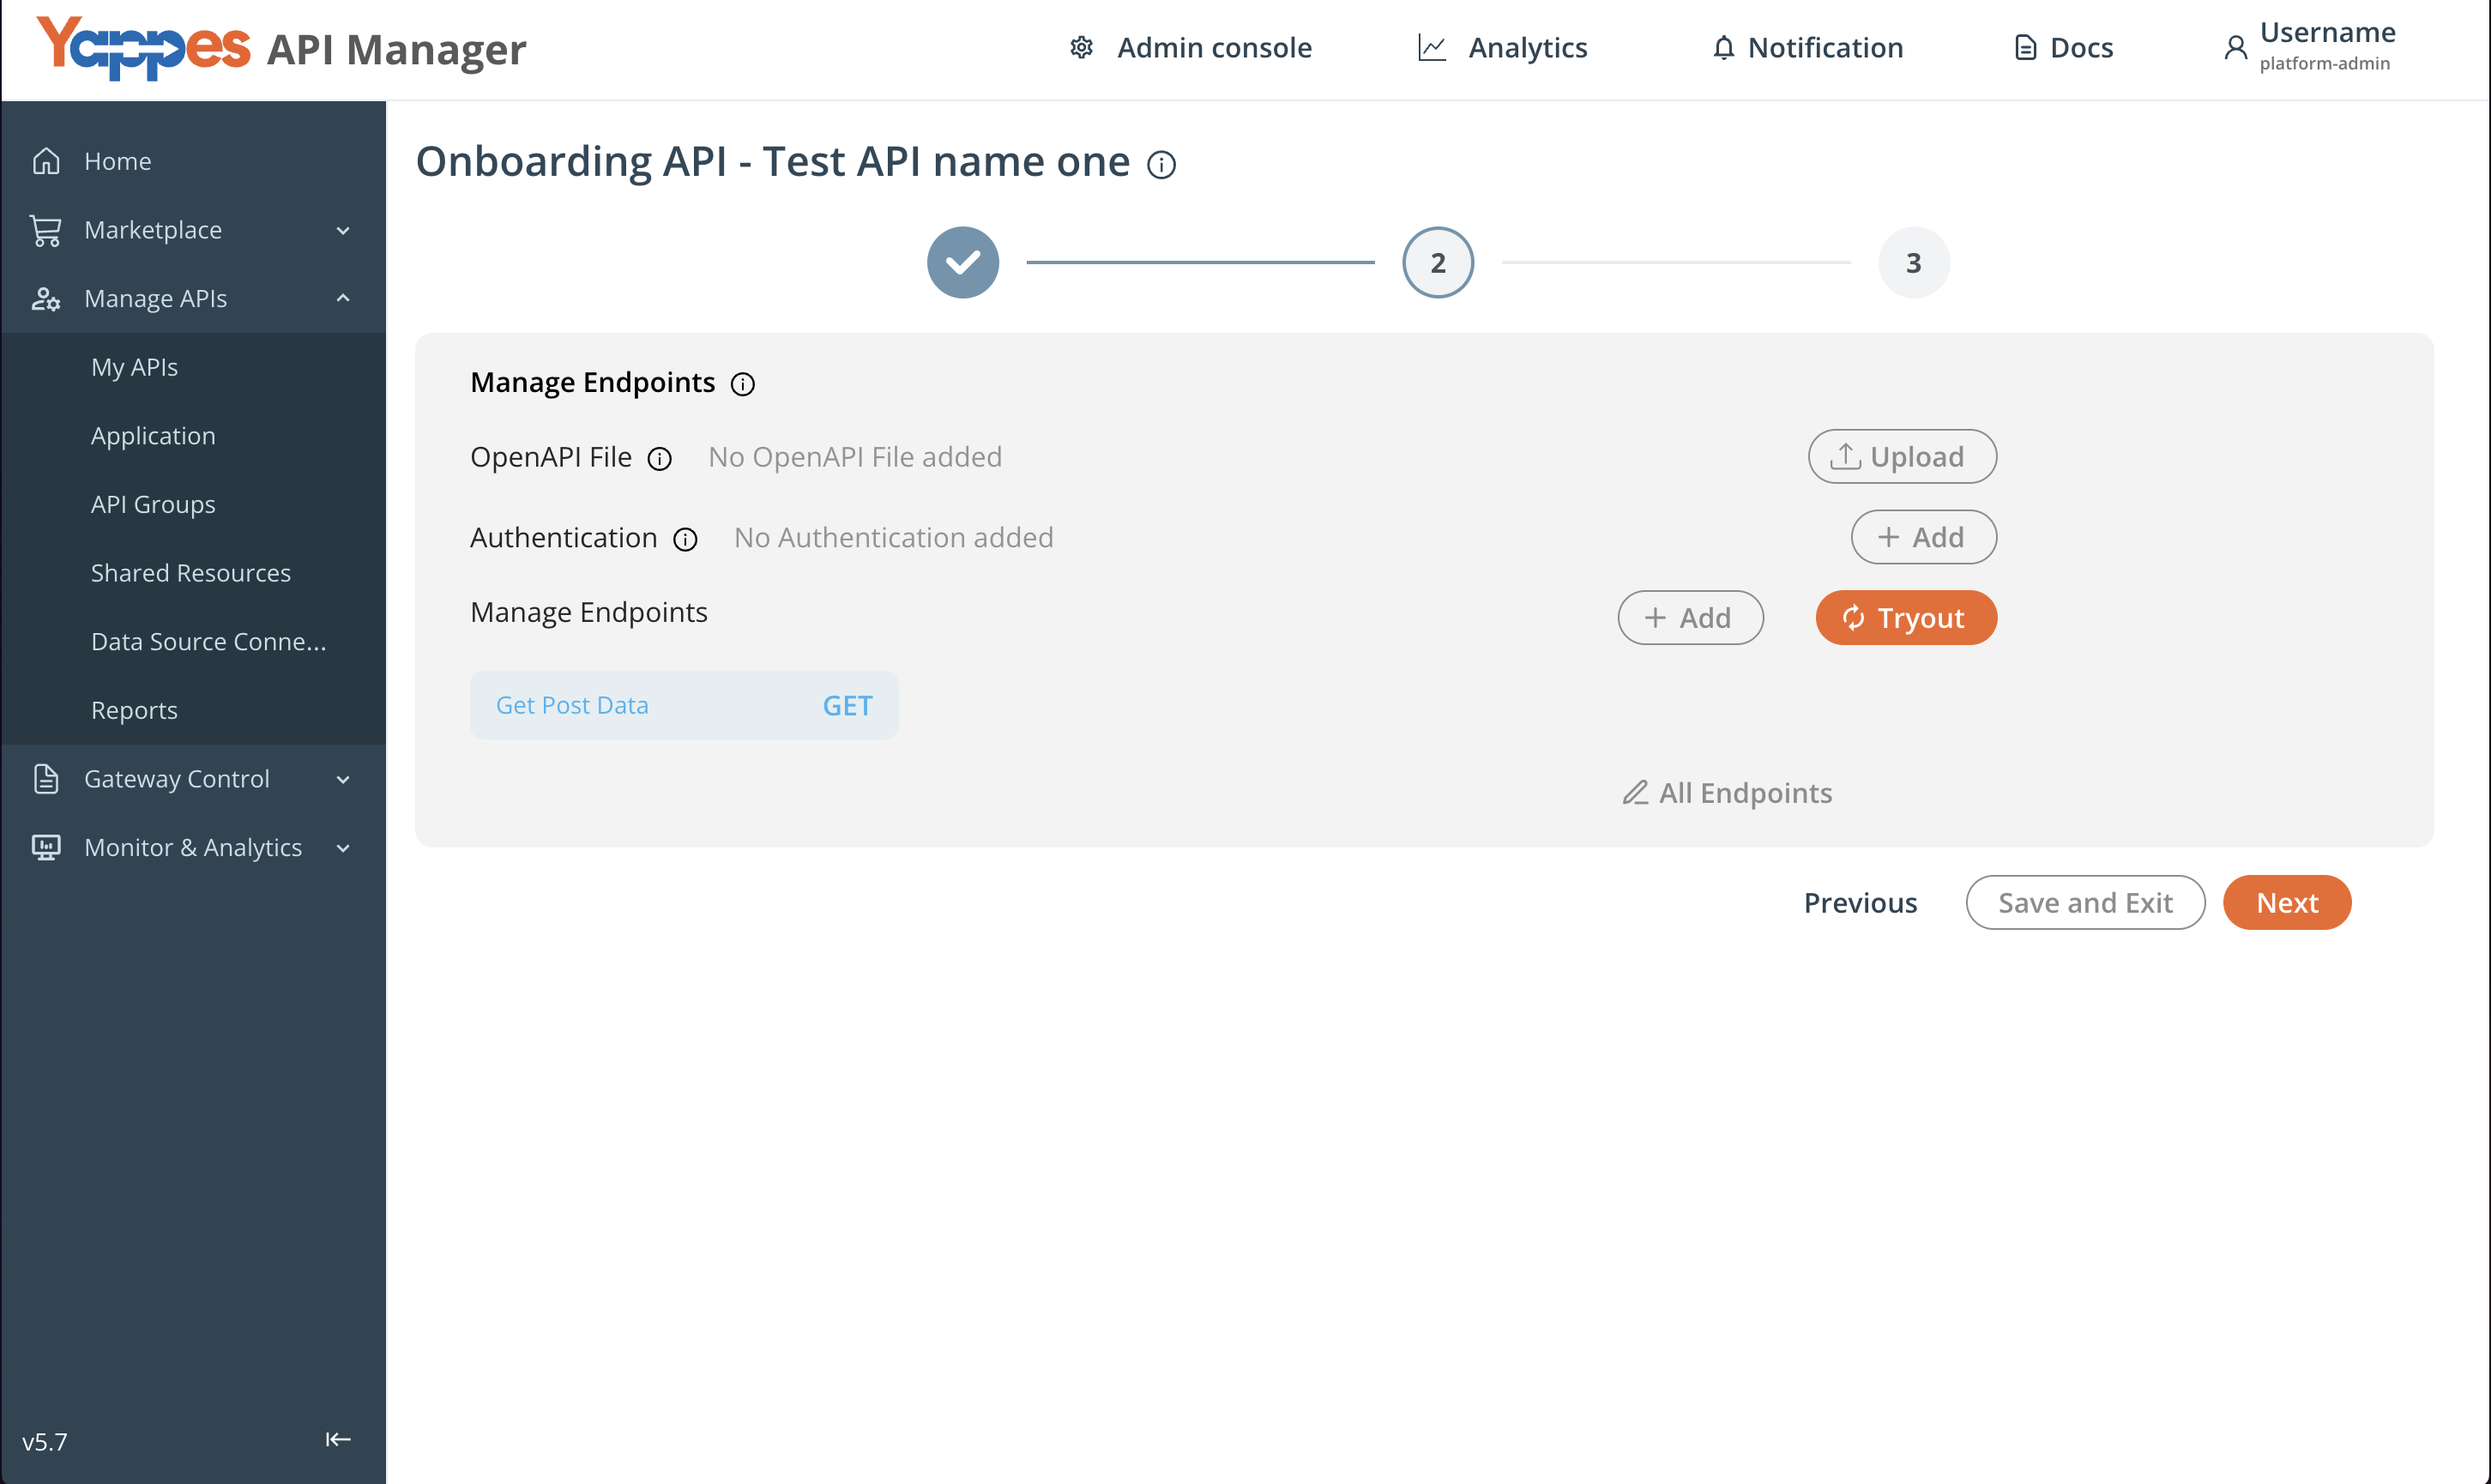
- Onboard from My APIs using the guide for your API type.
Step 3: Select Endpoint for attaching Mock API Response
- Click on your newly created endpoint (e.g.,
get Post Data). - The endpoint details panel will open.
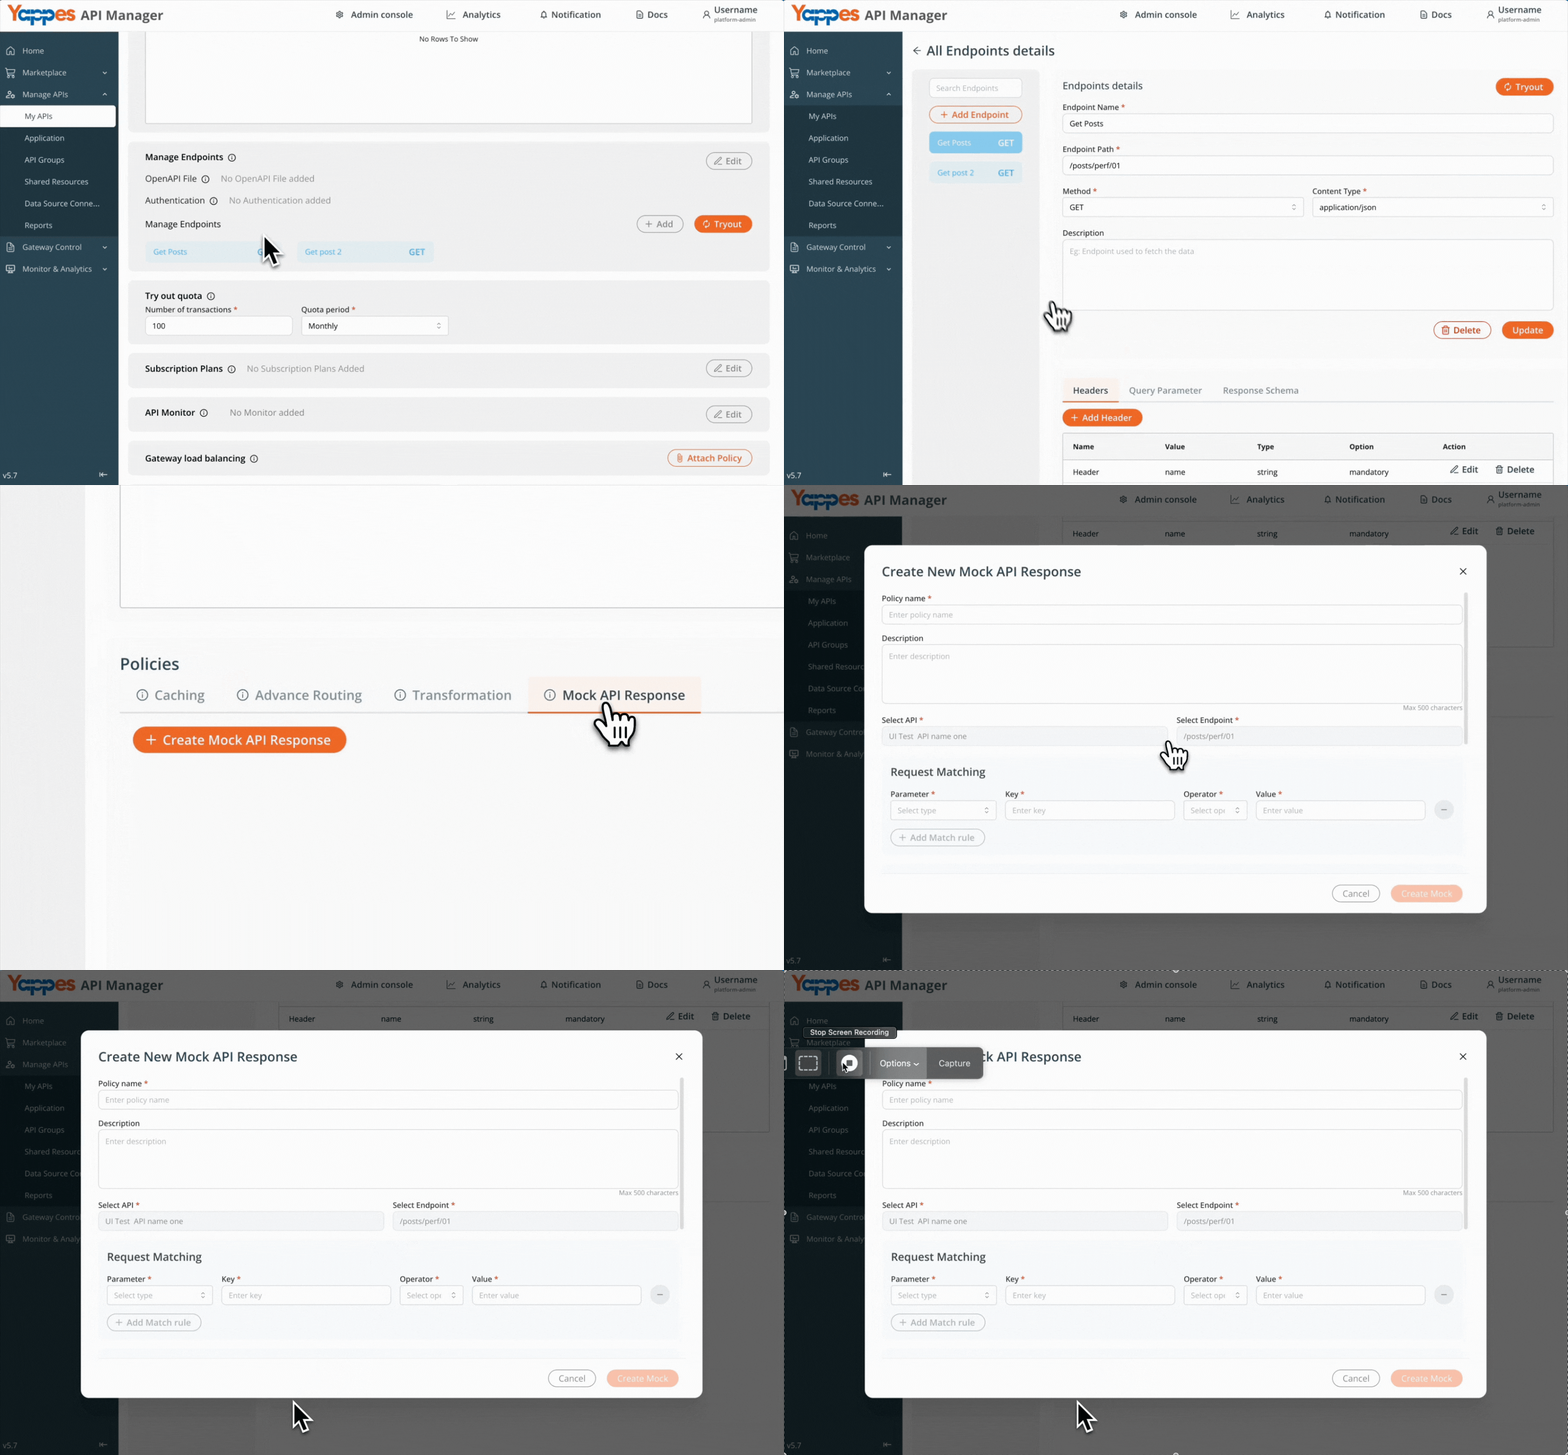
Step 4: Access Mock API Response Configuration
- Locate and click the
Mock API Responsetab in the interface. - Click
Create Mock API Responseto open the policy configuration panel. - The Mock API Response configuration dialog will appear.
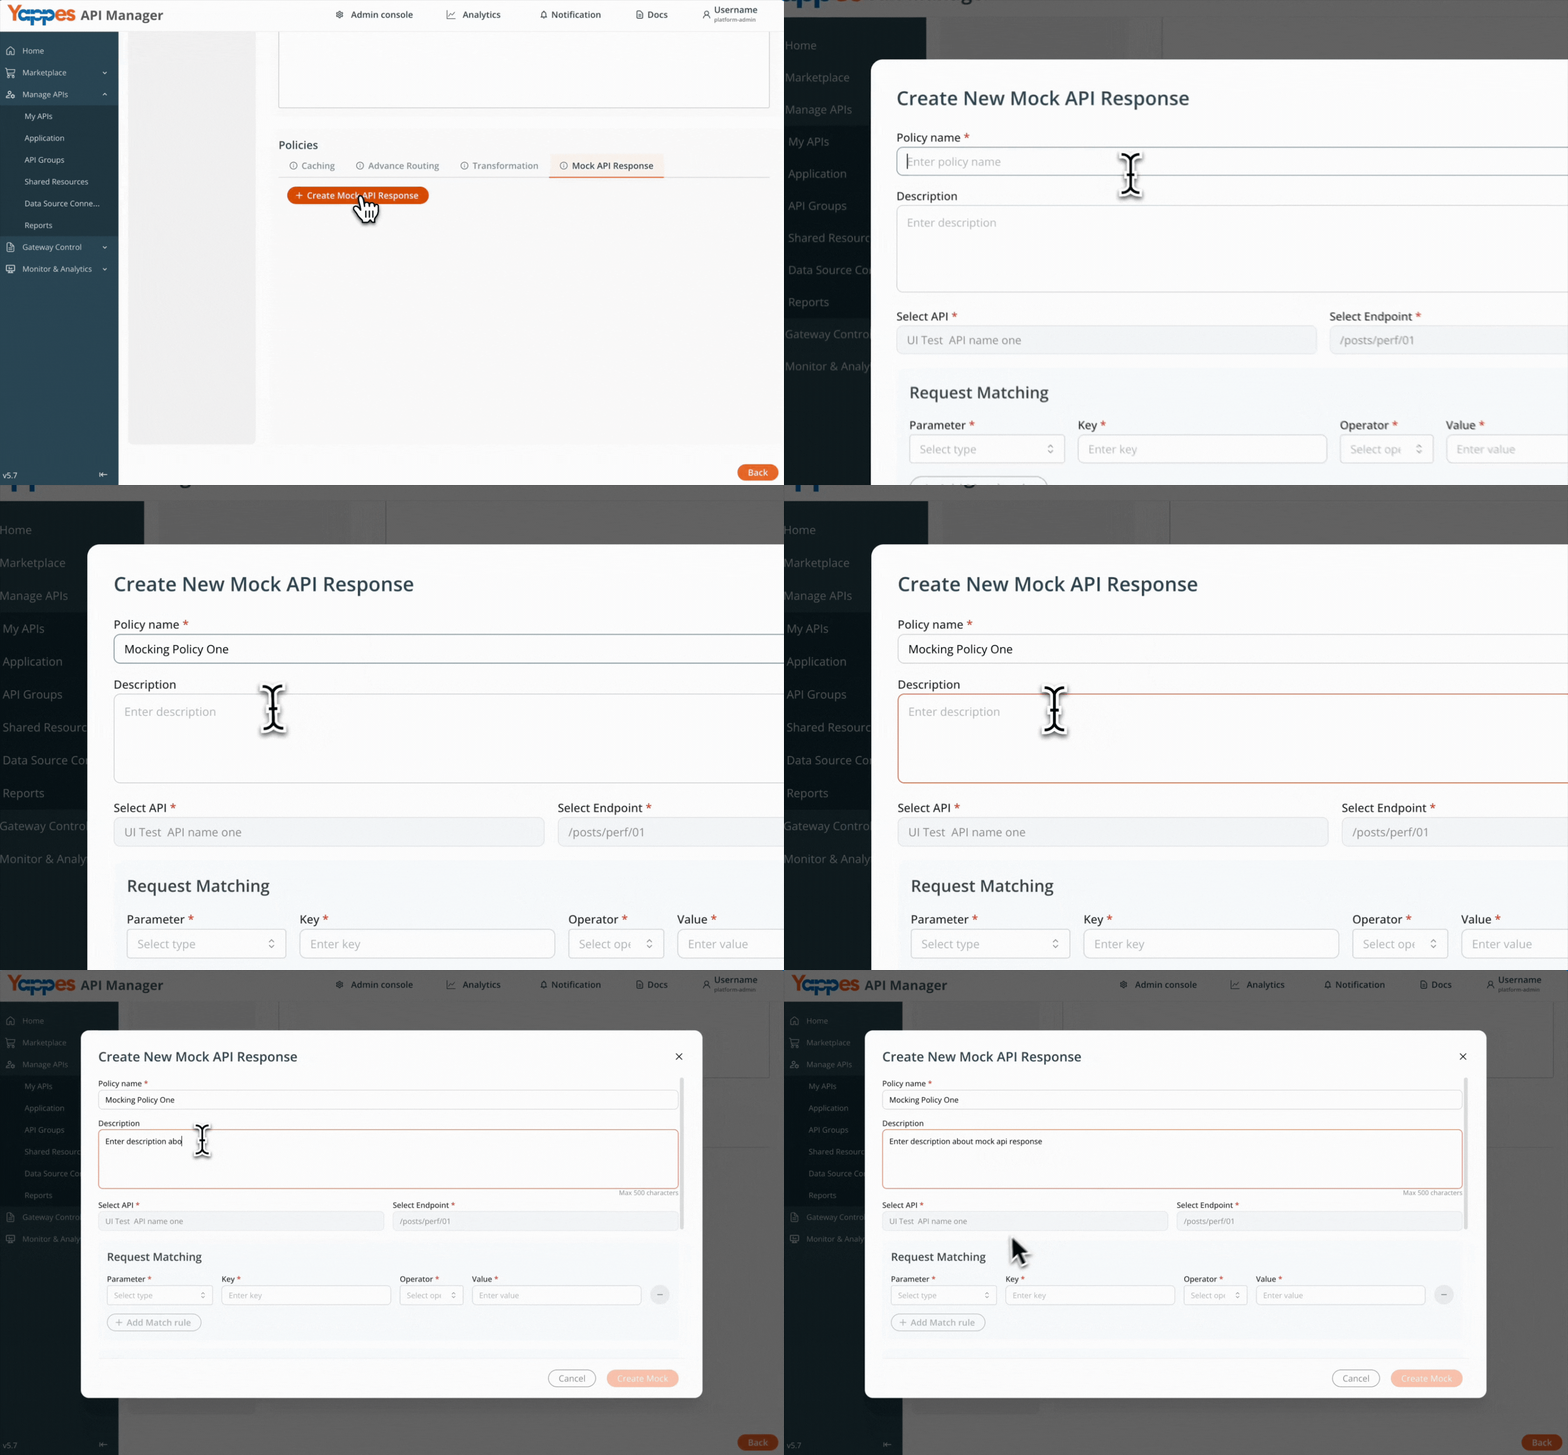
Step 5: Create the Mock API Response Policy
- Enter a descriptive name in the
Policy Namefield (e.g.,Mocking Policy One). - Add a detailed
descriptionin the Enter description field to document the policy purpose.
Step 6: Configure Request Matching Parameters
Define how incoming requests will be matched to trigger this mock response:
- Parameter: Select the
parameter type(e.g., Header) - Key: Enter the specific
keyto match (e.g., Server) - Operator: Choose the comparison
operator(e.g., Equals) - Value: Specify the
valuethat must match
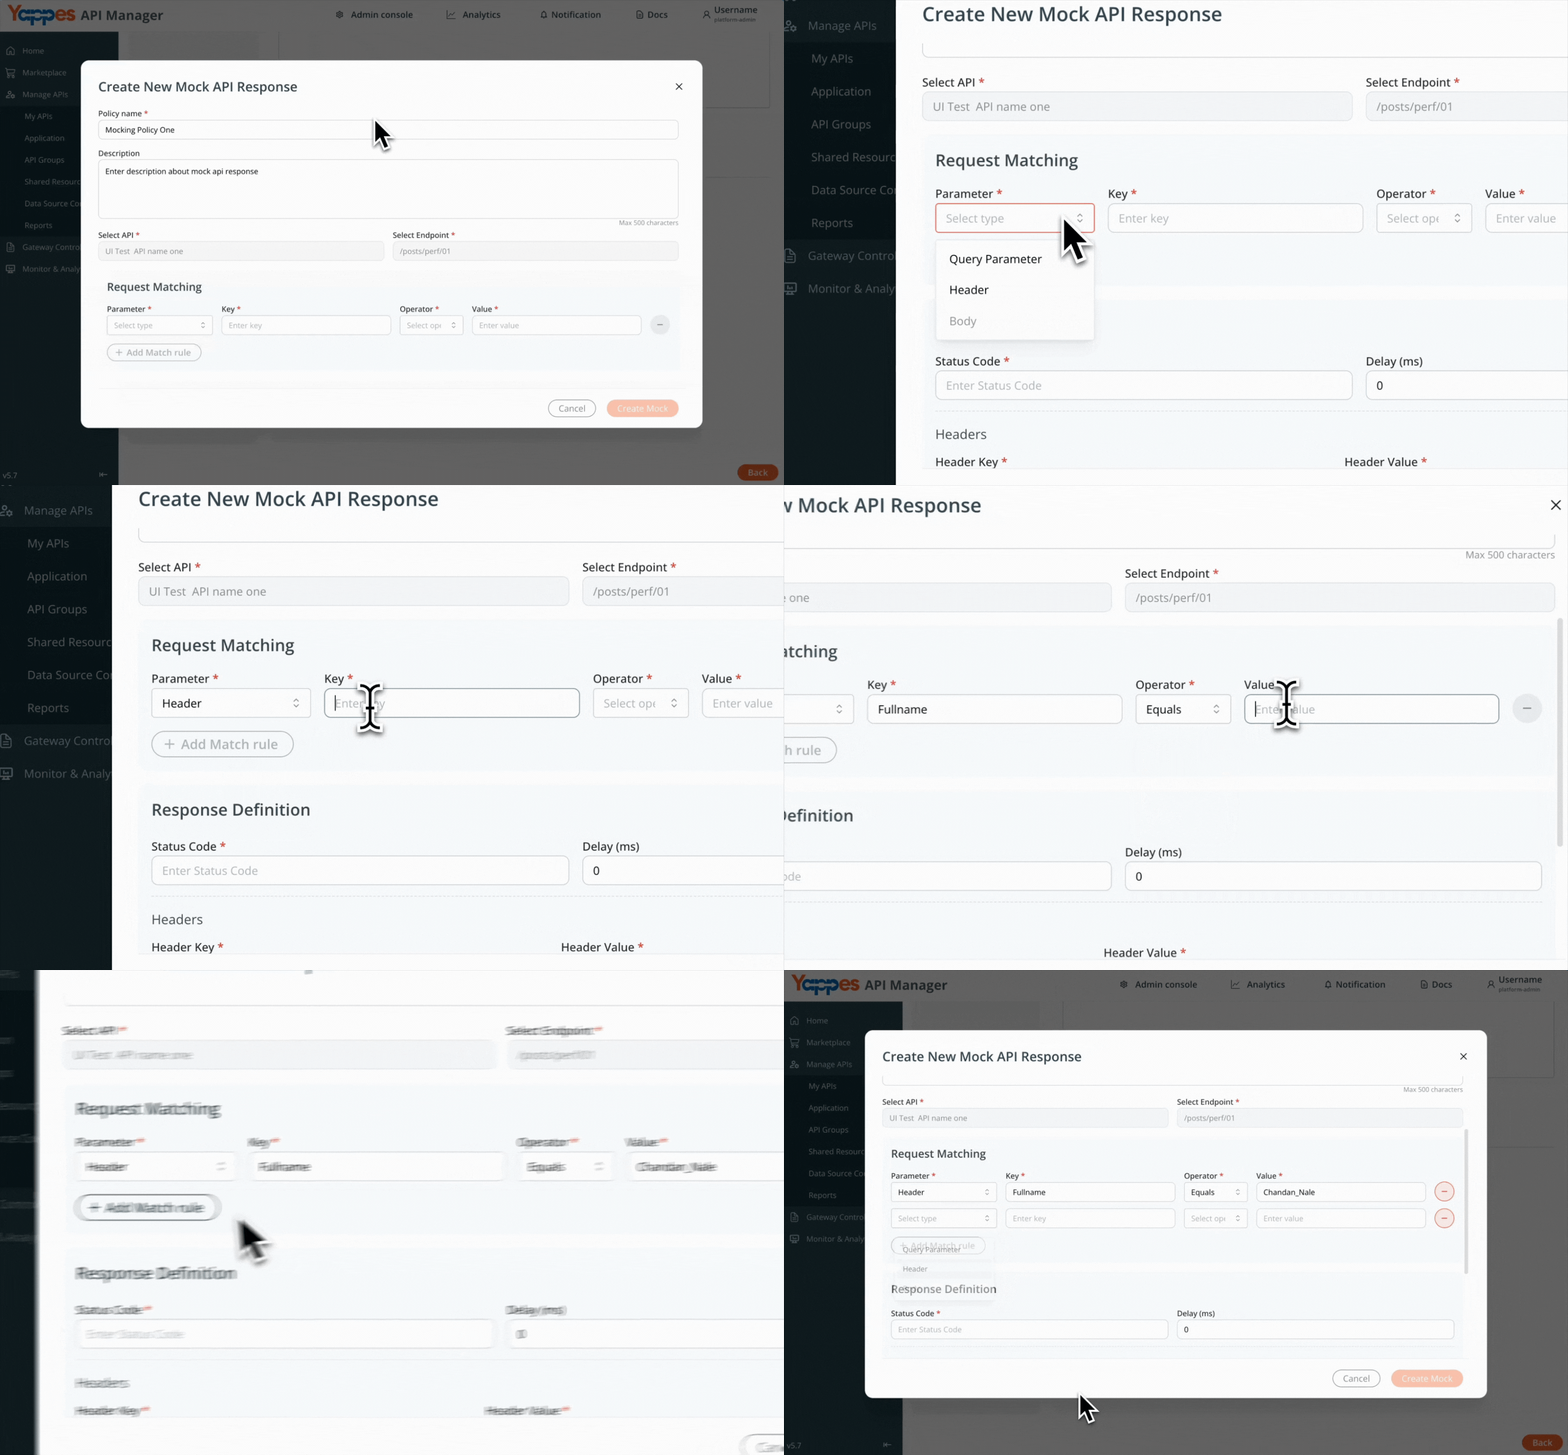
Step 7: Define Mock API Response Configuration
Configure the response that will be returned:
- Status Code: Set the HTTP status (e.g., 200)
- Delay (ms): Add artificial delay if needed (e.g., 0):
- Headers: Add custom response headers
- Header Key: connection
- Header Value: keep-alive
- Body: Define the response body.
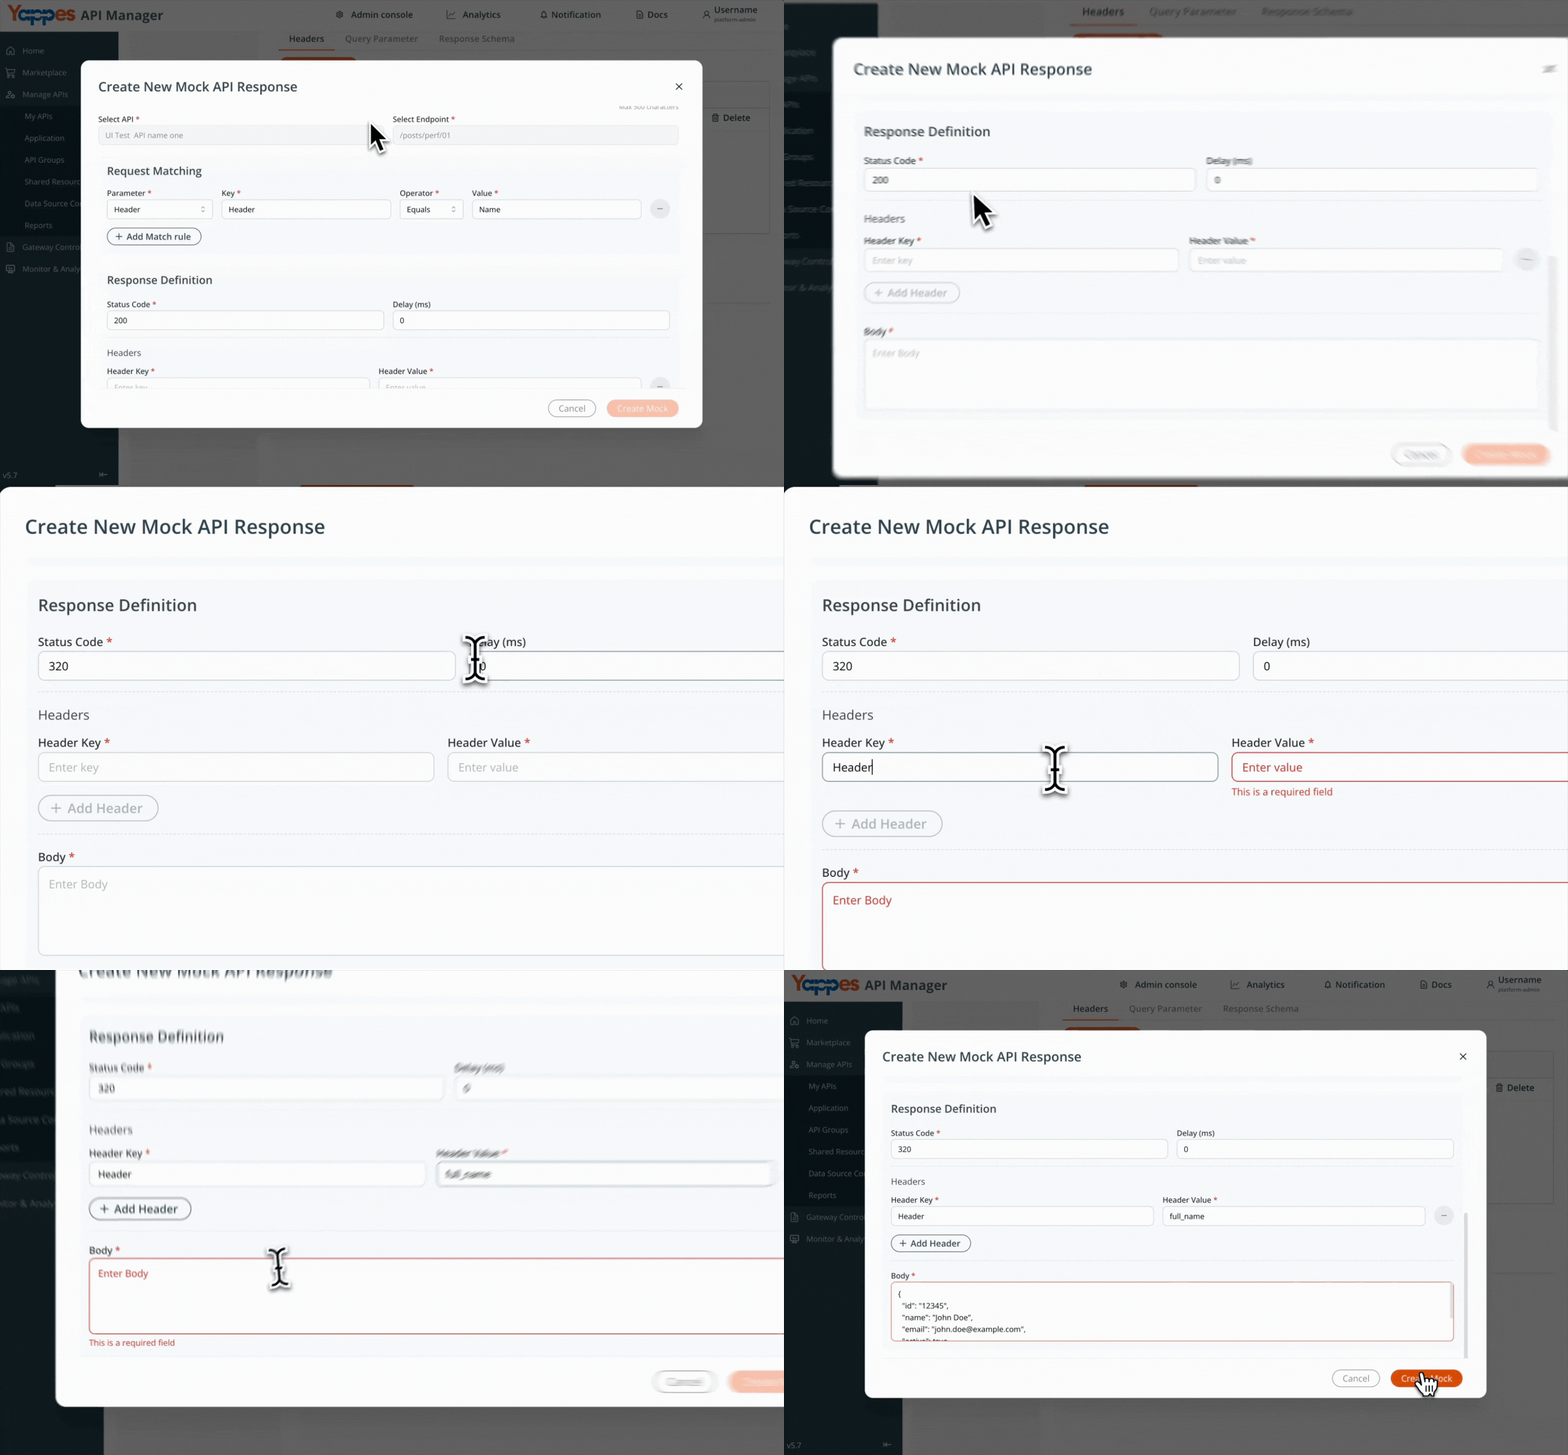
Step 8: Submit to Create Mock API response
- Review all configuration settings.
- Click
Submitto create the Mock API Response policy. - You’ll receive confirmation of the Mock API Response policy created and attached to the API endpoint.
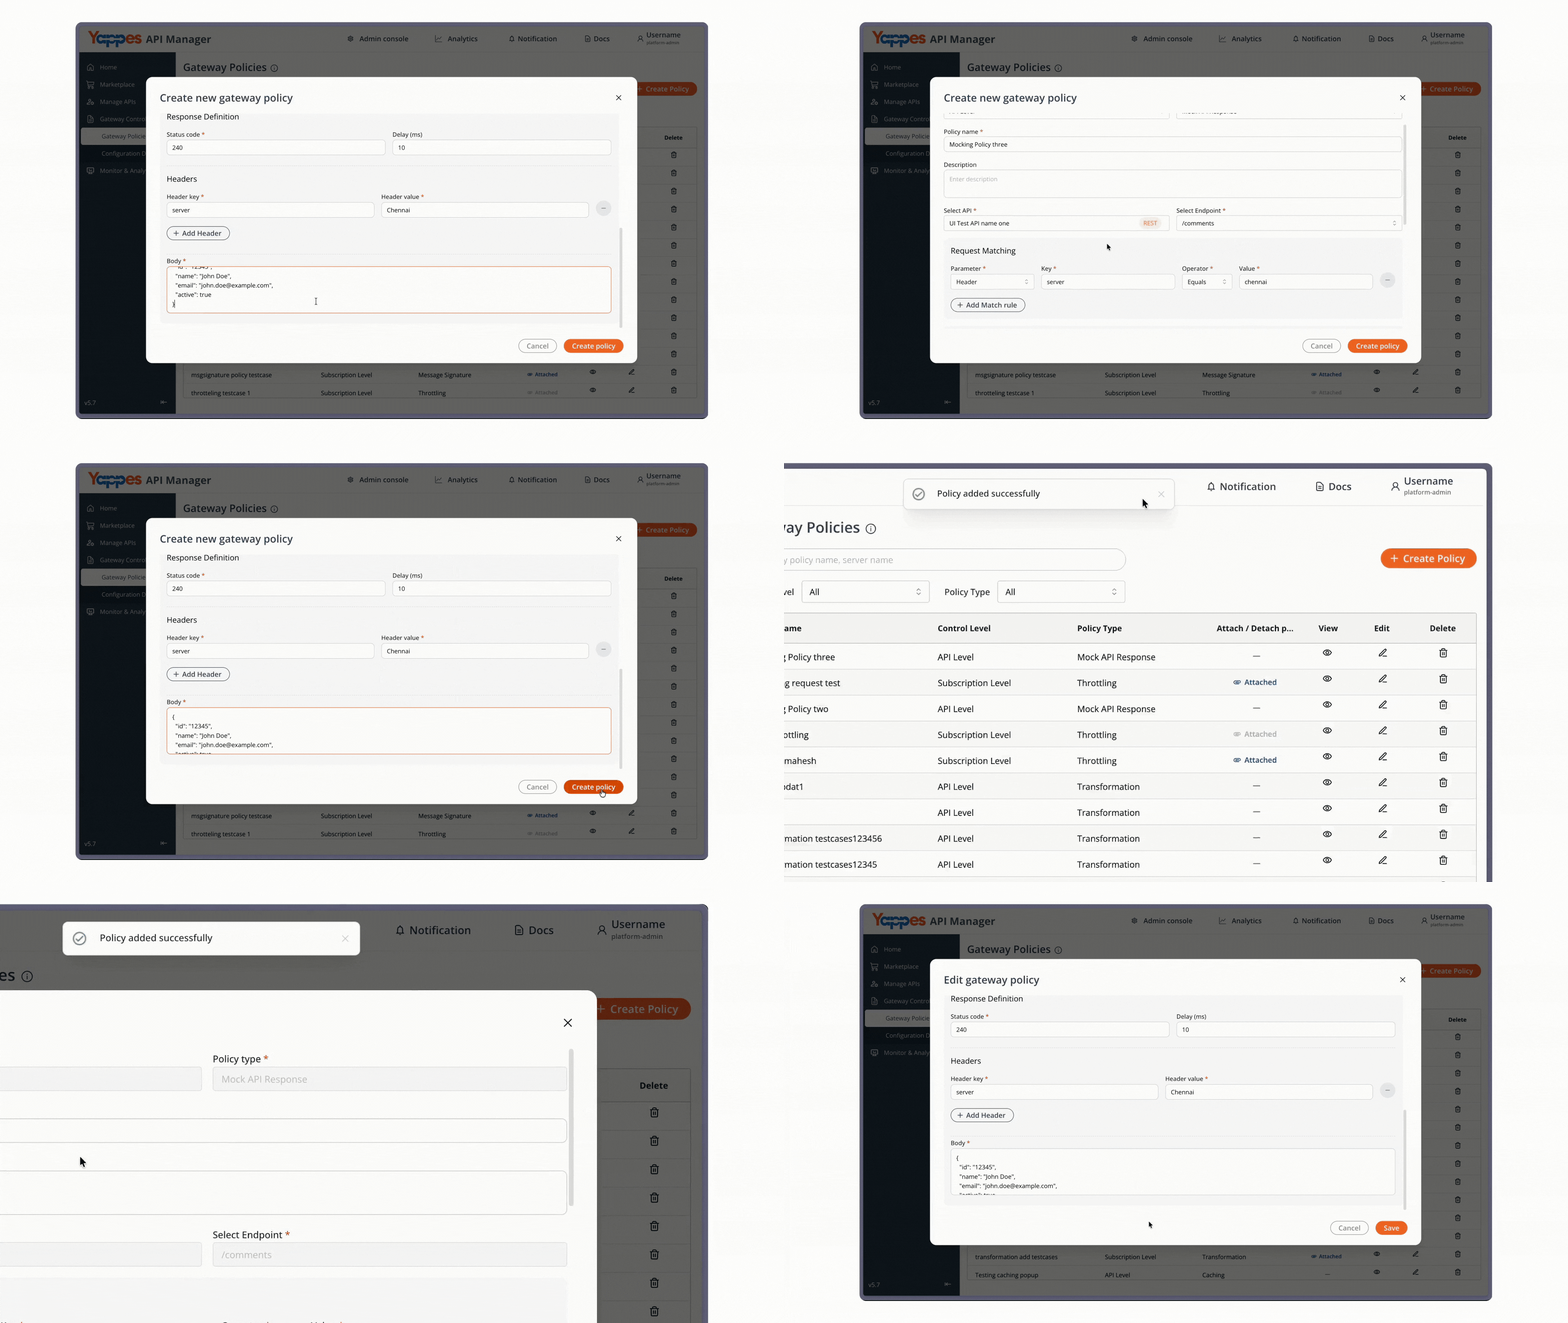
Method 2: Creating Mock API Response from Gateway Policy Page
Step 1: Navigate to Gateway Policies
- Locate
Gateway Control → Gateway Policiesin the main navigation menu. - The policies management interface will display.
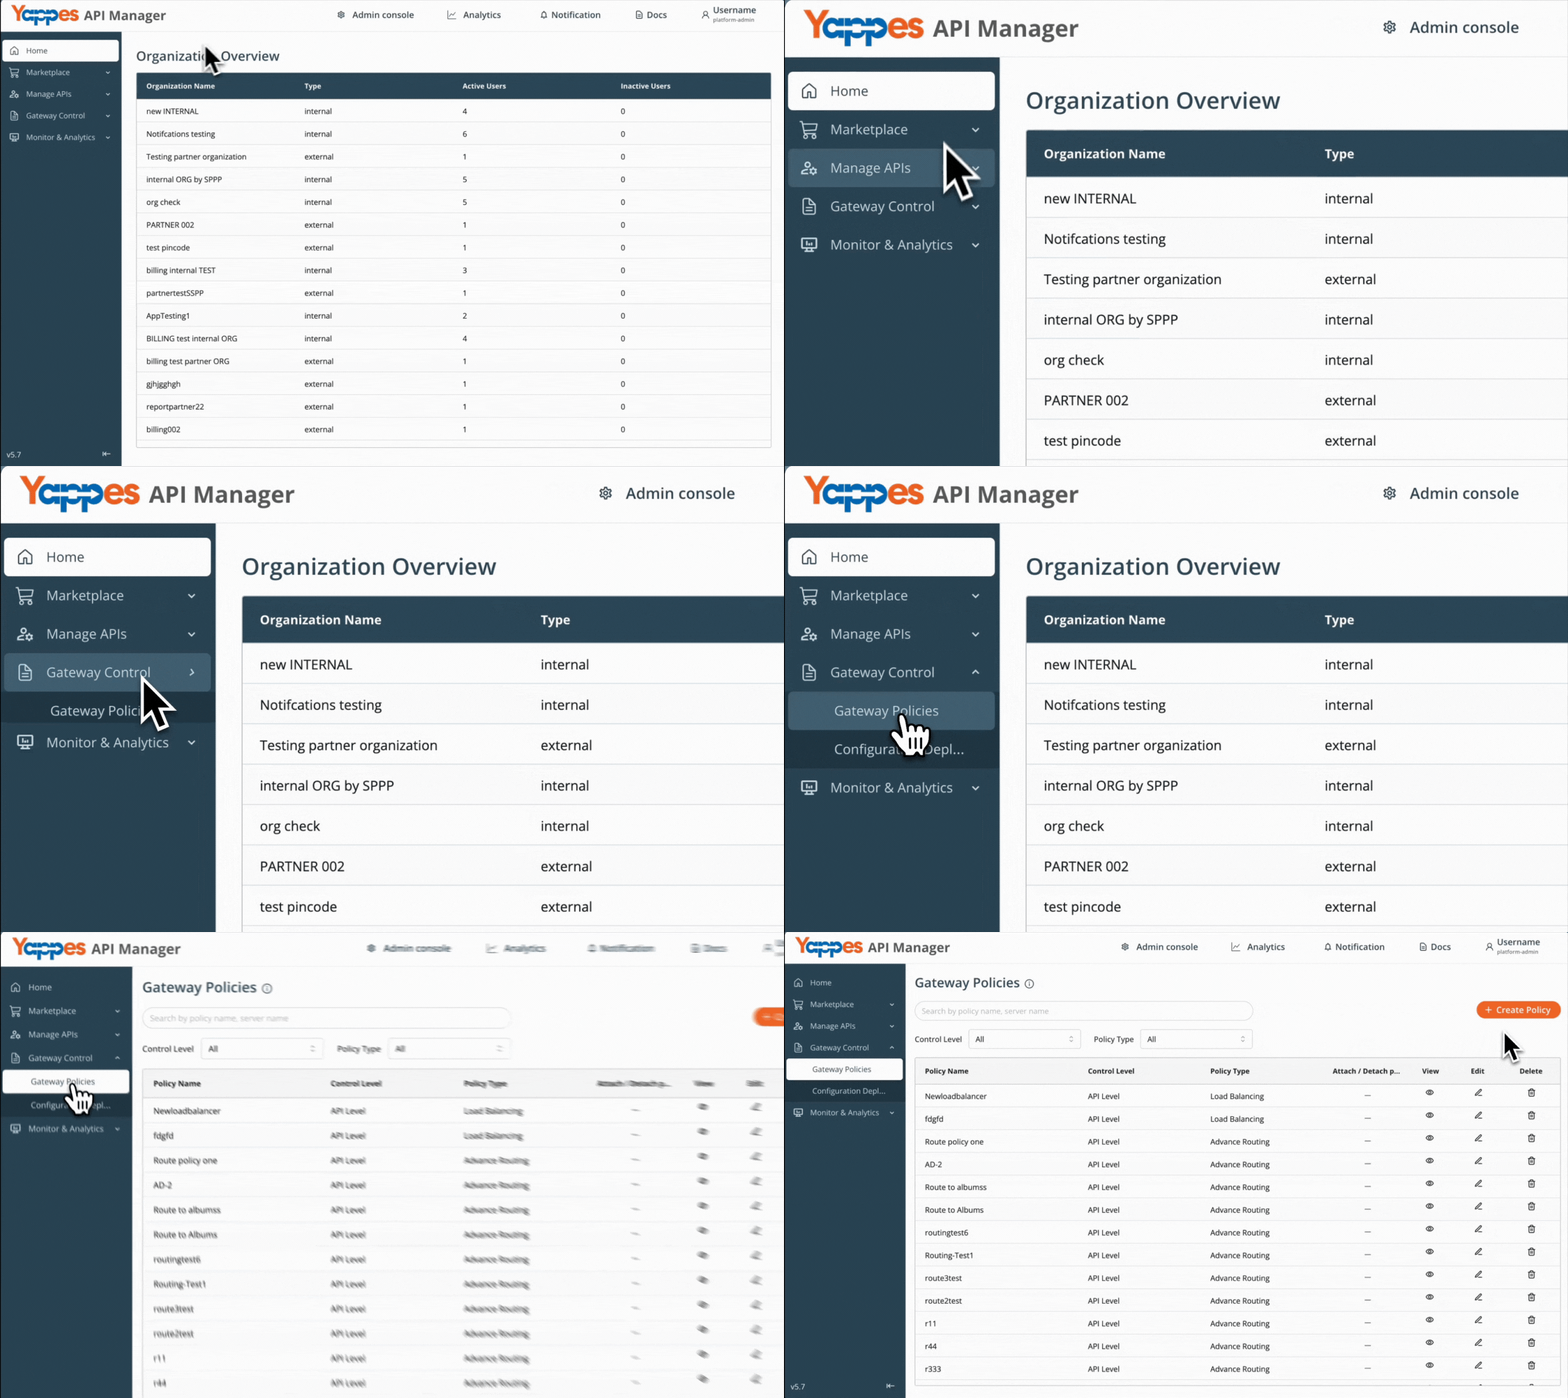
Step 2: Initialize New Policy Creation
- Click
+ Create Policybutton. - The policy creation modal will open.
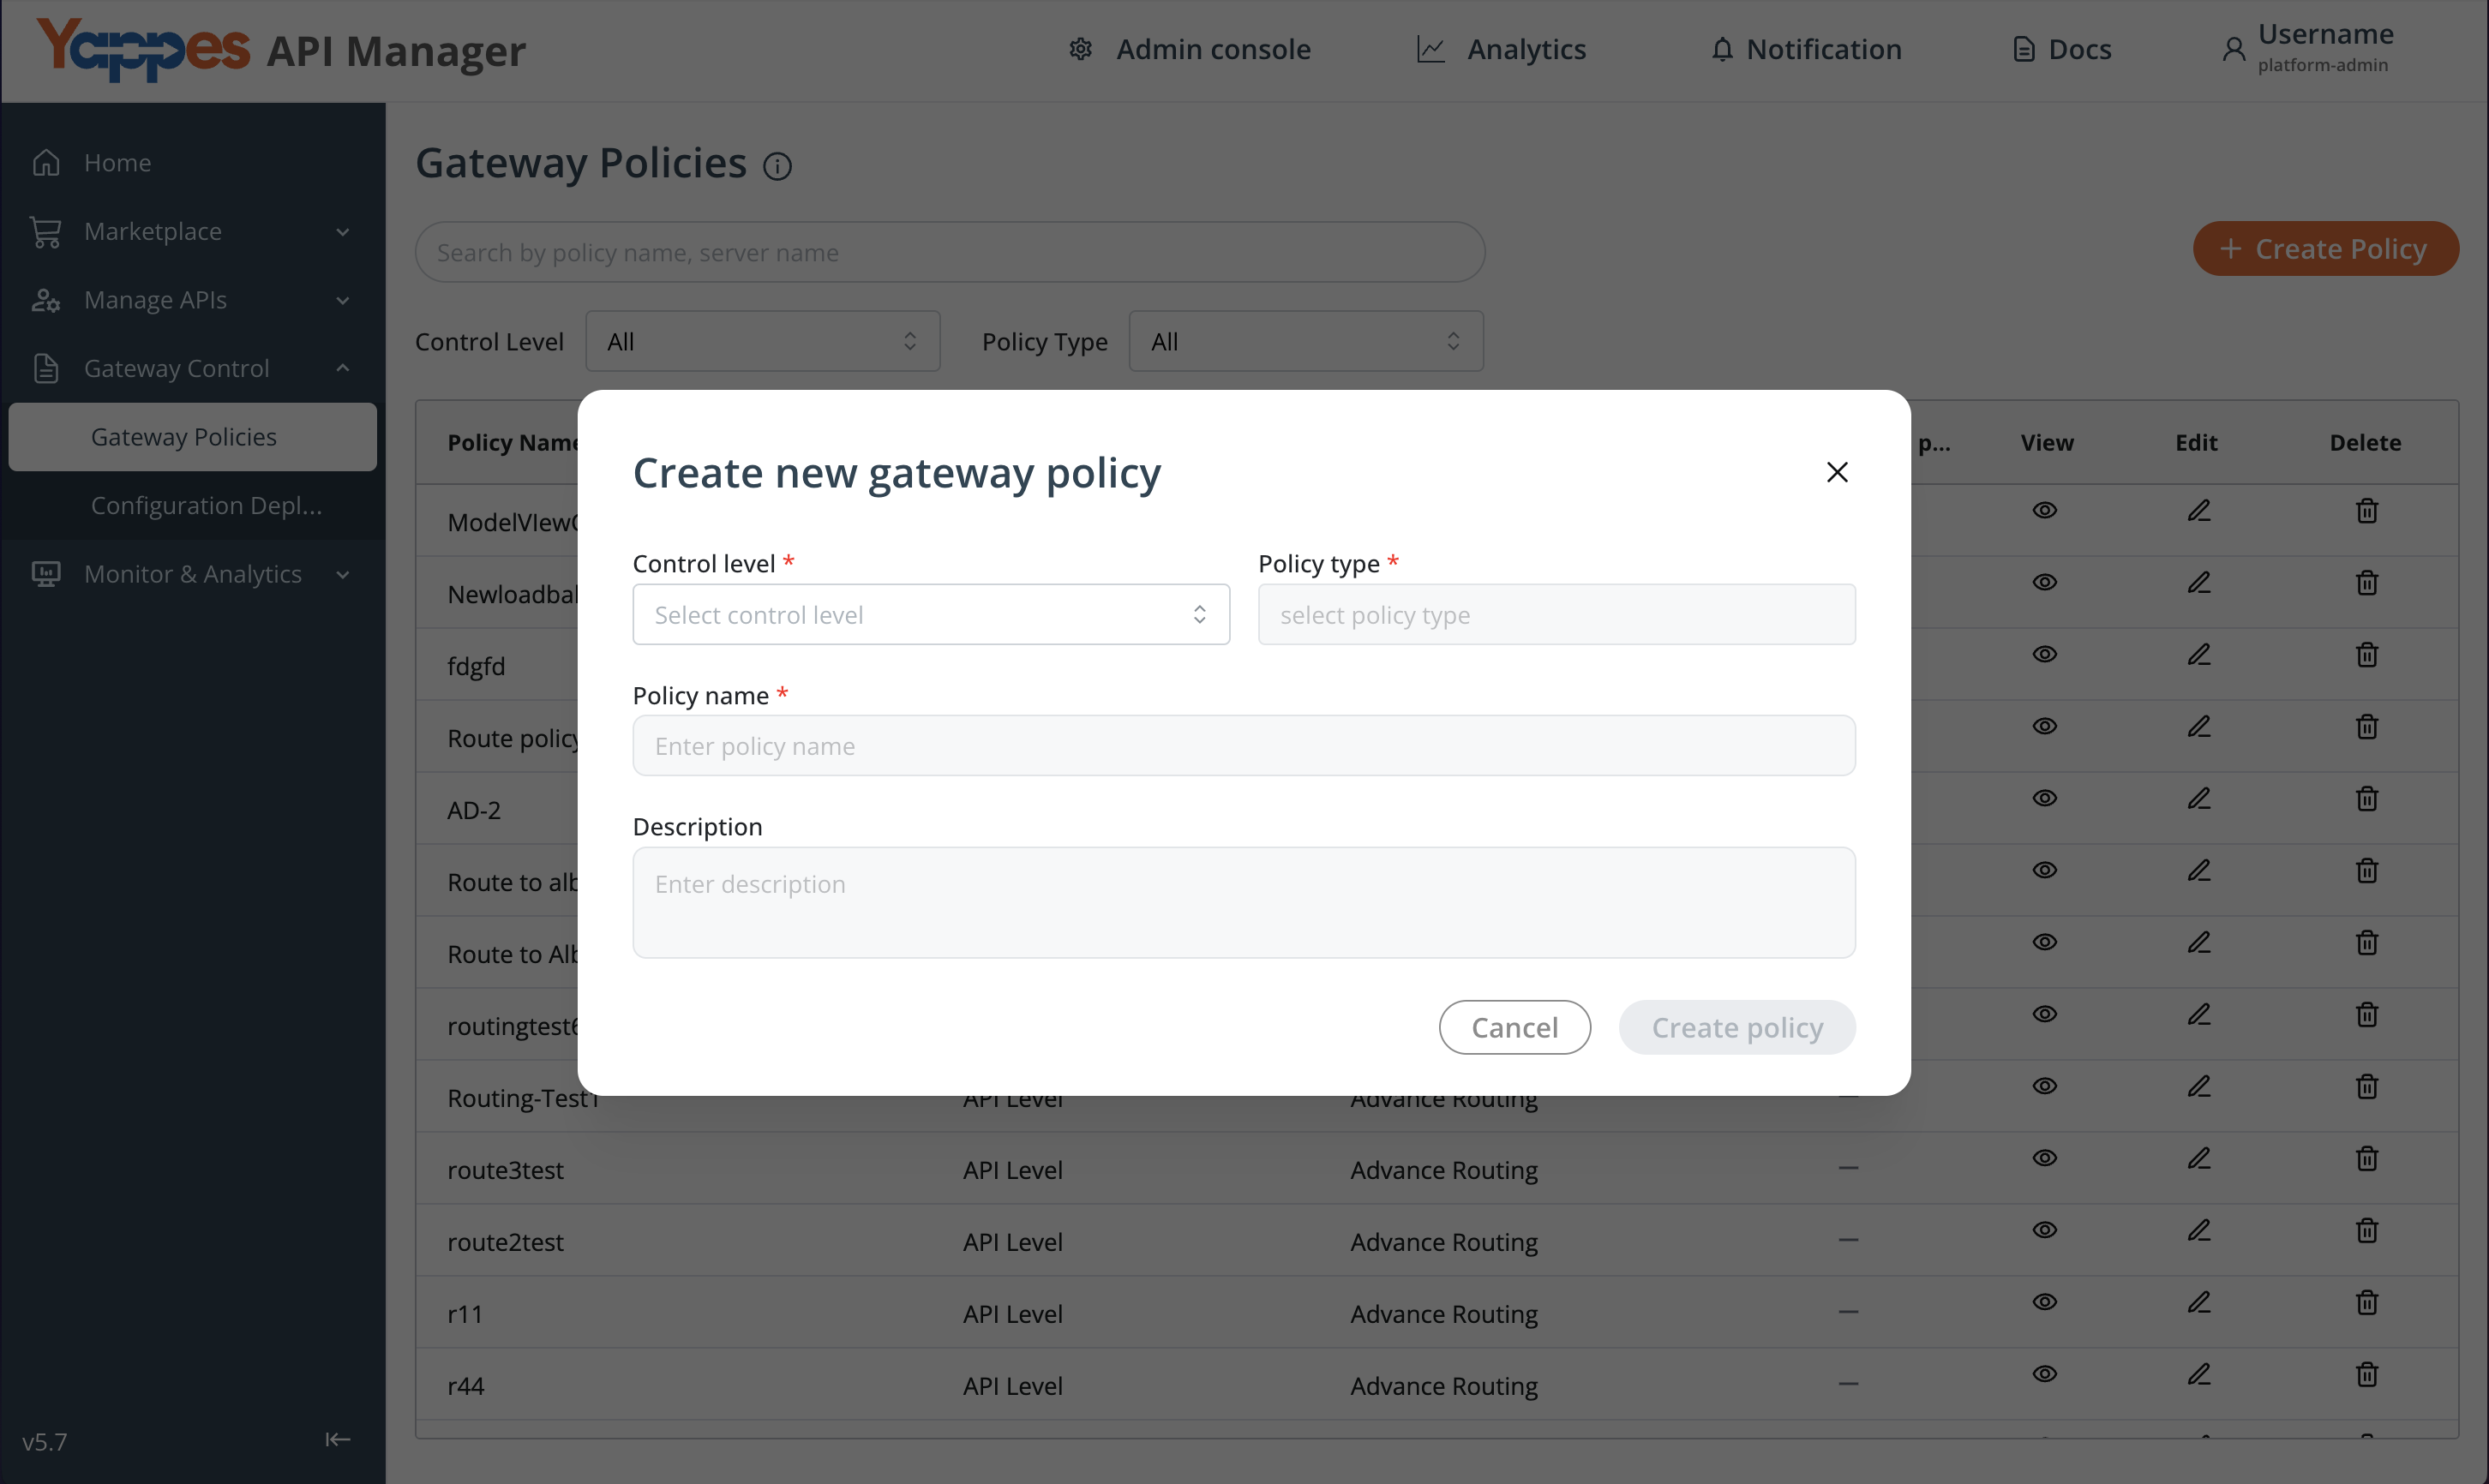
Step 3: Configure Policy Settings
-
Set the
Control LeveltoAPI Level. -
In the
Policy Typedropdown, selectMock API Response. -
These settings determine the policy scope and functionality.
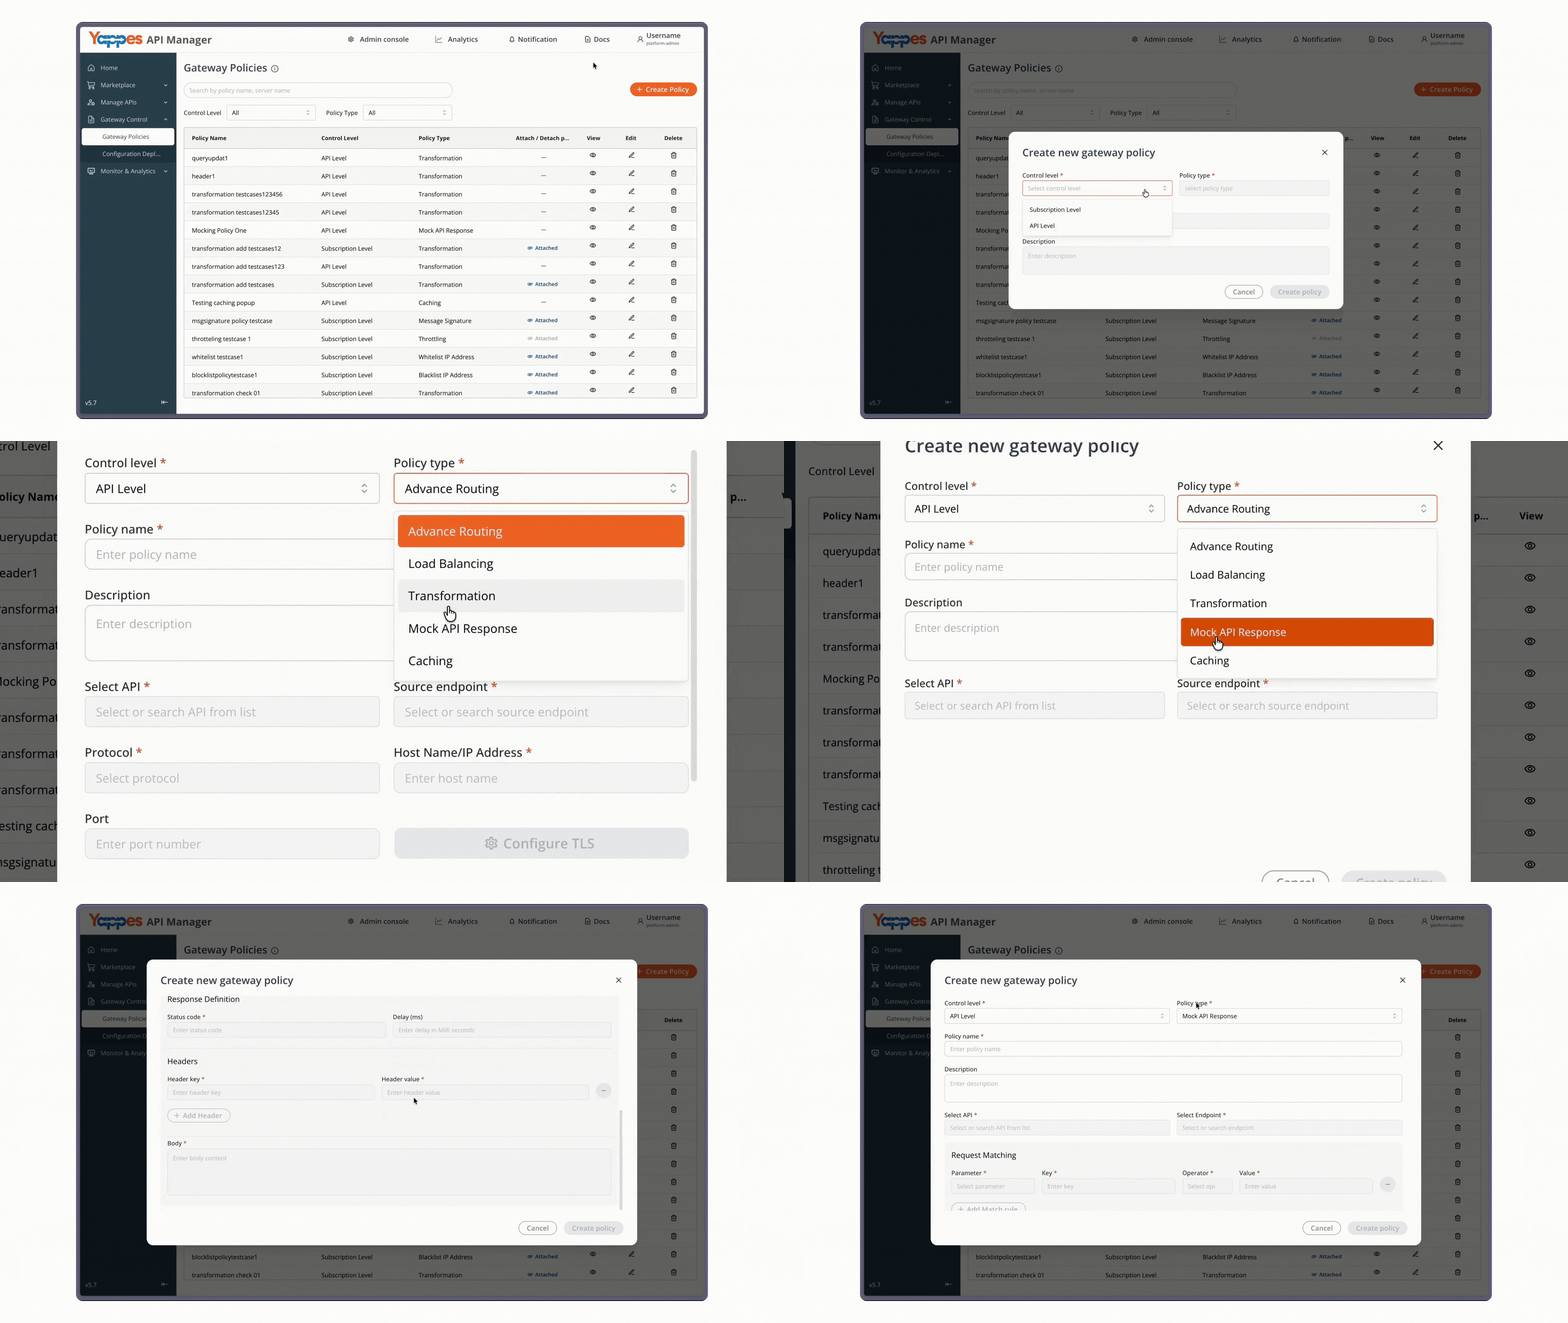
Step 4: Define Policy Details
-
Enter a unique
Policy Namefor identification. -
Add a comprehensive Description of the policy purpose.
Step 5: Select Target API
- From the available APIs list, select the
API & Endpointto attach the policy.
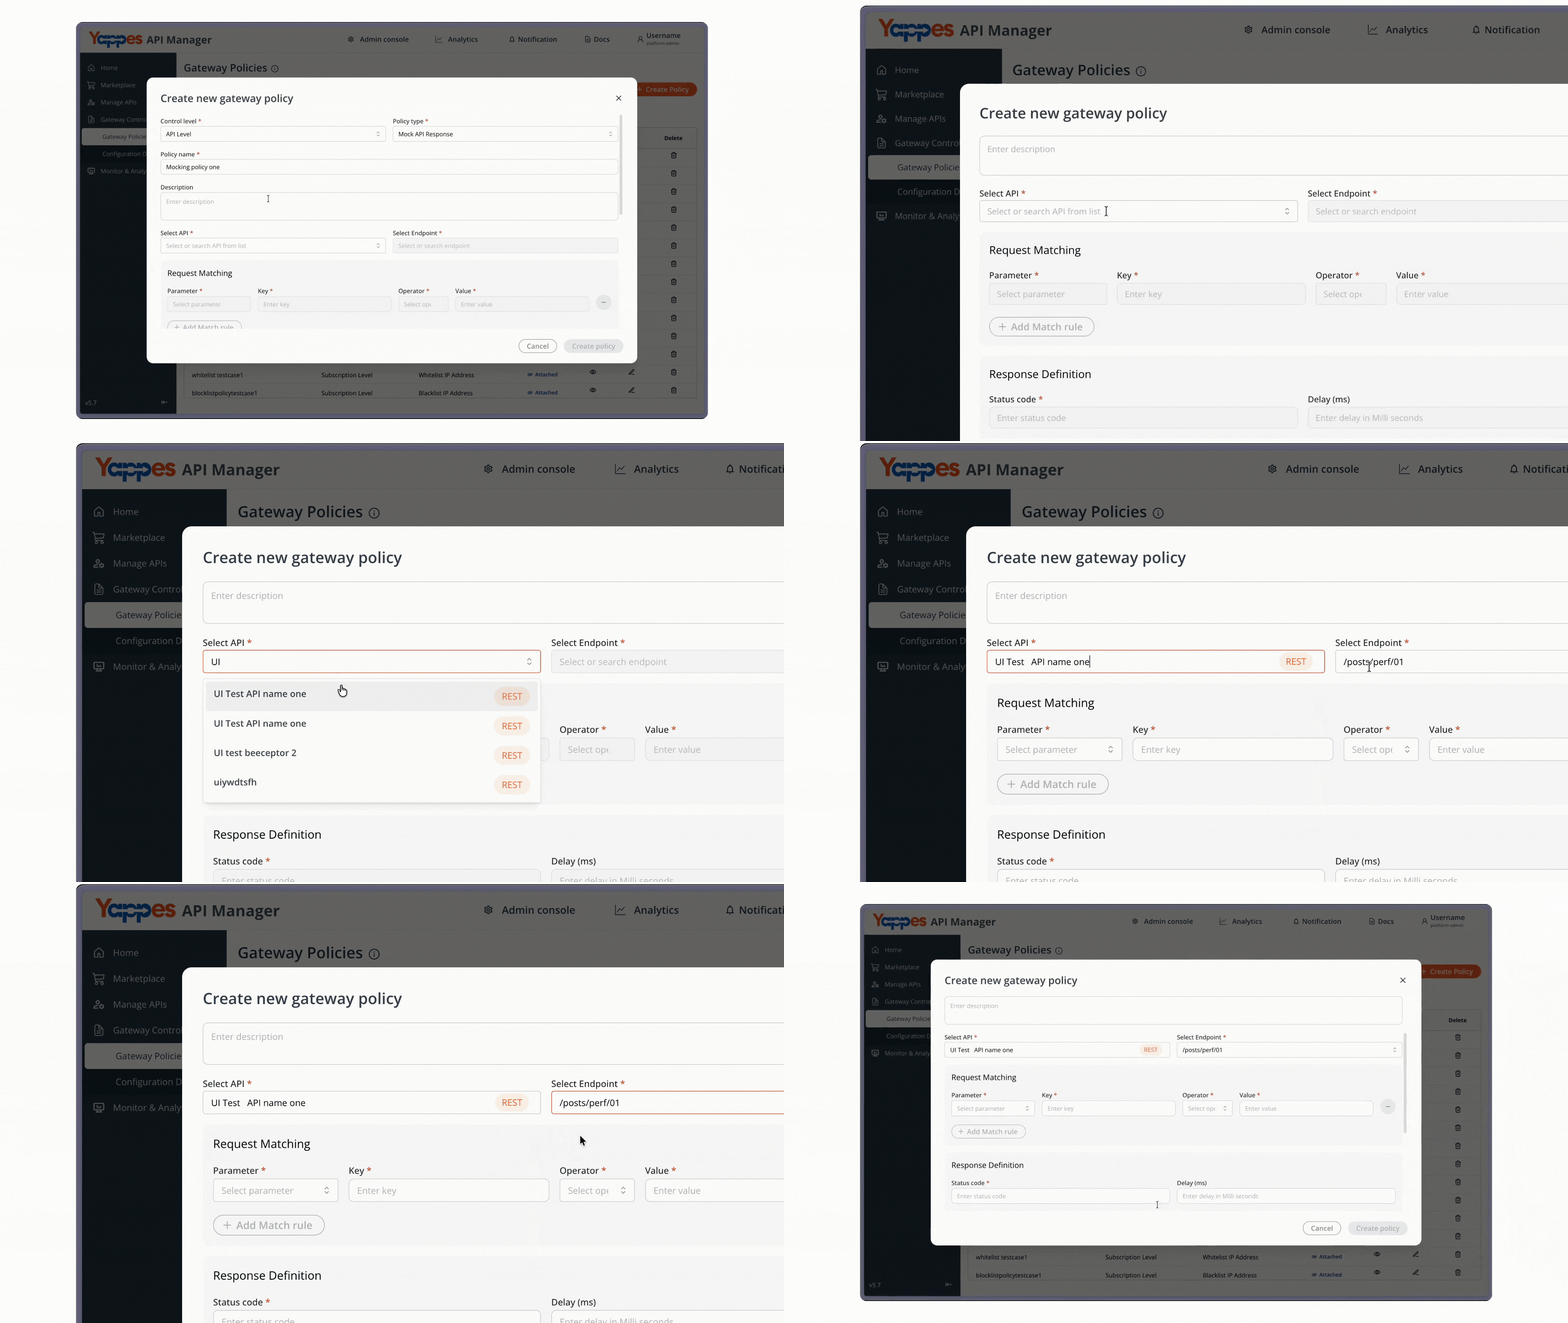
Step 6: Configure Request Matching Parameters
Define how incoming requests will be matched to trigger this mock response:
- Parameter: Select the
parameter type(e.g., Header) - Key: Enter the specific
keyto match (e.g., Server) - Operator: Choose the comparison
operator(e.g., Equals) - Value: Specify the
valuethat must match
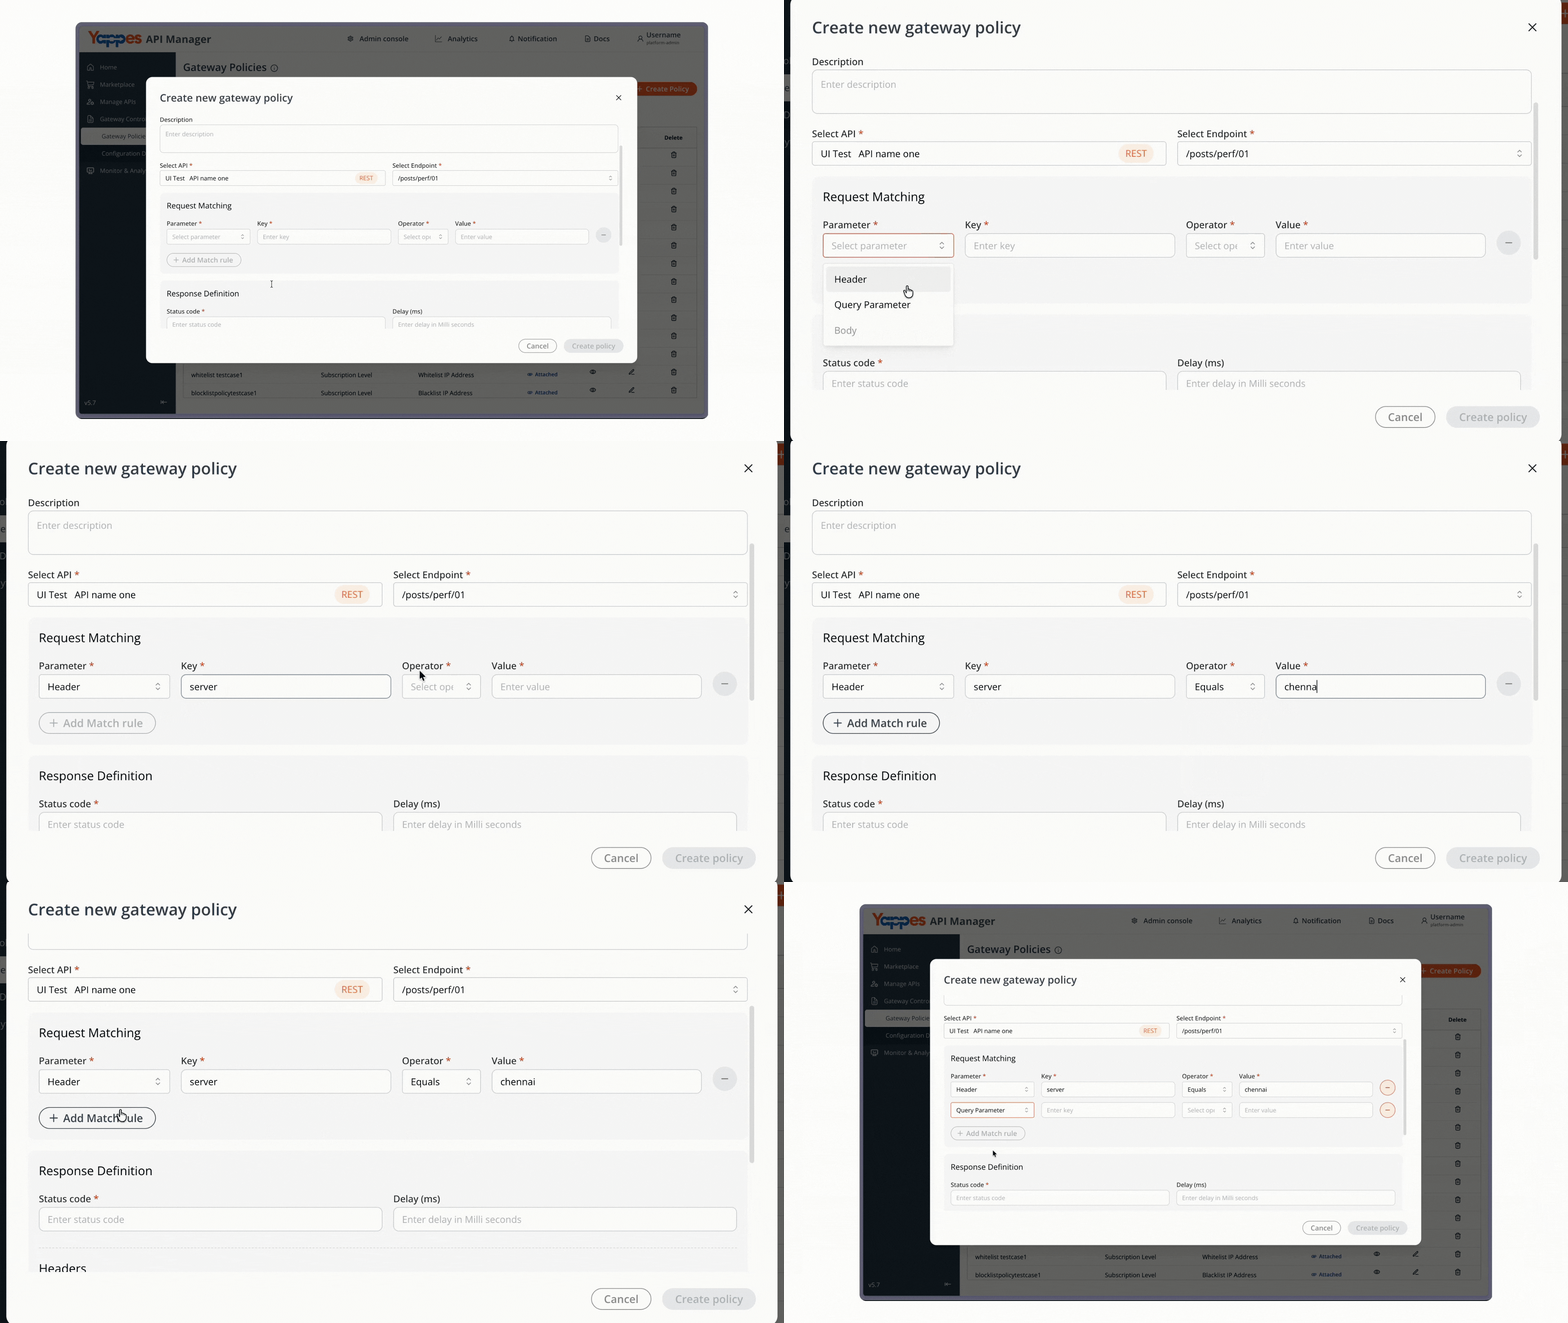
Step 7: Define Mock API Response Configuration
Configure the response that will be returned:
- Status Code: Set the HTTP status (e.g., 200)
- Delay (ms): Add artificial delay if needed (e.g., 0):
- Headers: Add custom response headers
- Header Key: connection
- Header Value: keep-alive
- Body: Define the response body.
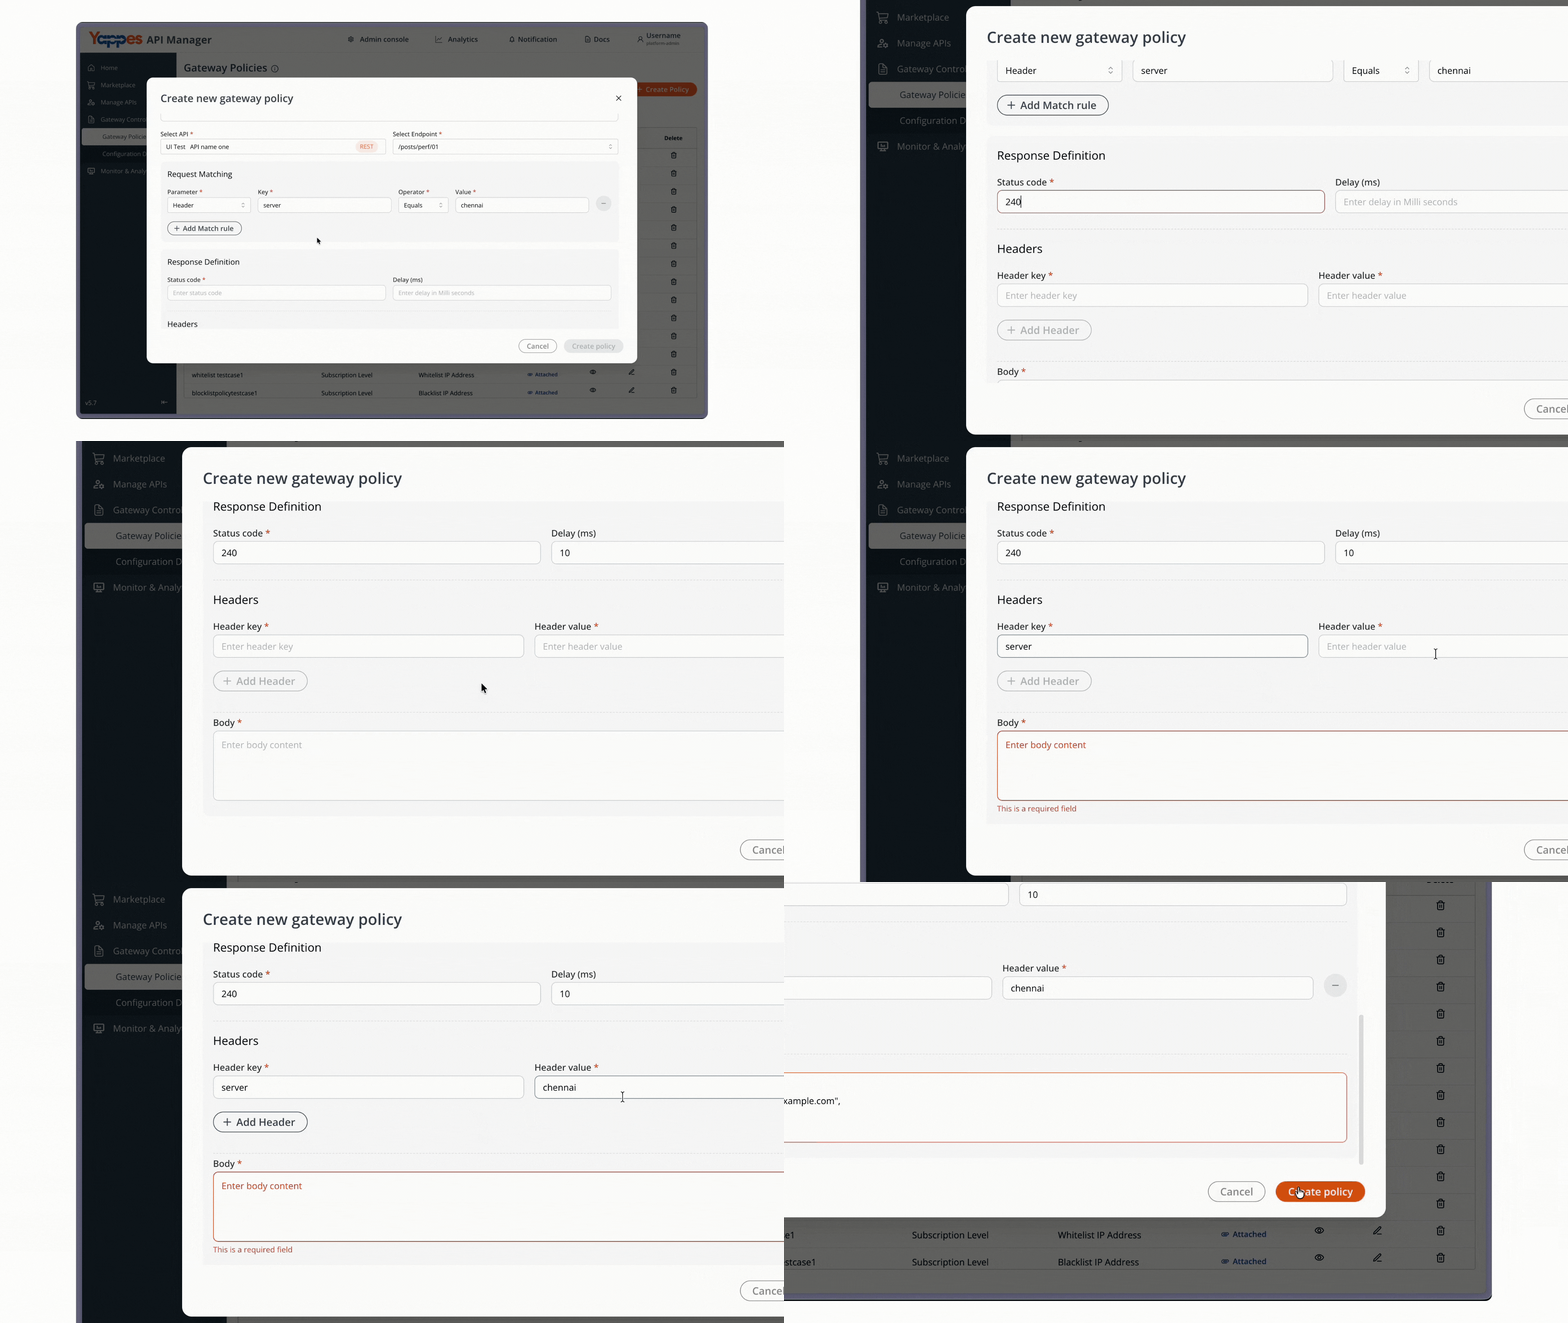
Step 8: Submit to Create Mock API Response Policy
- Review all policy configurations.
- Click on
Create Policyto save the configurations. - The policy will be active for the selected Endpoint of the API.
Mock Policy Configuration Panel
On Yappes, the Mock Response functionality in the API Manager allows you to configure simulated responses for APIs, enabling testing, validation, and debugging without invoking backend services.
The mock response interface consists of three main sections:
Policy Identification
- Policy Name – Unique identifier for your mock response
- Description – Optional field for documenting the mock's purpose
- Status – Shows if the policy is active or inactive
Request Matching Section
- Parameter Selector – Choose between Header, Query, Path, or Body parameters
- Key Field – Specify the exact parameter key to match
- Operator Dropdown – Select comparison logic (
Equals,Contains,Regex) - Value Input – Define the expected value for matching
Response Definition Area
- Status Code Field – HTTP status to return (
100–599) - Delay Configuration – Artificial response delay in milliseconds
- Headers Table – Add multiple response headers with key-value pairs
- Body Editor – JSON or XML response body with syntax highlighting
ℹ️ Mock Policies are an effective way to simulate different API scenarios, helping you test success cases, errors, and edge conditions.
Advanced Configuration Tips
Key Takeaway: Configure multiple mock responses with different matching parameters to simulate various API scenarios – success cases, errors, and edge cases.
Common Configuration Patterns
-
Success Response Mock
-
Status:
200 - Headers:
Content-Type: application/json -
Body: Valid JSON response
-
Error Response Mock
-
Status:
404or500 - Headers:
X-Error-Code: RESOURCE_NOT_FOUND -
Body: Error message JSON
-
Delayed Response Mock
- Status:
200 - Delay:
3000(3 seconds) - Use for timeout testing
Verification and Testing
Testing Your Mock Response
-
Send Test Request
-
Use Tryout on Yappes Platform or
cURL - Include the matching parameters defined in your policy
-
Send request to your API endpoint
-
Verify Response
- Check status code matches configuration
- Validate headers are present
- Confirm body content is correct
Success Indicators
- Request logs show policy execution
- Response matches all configured parameters
- No error messages in gateway logs
Troubleshooting
| Issue | Possible Cause | Solution |
|---|---|---|
| Mock response not triggering | Request doesn't match parameters | Verify exact parameter values and operators |
| Wrong status code returned | Multiple policies conflicting | Check policy priority and disable conflicting mocks |
| Response body is empty | JSON formatting error | Validate JSON syntax in body editor |
| Headers not appearing | Header key formatting | Ensure header keys follow HTTP standards |
| Excessive response time | Delay set too high | Reduce delay value or set to 0 |
Error Messages
-
"Policy matching failed"
-
Review request matching parameters
- Check operator logic (
Equals,Not Equals,Like) -
Verify case sensitivity in values
-
"Invalid response configuration"
- Validate JSON syntax in body
- Ensure status code is valid (
100–599) - Check header key-value format
Getting Help
If issues persist:
- Check the gateway logs for detailed error messages
- Verify API and policy status are both active
- Contact Yappes support with policy name and error details