Onboard REST APIs
API management helps organizations secure, govern, scale, and monetize their APIs. By onboarding APIs to the Yappes platform, one can easily facilitate all of these factors. You can ensure that:
- The APIs are secure and protected from unauthorized access
- It’s easier for developers to discover, understand, and consume the APIs within their organization
- Analytics and reporting capabilities explicitly help you gather insights into API usage, performance, and trends
This page covers REST API onboarding via Manually Configure API.
Through the My APIs functionality of API Manager, the user with the role of platform-admin, api-developer or api-product-manager can onboard a REST API within the organization they are part of by following a user-friendly three-step process. Once the API has been onboarded, they can:
Define a standardized set of policies to protect itSelect an Upstream (with optional TLS on the Upstream target) for backend connectivitySet a tryout quota to limit and monitor API usageAdd rate plans to monetize itDefine licenses for public or private use
Overall, onboarding APIs to the Yappes platform streamlines the API lifecycle, enhances security, improves developer experience, provides analytics, and enables scalability and performance optimization.
Prerequisites:
| S.No. | Requirement |
|---|---|
| 1. | platform-admin/api-developer/api-product-manager role. |
| 2. | Internal organization access. |
| 3. | At least one Upstream in Gateway Control → Upstream. |
| 4. | Publishing Path (unique gateway path prefix, e.g. /public). |
| 5. | API Classification (required — Public / Internal / Partner; defaults to Internal). |
| 6. | API Logo (jpeg or png only) |
| 7. | Marketplace Tags. (Create one if not already.) |
| 8. | Swagger 2.0 or OpenAPI 3.0.0 / 3.1.0 JSON specification for Endpoints. Optional |
| 9. | Base Path (optional). |
| 10. | OAuth1, OAuth2, Yappes OAuth, and JWT Values, if Using for Authentication. For Yappes OAuth, ensure OAuth 2.0 Configuration is completed in the Admin Console first. |
| 11. | Application for API Tryout. (Create one if not already.) |
| 12. | Read Me and License Details. |
Onboarding methods
Clicking Onboard API opens a method chooser. This page documents the Manually Configure API path (three-step process). For the other options:
| Method | Description |
|---|---|
Manually Configure API |
Full three-step process — basic info, endpoints, subscriptions, and monitoring (this page). |
Onboard Via Curl Command |
Paste one curl; the platform extracts host, path, method, headers, and body. See Onboard via CURL Command. |
Steps for onboarding an API
Before proceeding with the steps, ensure you meet all the above requirements. If you do, then move on to the following steps.
Step 1 - Add basic information; configure upstream servers; choose tags, and add logo
The first step of onboarding an API at Yappes requires adding basic details: API name, API Classification, Publishing Path, optional Base Path and Description, then selecting an Upstream under Configure Upstream Servers. You can also utilize the Marketplace Tags that help you categorise the API for easy discoverability, and upload a logo that would be visible to the consumer when they subscribe to it.
To onboard the API and perform all the necessary actions, do the following:
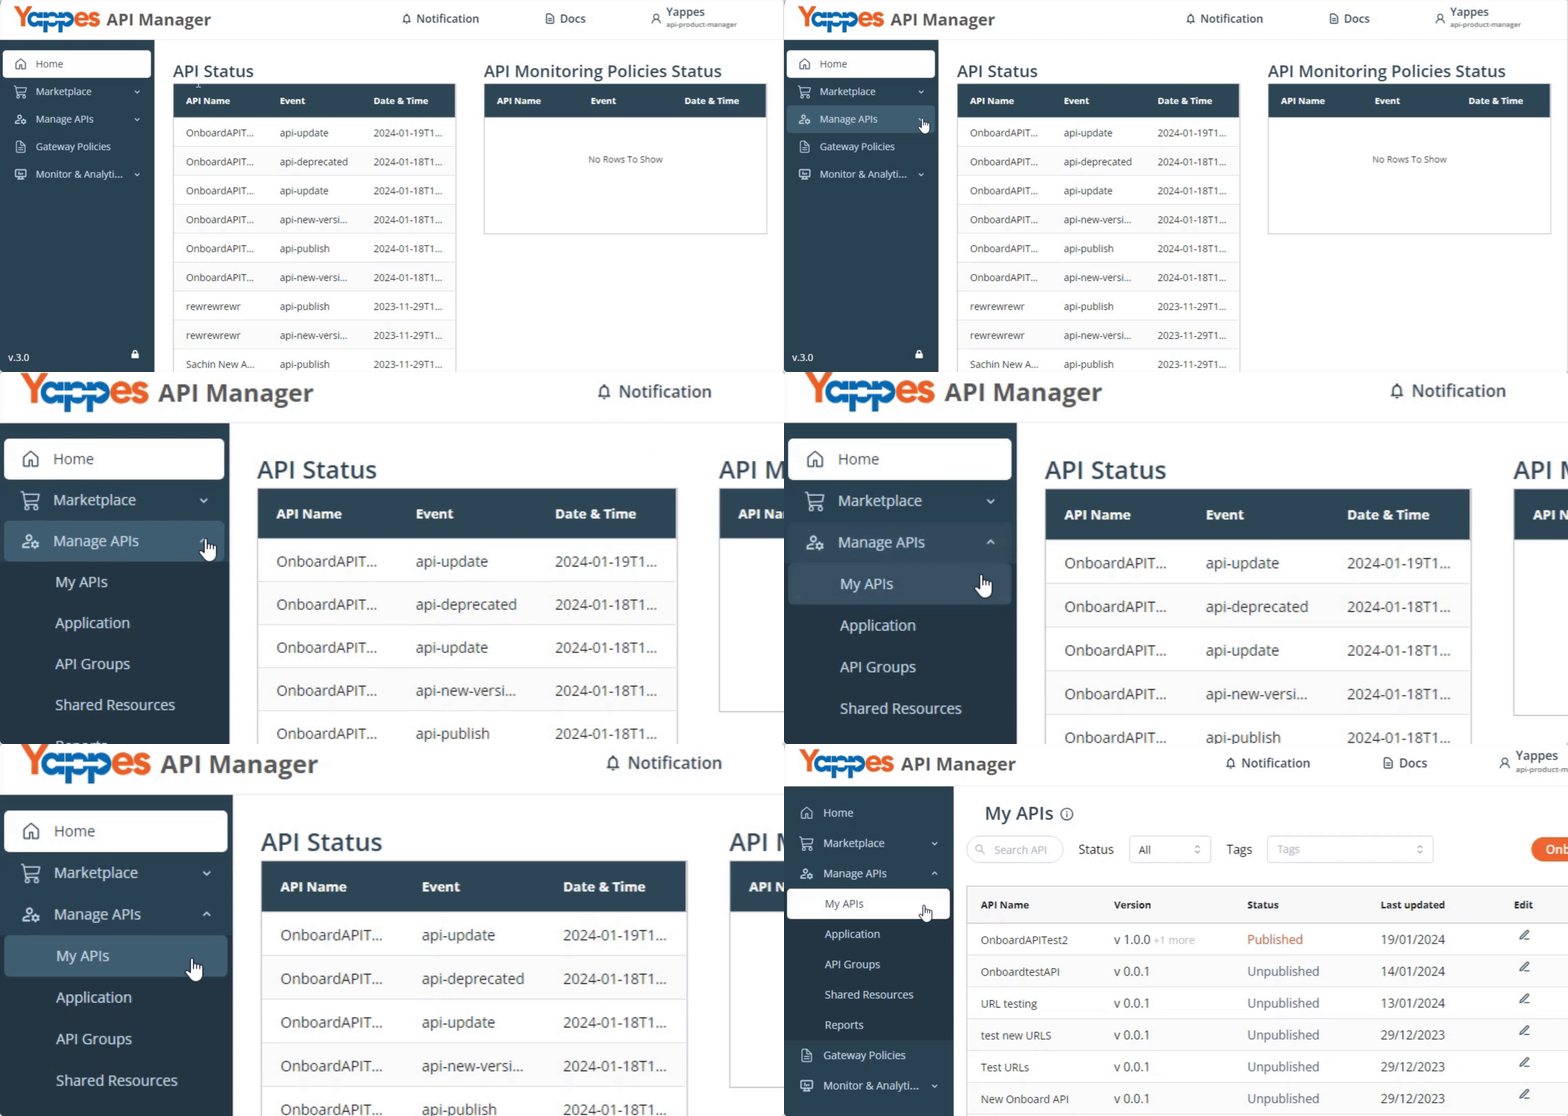
- From your home screen, go to
Manage APIs→My APIs.
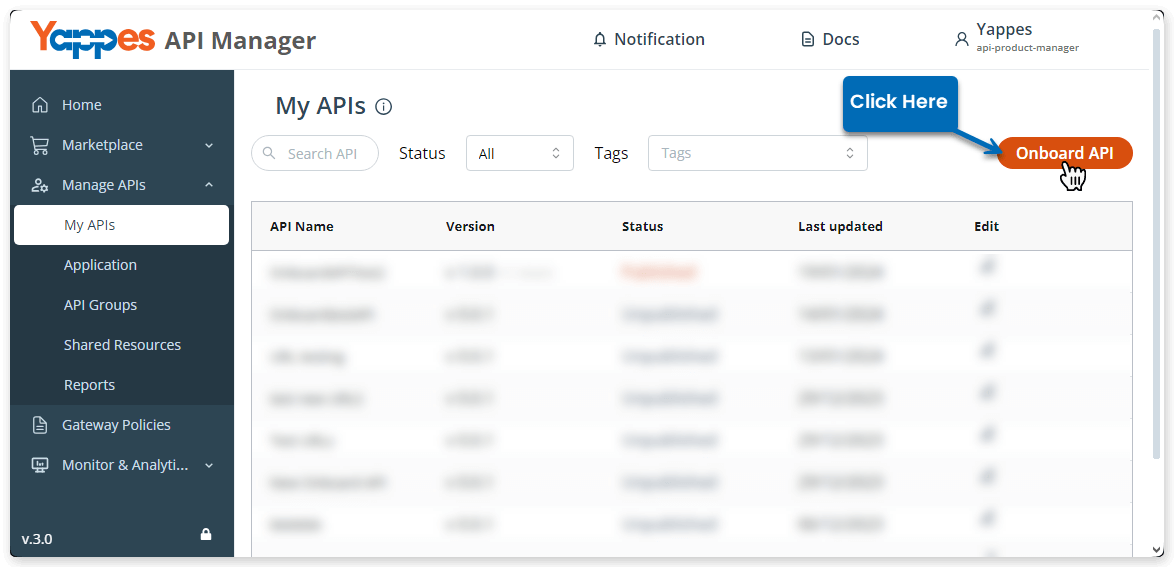
- Click
Onboard API.
- In the
Onboard APImodal, selectManually Configure API. - The API onboarding interface opens with fields to add Basic Information. Select
RESTas the API type, then define the values in fields as appropriate:API Type:REST(A stateless architectural style that uses standard HTTP methods like GET, POST, PUT, and DELETE for communication.)API Name(required)API Classification(required — multiselect; choose one or more ofPublic,Internal,Partner; defaults toInternal. Locked after the first save.)Base Path(optional — path segment on the backend, e.g./v1)Publishing Path(required — gateway-facing path prefix, e.g./publicor/api; must be unique across all platform APIs;)Description(optional)
- Once done, click
Save.
Info
Fields with asterisk (*) are mandatory.
Your changes will be saved, and new sections will open where you can configure upstream servers, add an API logo, and assign marketplace tags.
Configure Upstream Servers
- Go to
Configure Upstream Servers. - In the
Upstreamfield, choose an upstream from the list (placeholder:Select Upstream here). - Click
Update.
Info
If you see No upstream created for this API type, open Gateway Control → Upstream, create a target with the matching API Type (including TLS, timeouts, and endpoints as needed), then return here and select it.
Configure TLS on the Upstream target when the backend requires it. See Upstream.
Change Upstream on API Details
To select or change the Upstream on an existing API:
- Go to
Manage APIs → My APIsand open the API (API Details). - Go to
Configure Upstream Servers. - In the
Upstreamfield, choose an upstream (placeholder:Select Upstream here). - Click
Update.
Create or edit targets under Gateway Control → Upstream when you need a new backend or TLS settings. The list is filtered by the API’s API Type.
After selecting the Upstream, add a logo and choose marketplace tag(s) for easy recognition and discoverability in the listing. In order to do that:
- Go to
API Logoand clickUpload. - Choose the logo file and upload it.
- Then, go to the
Marketplace Tagsand click on the Search Tags field. - Select the available tags from the menu.
Info
If there are no marketplace tags available. You need to create one using the Marketplace Tags functionality in the Admin Console.
When you have added the logo and tags, click Next to move on to the next step.
If you don’t want to continue the step but want to proceed later, you can also click Save and Exit, and it will save all the details and add the API to the list as unpublished, like the following:
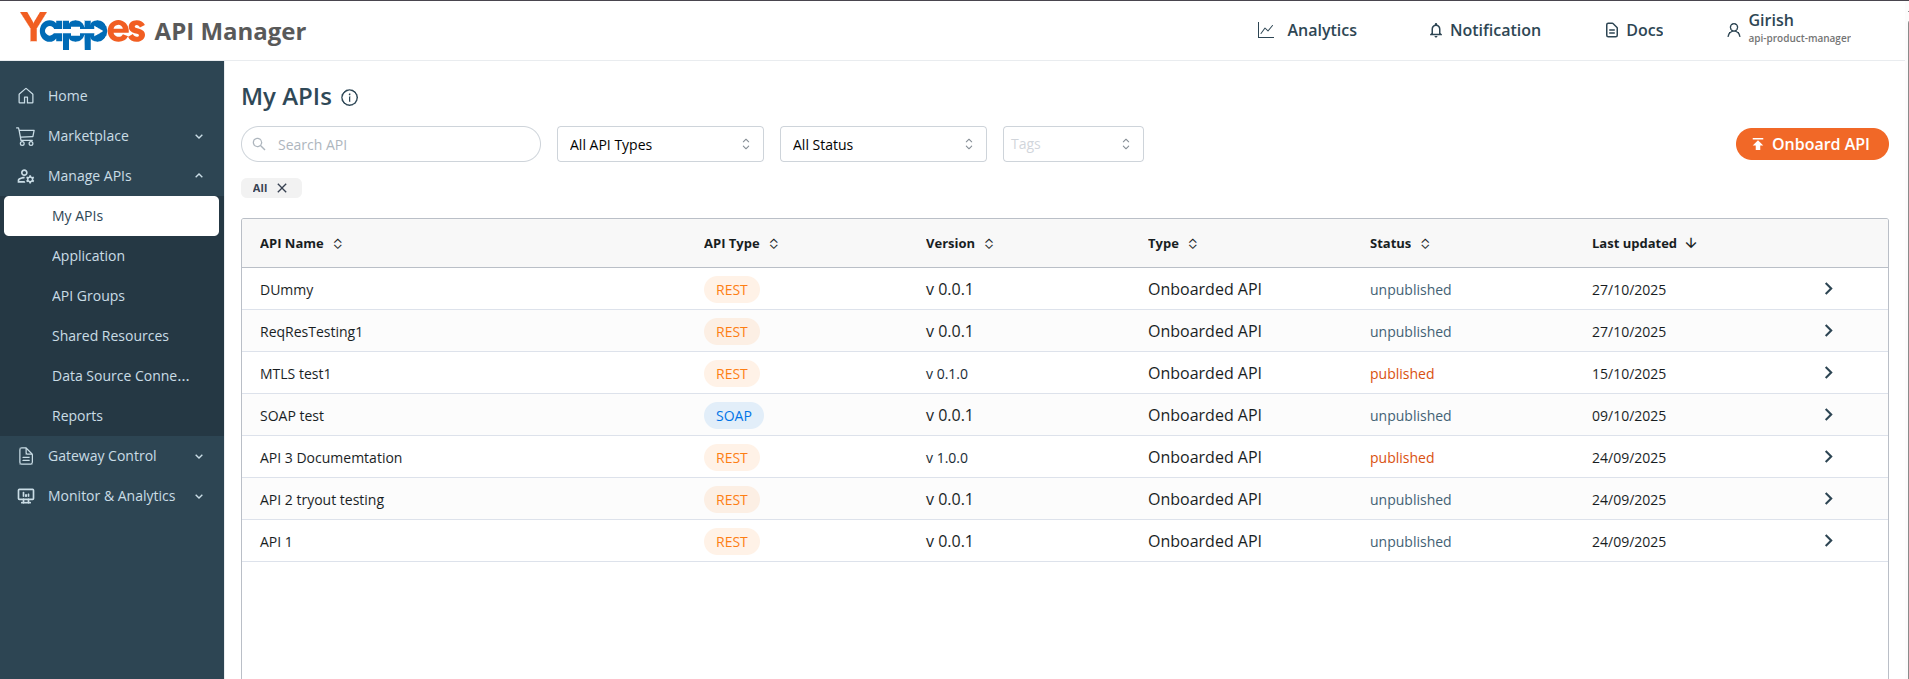
In the next step, you can manage Endpoints as well as add authentication for the Tryout.
Step 2 - Manage endpoints; add authentication, and tryout response
In this step, configure endpoints and tryout authentication.
Endpoints define the operations consumers can call. Register them by:
- Uploading a
Swagger 2.0orOpenAPI 3.0.0/3.1.0JSON specification - Adding endpoints manually
Authentication limits who can try out the API. Supported types:
HTTP BasicHeaderOAuth1OAuth 2Yappes OAuth(also enforces gateway protection for subscribed consumers)Query Parameter
To manage the endpoints and set up authentication, follow the below sections:
Manage endpoints
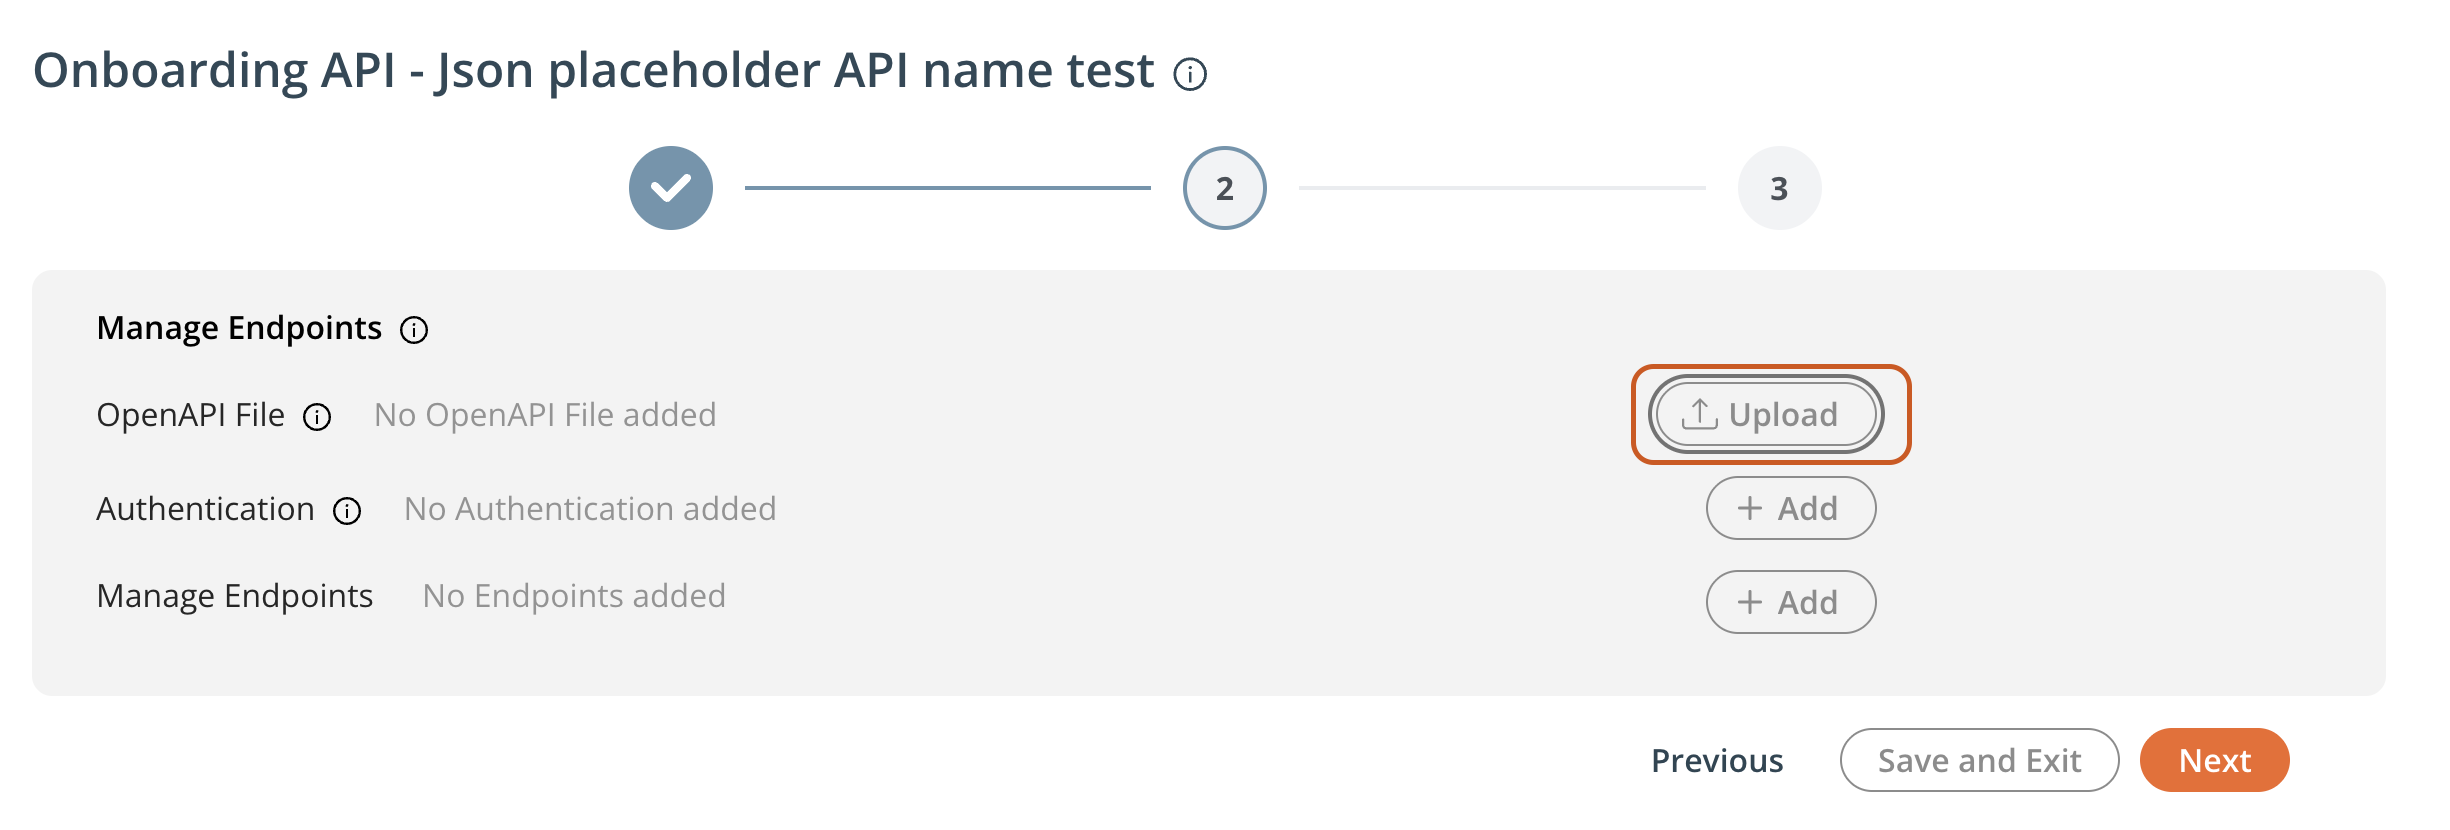
Registering endpoints for the API can be done by uploading an OpenAPI file. To do so:
- Go to the Open API File section and click
Upload.
- In the popup shown, enter the file Version number.
- Then, click
Select File, and choose a Swagger 2.0 or OpenAPI 3.0.0 / 3.1.0 JSON specification.
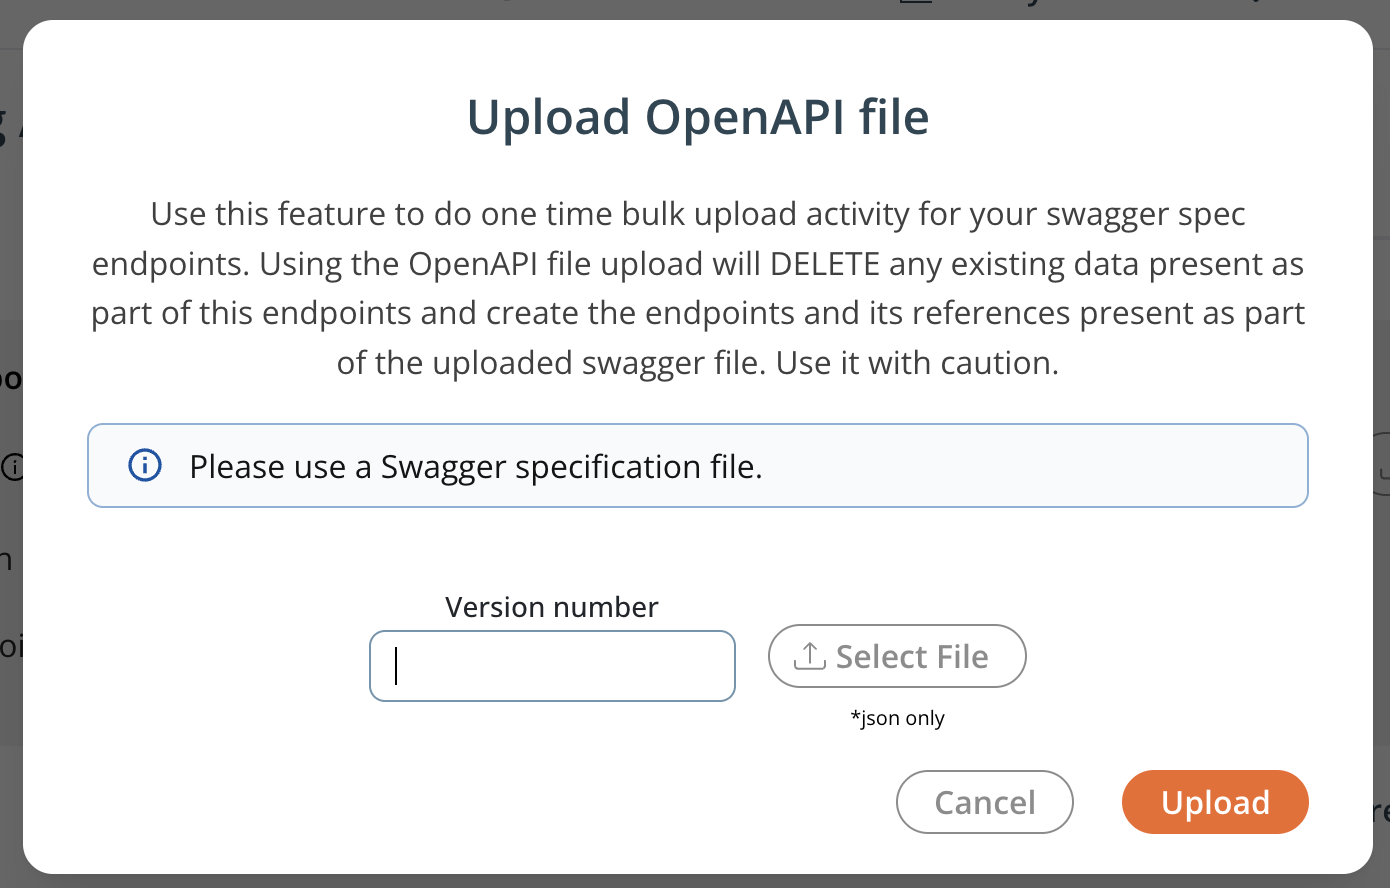
- After selecting the file, click
Upload.
If you need to register the endpoints manually, then in that case, you can follow the below steps:
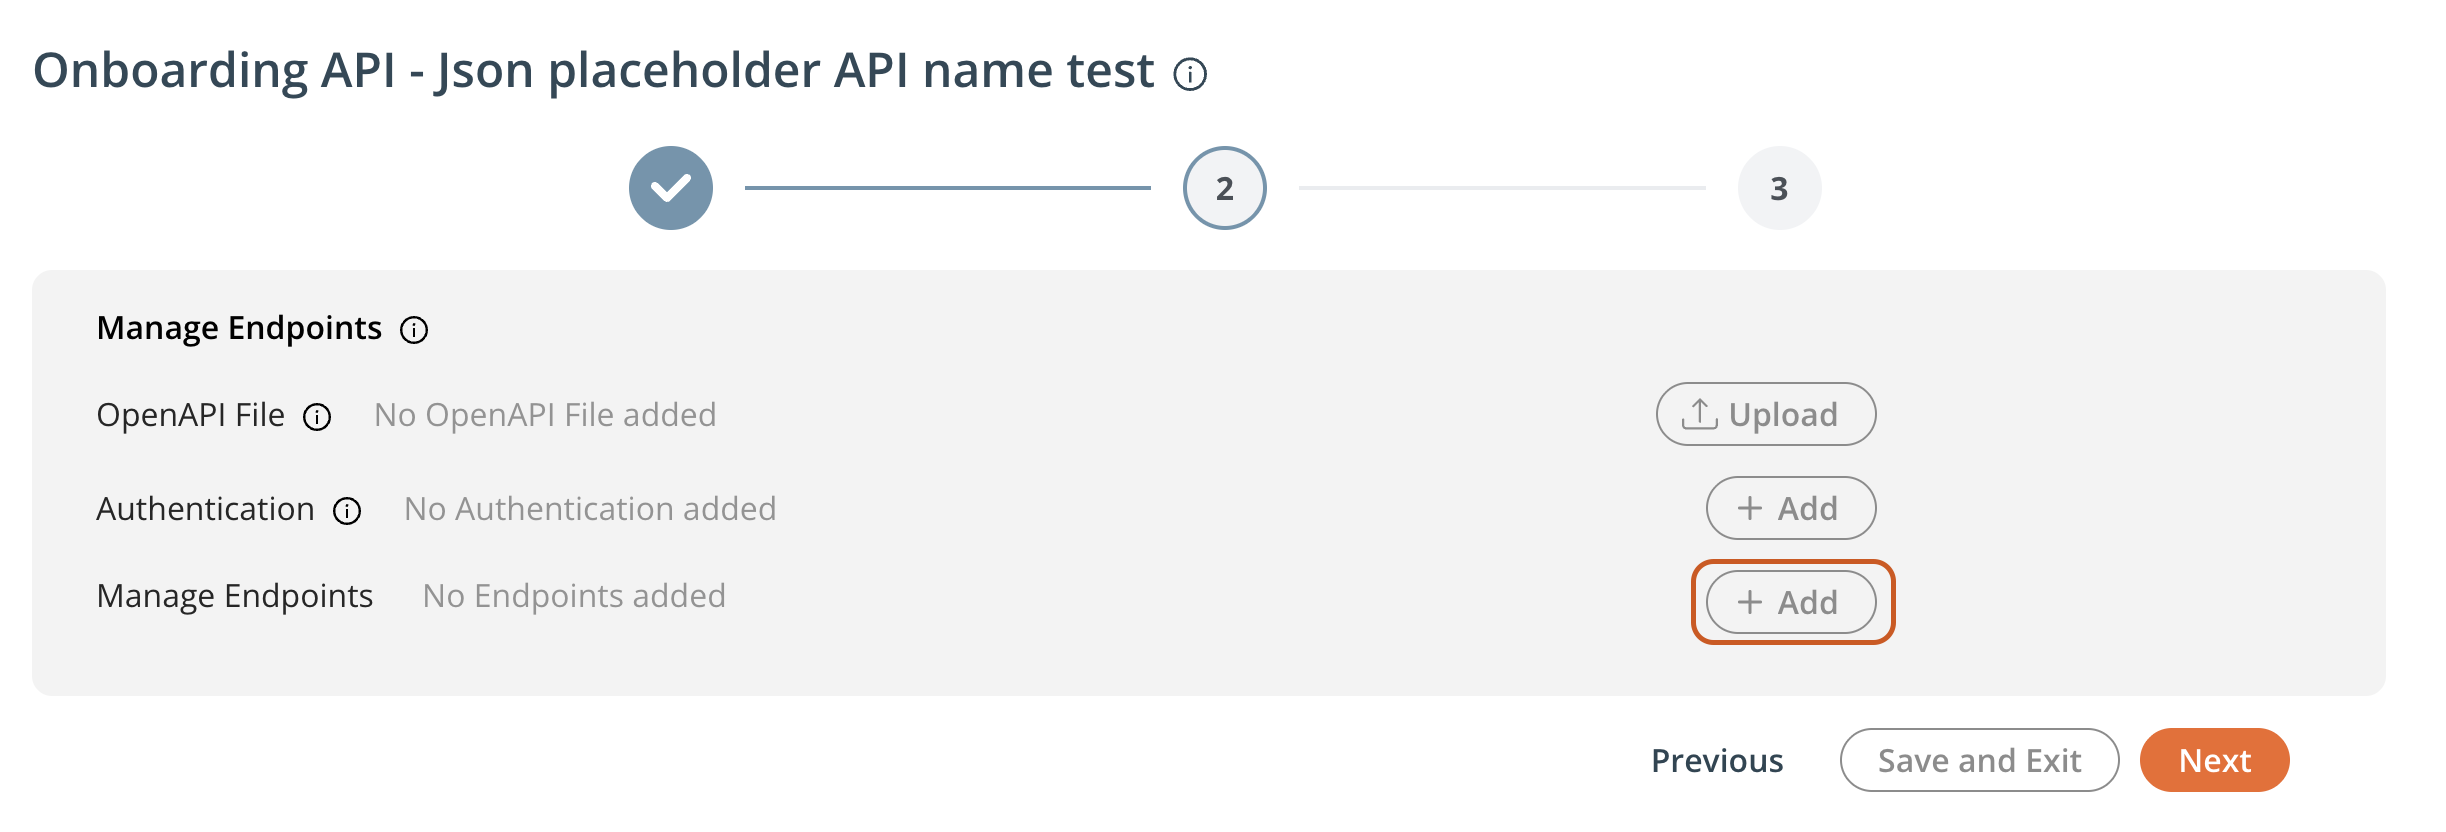
- Go to the Endpoint section and click
Add.
-
In the popup shown, enter the Endpoint details in the fields as appropriate:
- Enter the Endpoint Name
- Then, Endpoint Path
- Select the
Method- GET | PUT | POST | DELETE | PATCH - Then, select the
Content Type- application/json | application/x-www-form-encoded | multipart/form-data | application/xml - Add the Description
-
Click
Add Endpoint.
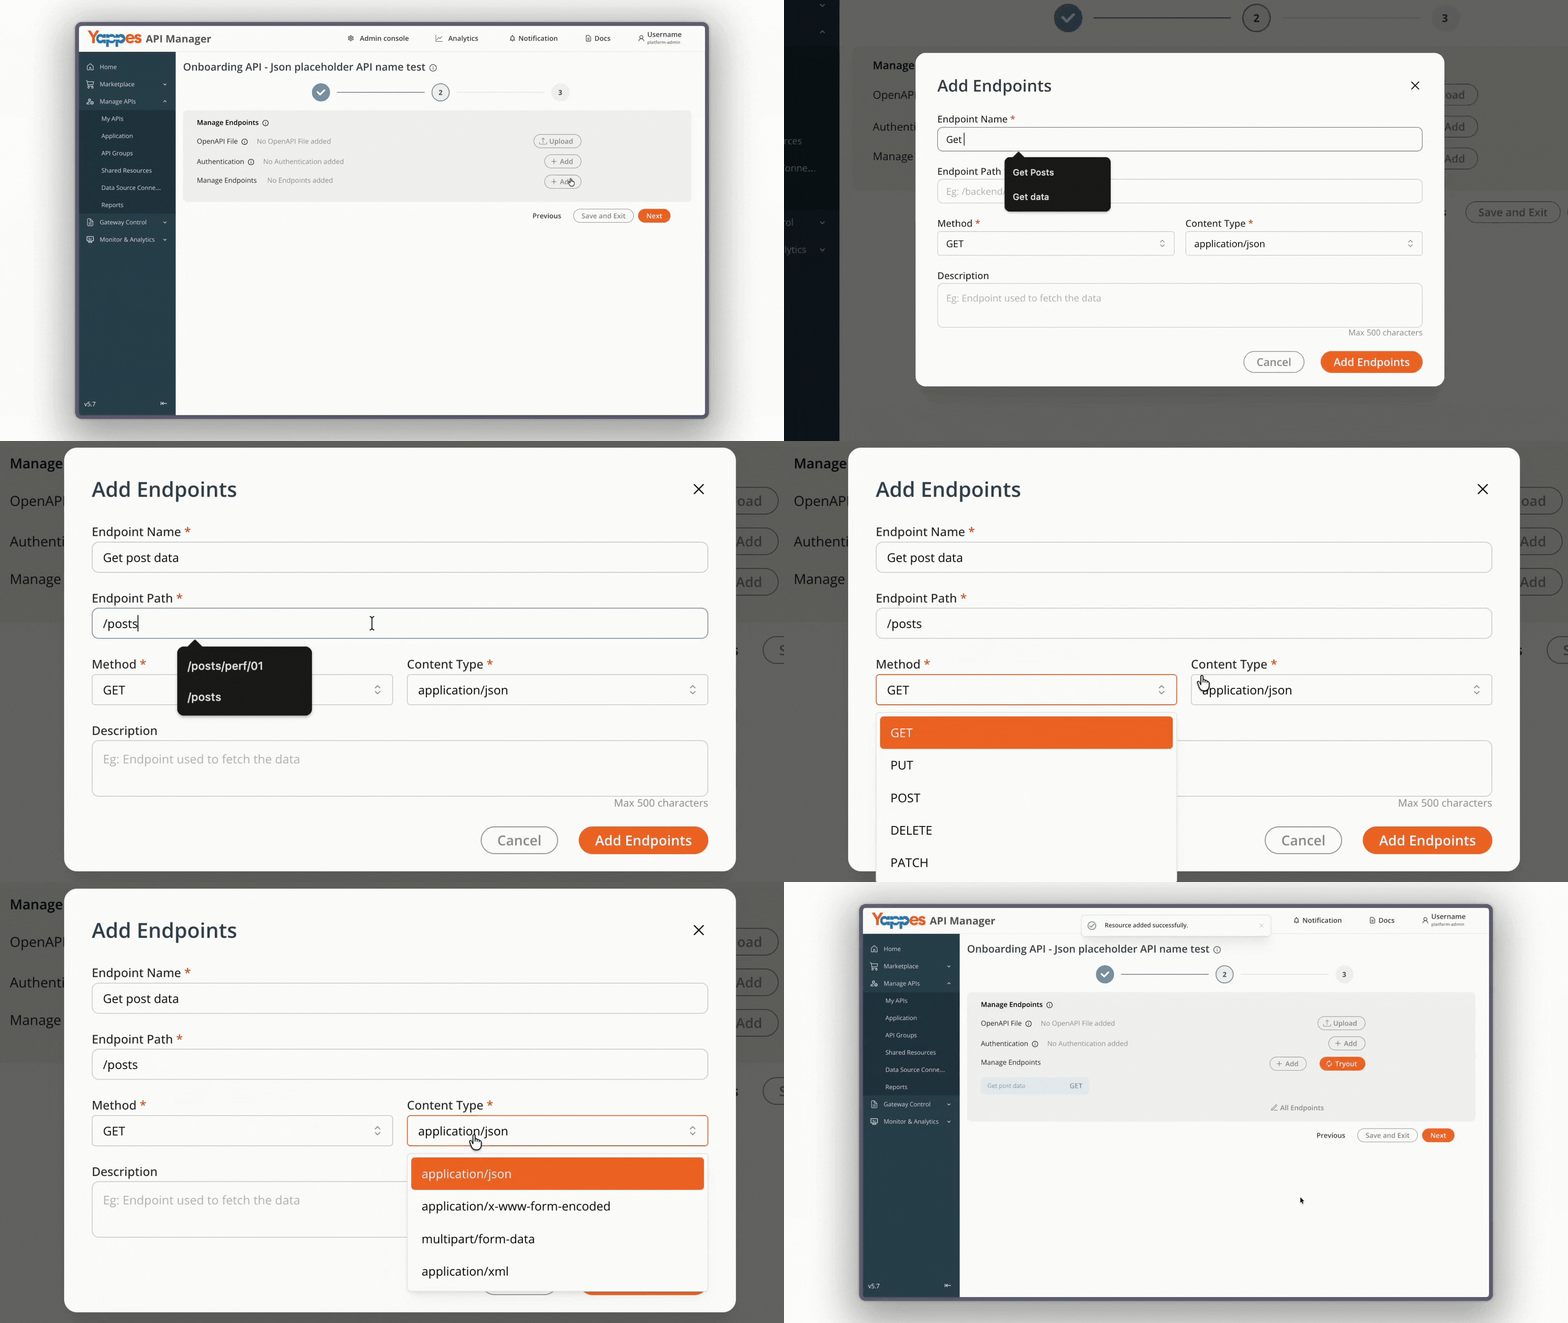
This will add the endpoint for the API. If you need to add multiple endpoints, you can simply repeat this step and choose a different Method and Content Type according to the requirements.
Add authentication
Once you add the Endpoints, the Tryout functionality will be active, and you can try out the response of the API you’ve onboarded. However, when developers or consumers try to consume the API, you might want to add authentication so that only users with access (authentication details) can do API calls and test the responses. Therefore, to add an authentication rule to the API, you need to do the following:
- Go to the Authentication section → click Add.
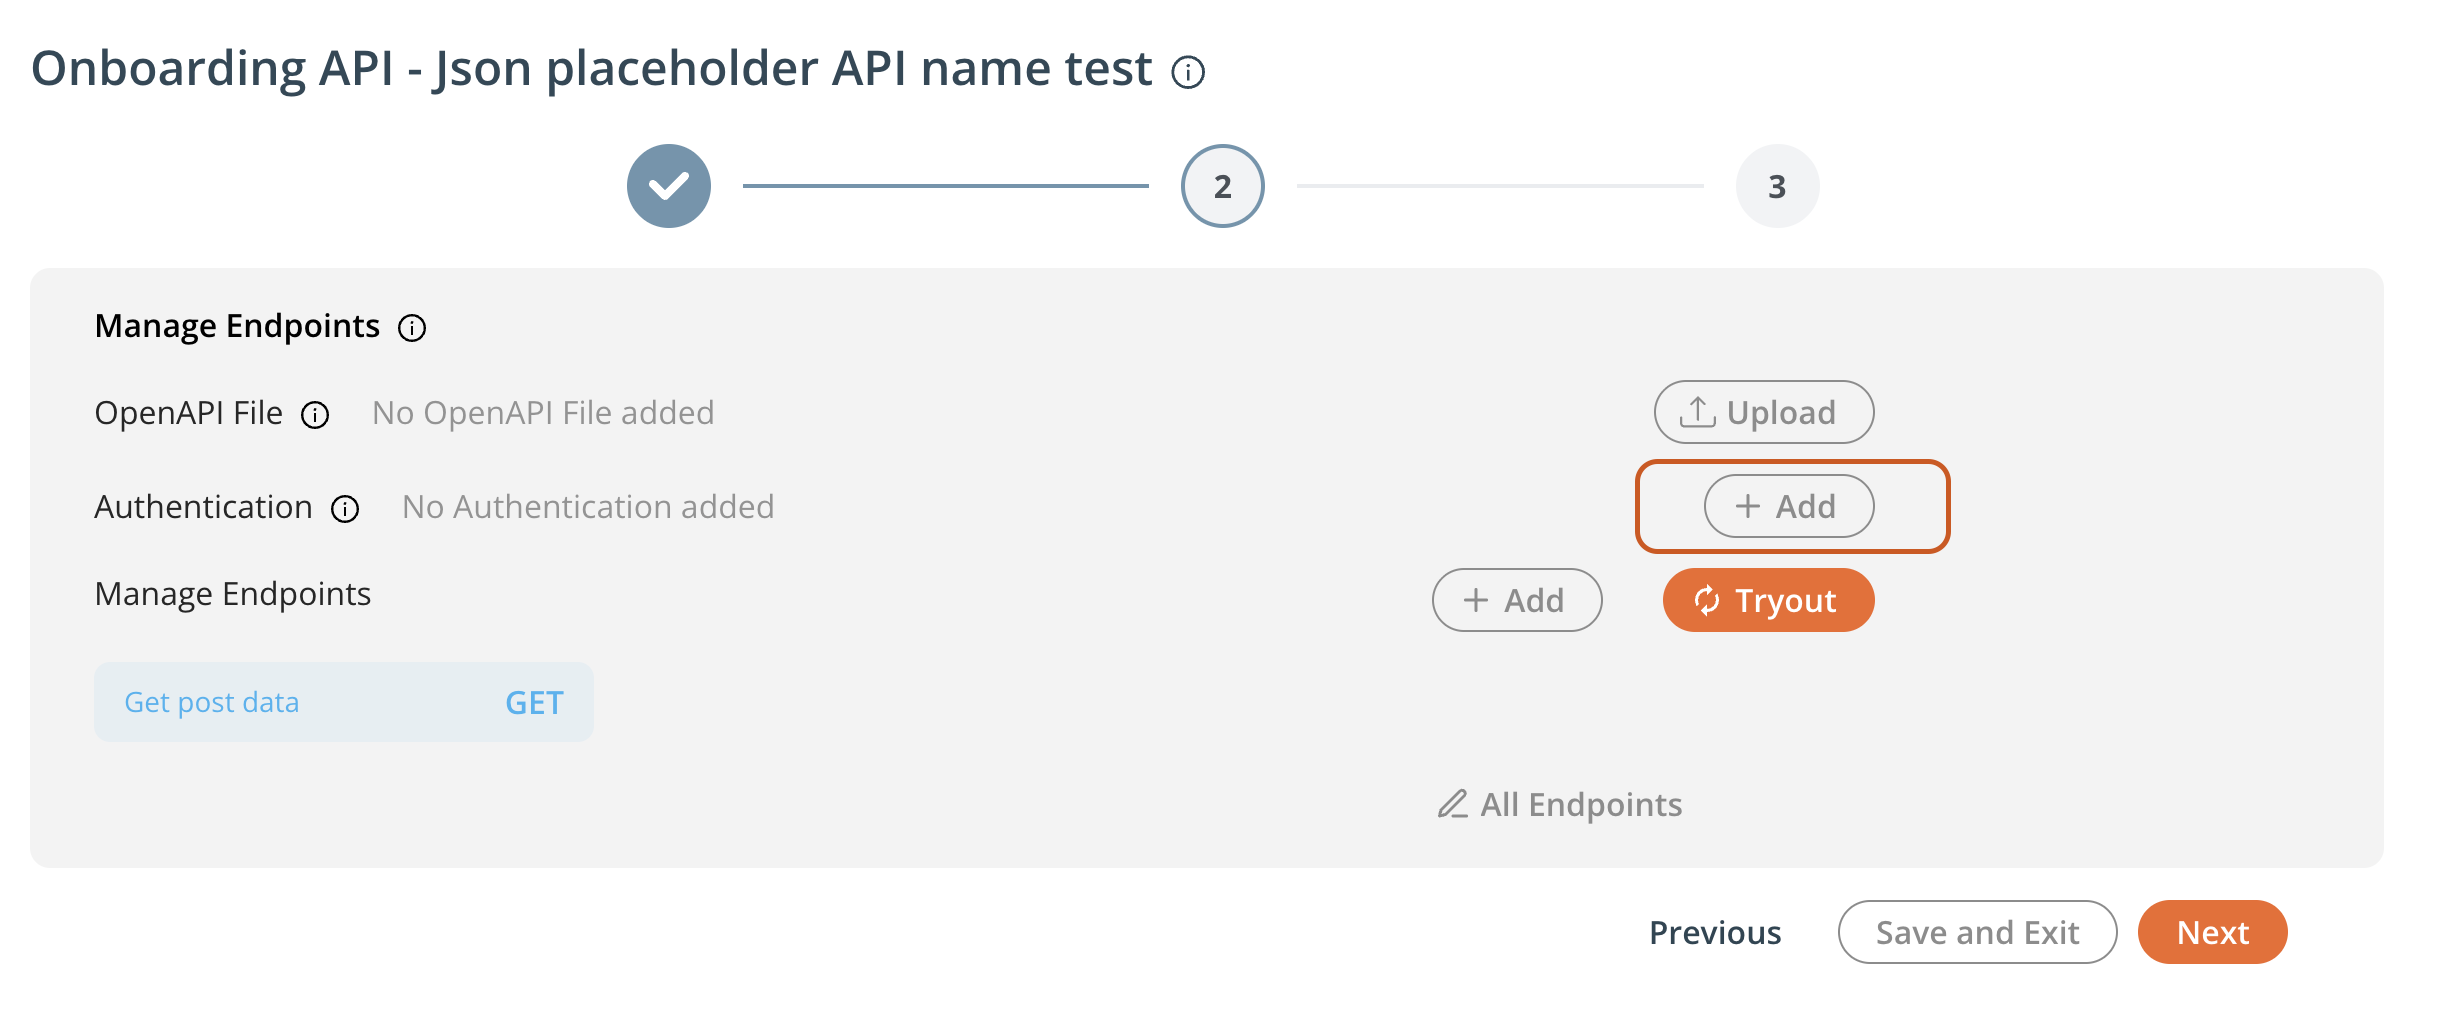
- In the popup shown:
- Choose the
Authentication Type- HTTP Basic | Header | OAuth1 | Query Parameter | OAuth 2 | Yappes OAuth - Add required details based on the selected Authentication
- Choose the
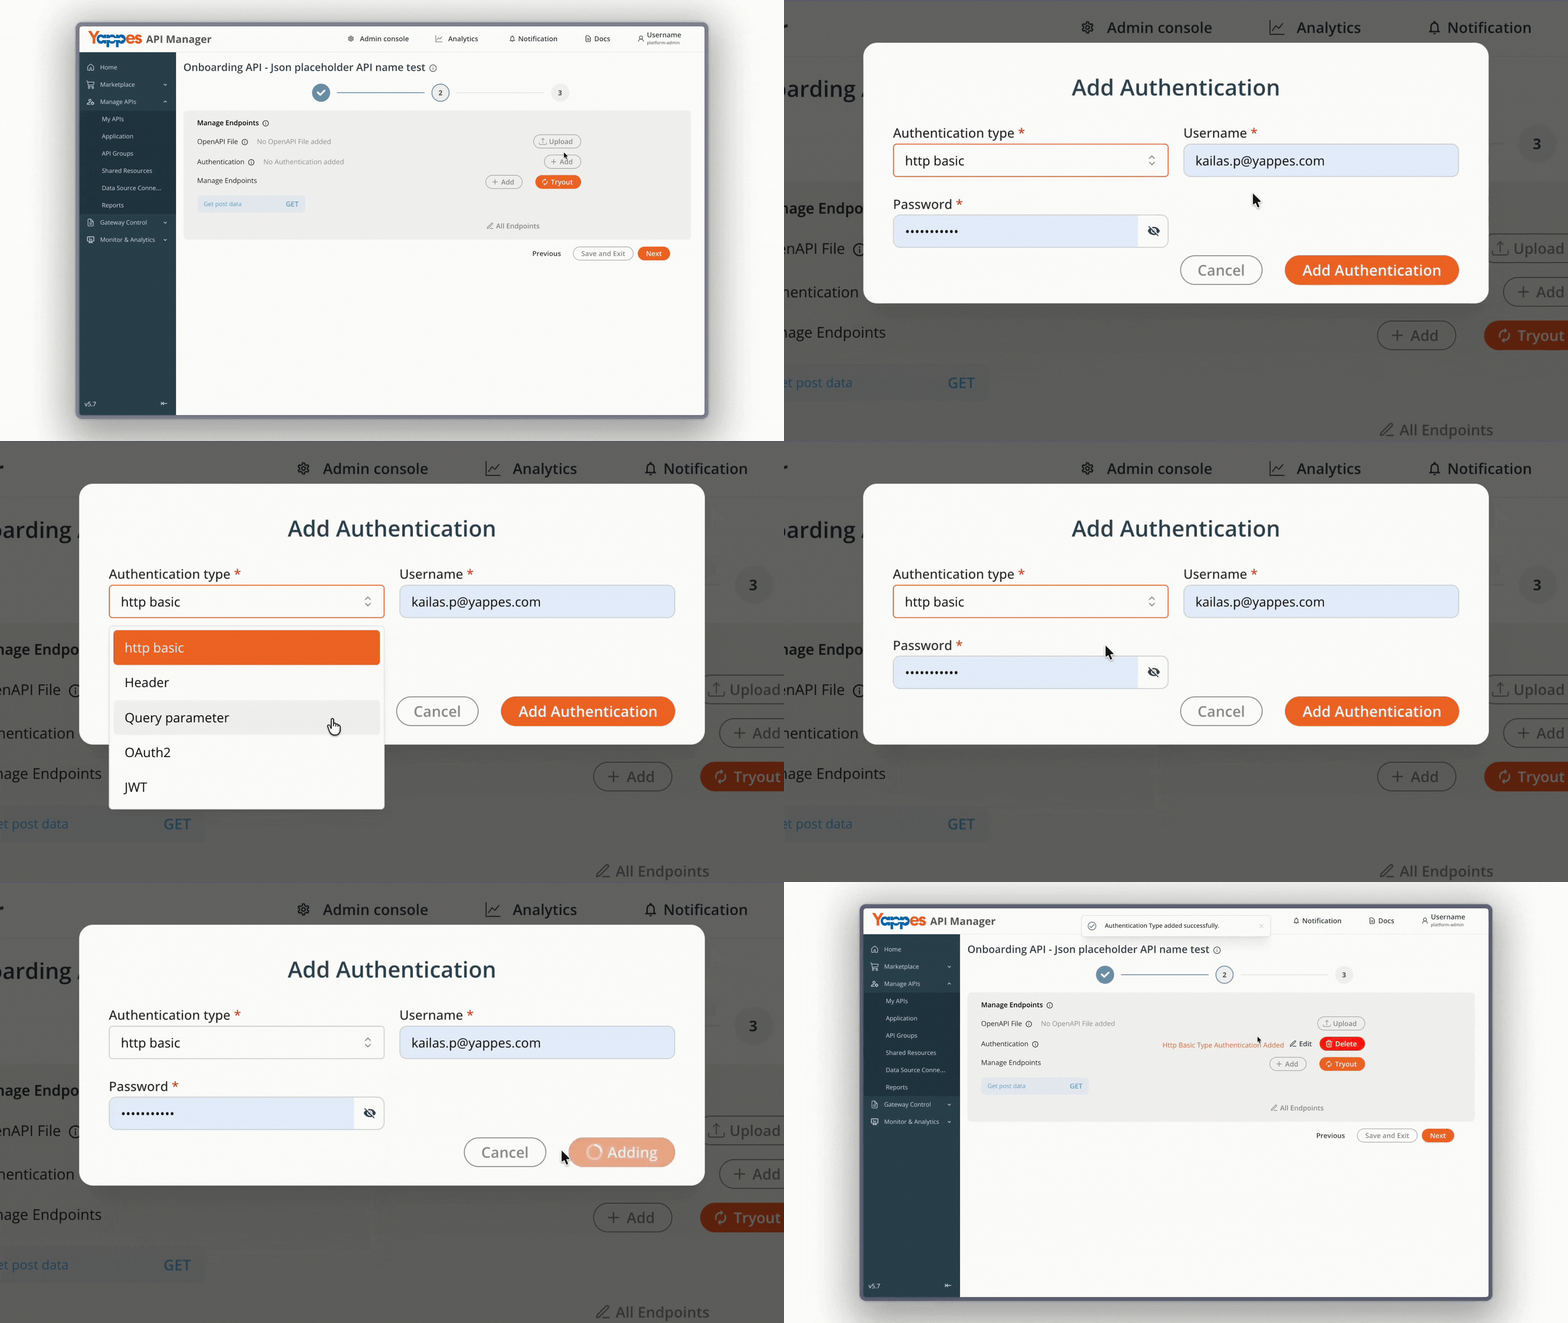
- Once done adding the details, click
Add Authentication.
Tip
For a detailed explanation of adding different authentication types, follow the instructions mentioned on this page. For Yappes OAuth, including endpoint scope configuration, see Yappes OAuth.
When Yappes OAuth is selected, an OAuth tab appears under Endpoint Details where you can add scopes per endpoint.
This will add the authentication for the API.
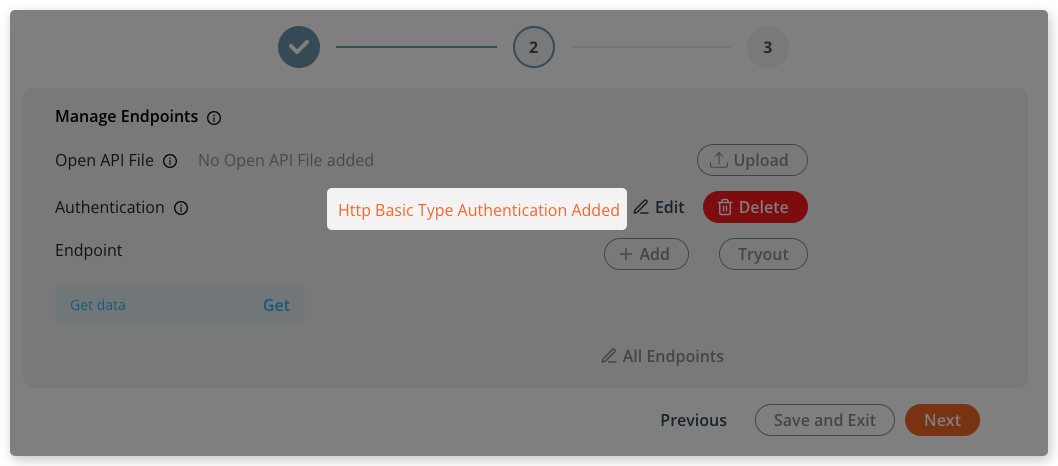
If you need to make changes to it or delete it:
- Simply click
EditorDeleteand confirm your choice in the popup, followed by the action.
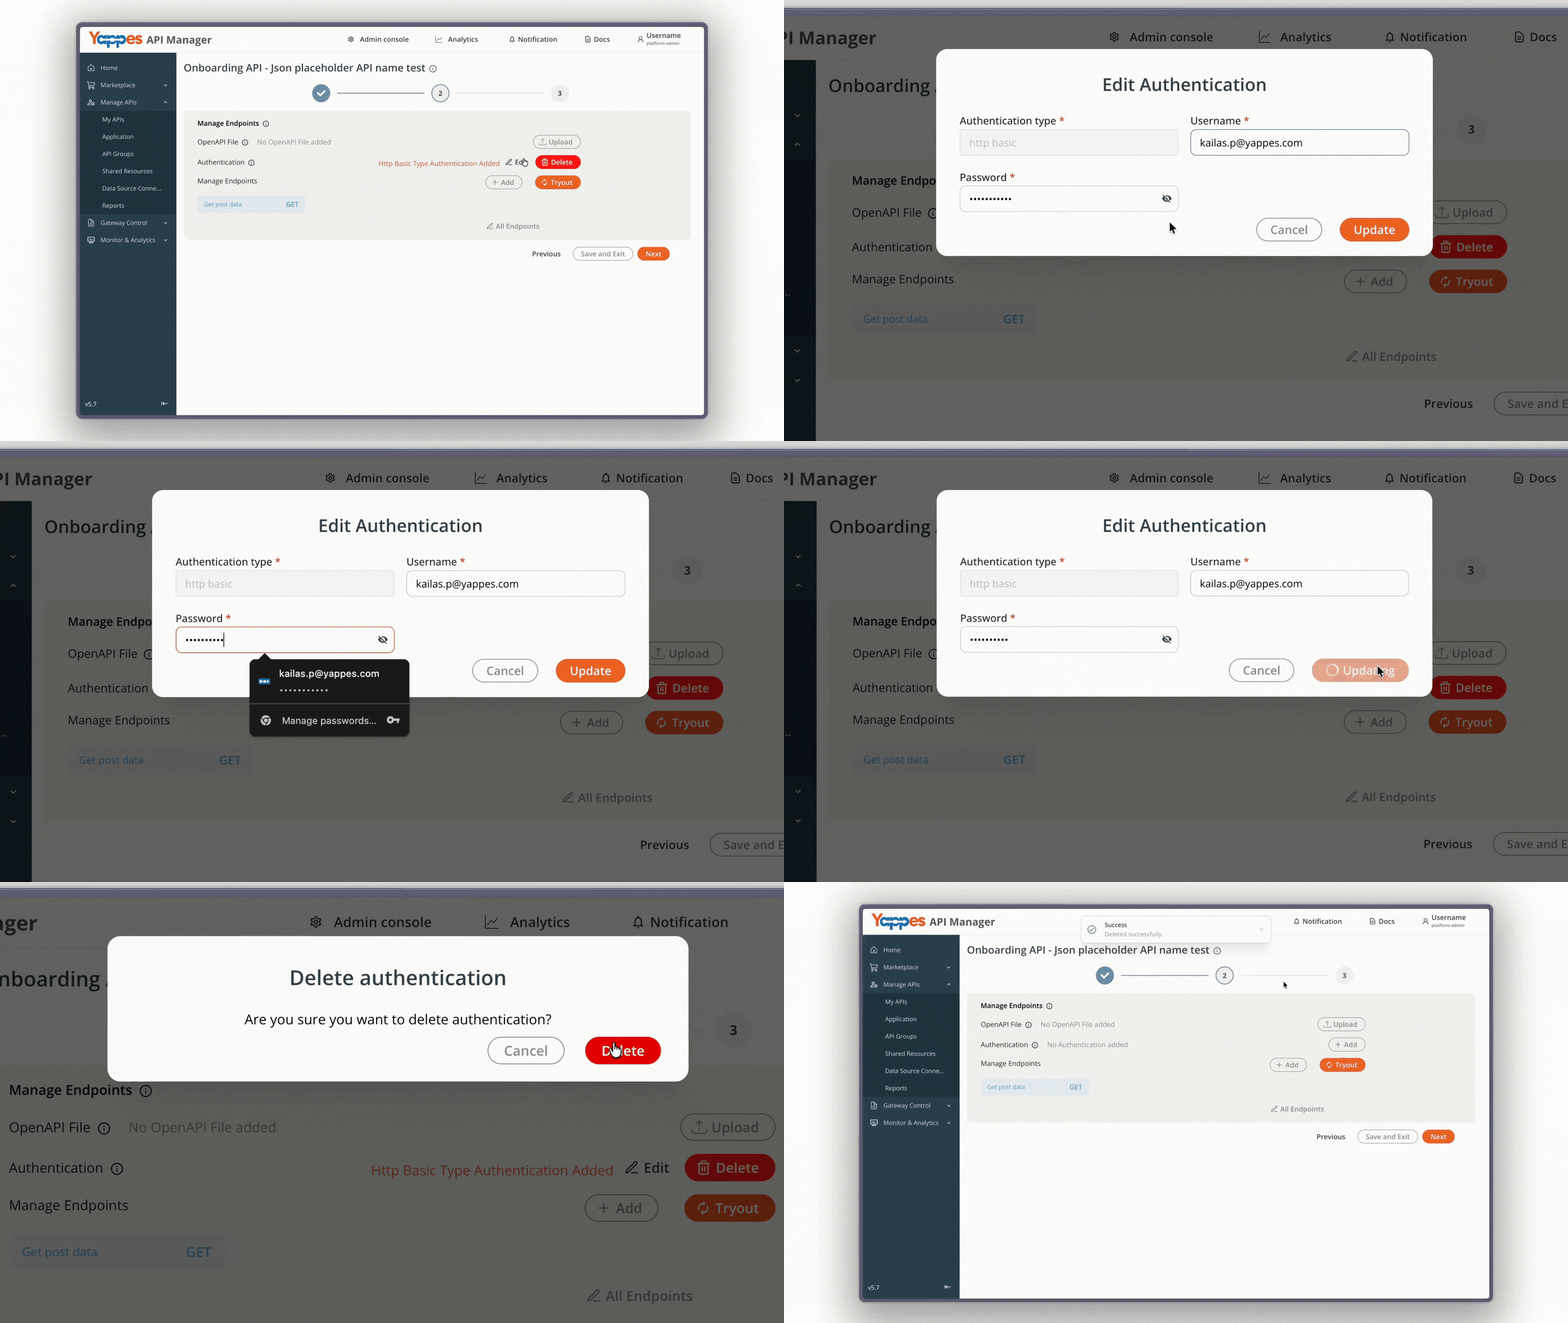
Tryout
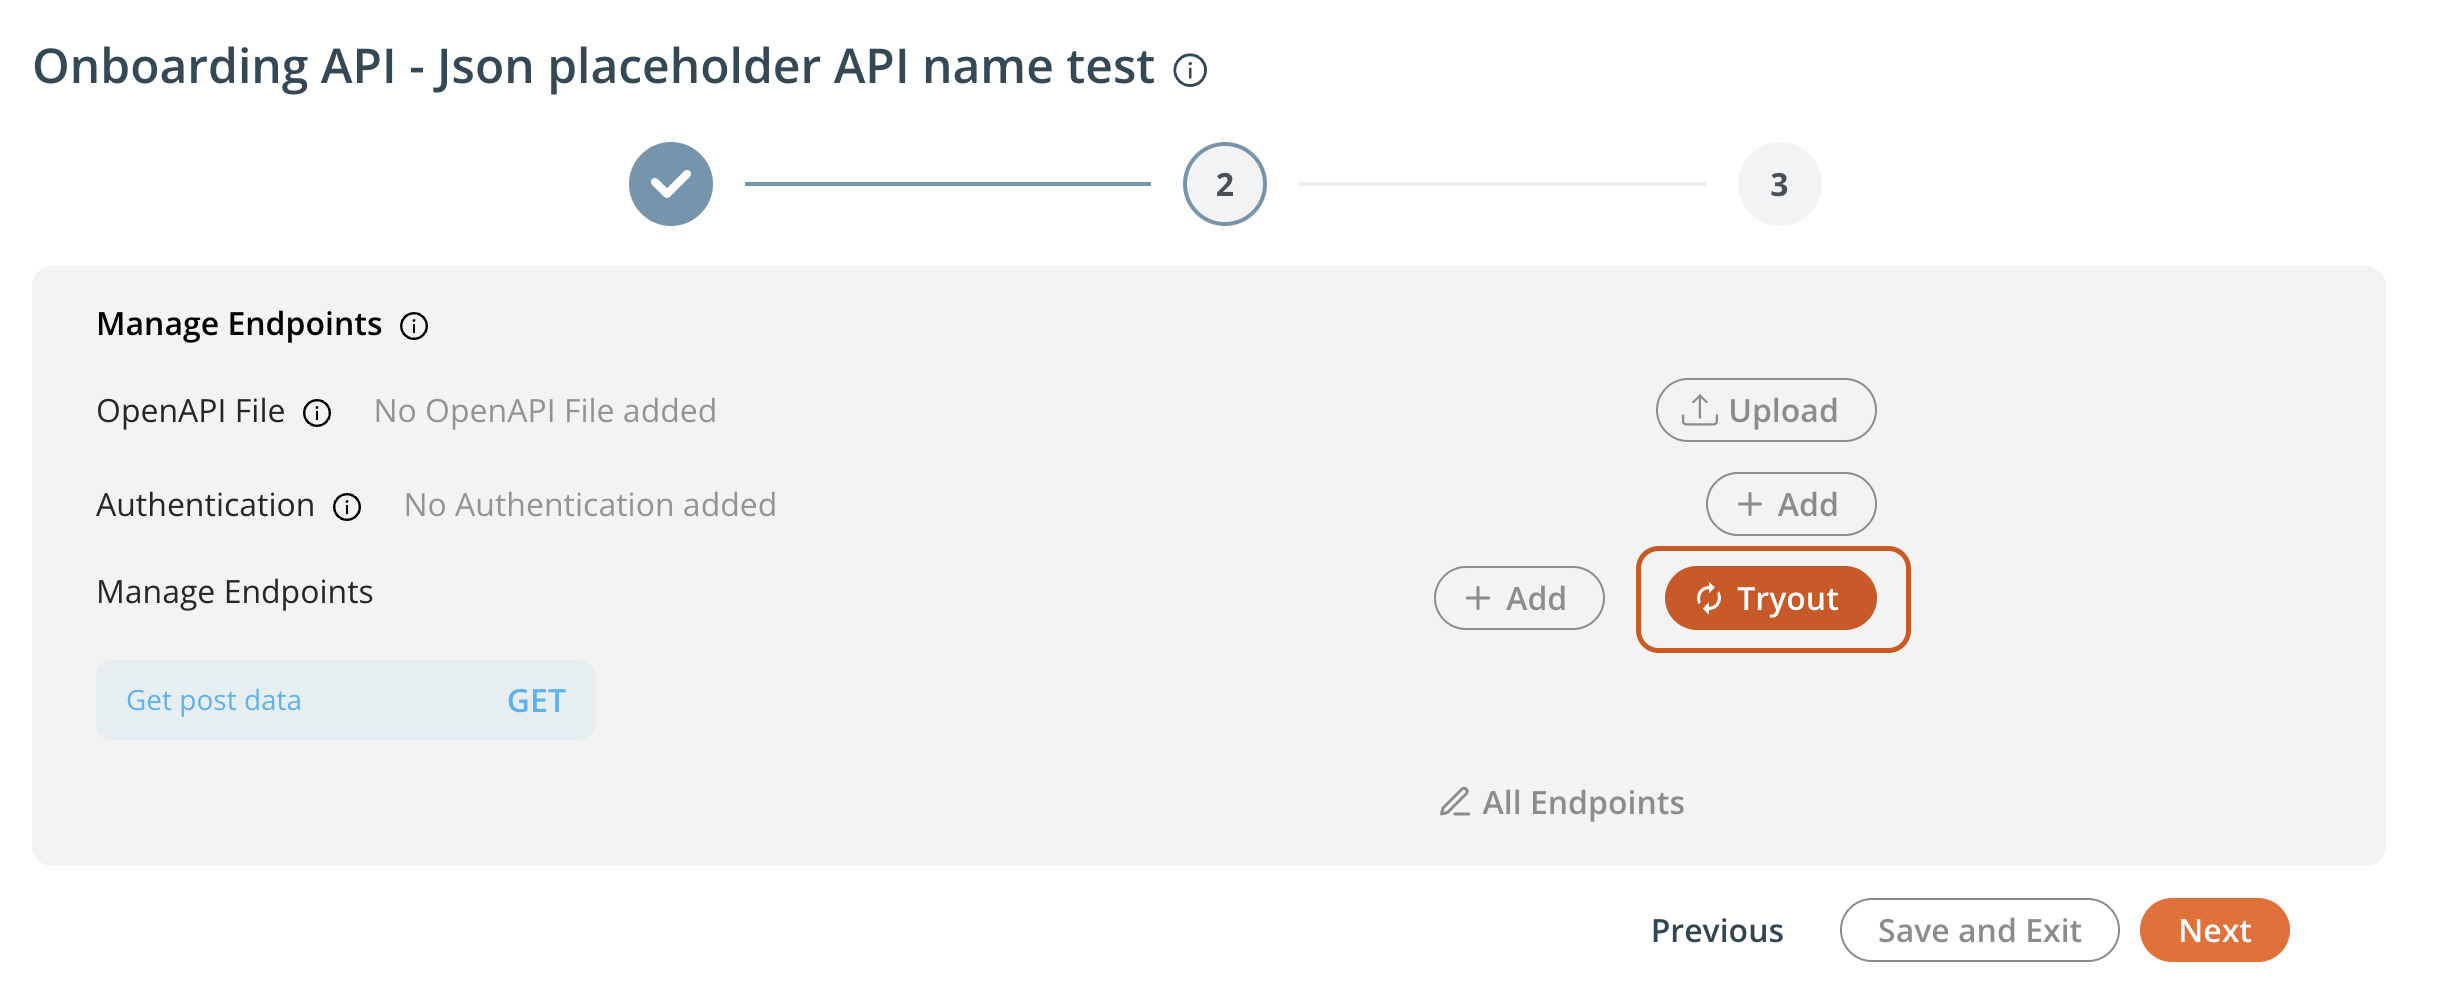
Once you’ve added the Endpoints, the onboarded API is ready to test. You can utilize the Tryout functionality that becomes available in the same, Manage Endpoints section, soon after that. To test the API:
- Simply click the
Tryoutbutton.
- The Endpoint Tryout window will open with details of:
- Endpoints Used
- Endpoint Details
- X-yappes key
- X-Yappes-Subkey
- X-accept-version
- API Request examples using Curl, JavaScript, Python, and Php
- Remaining Tryouts
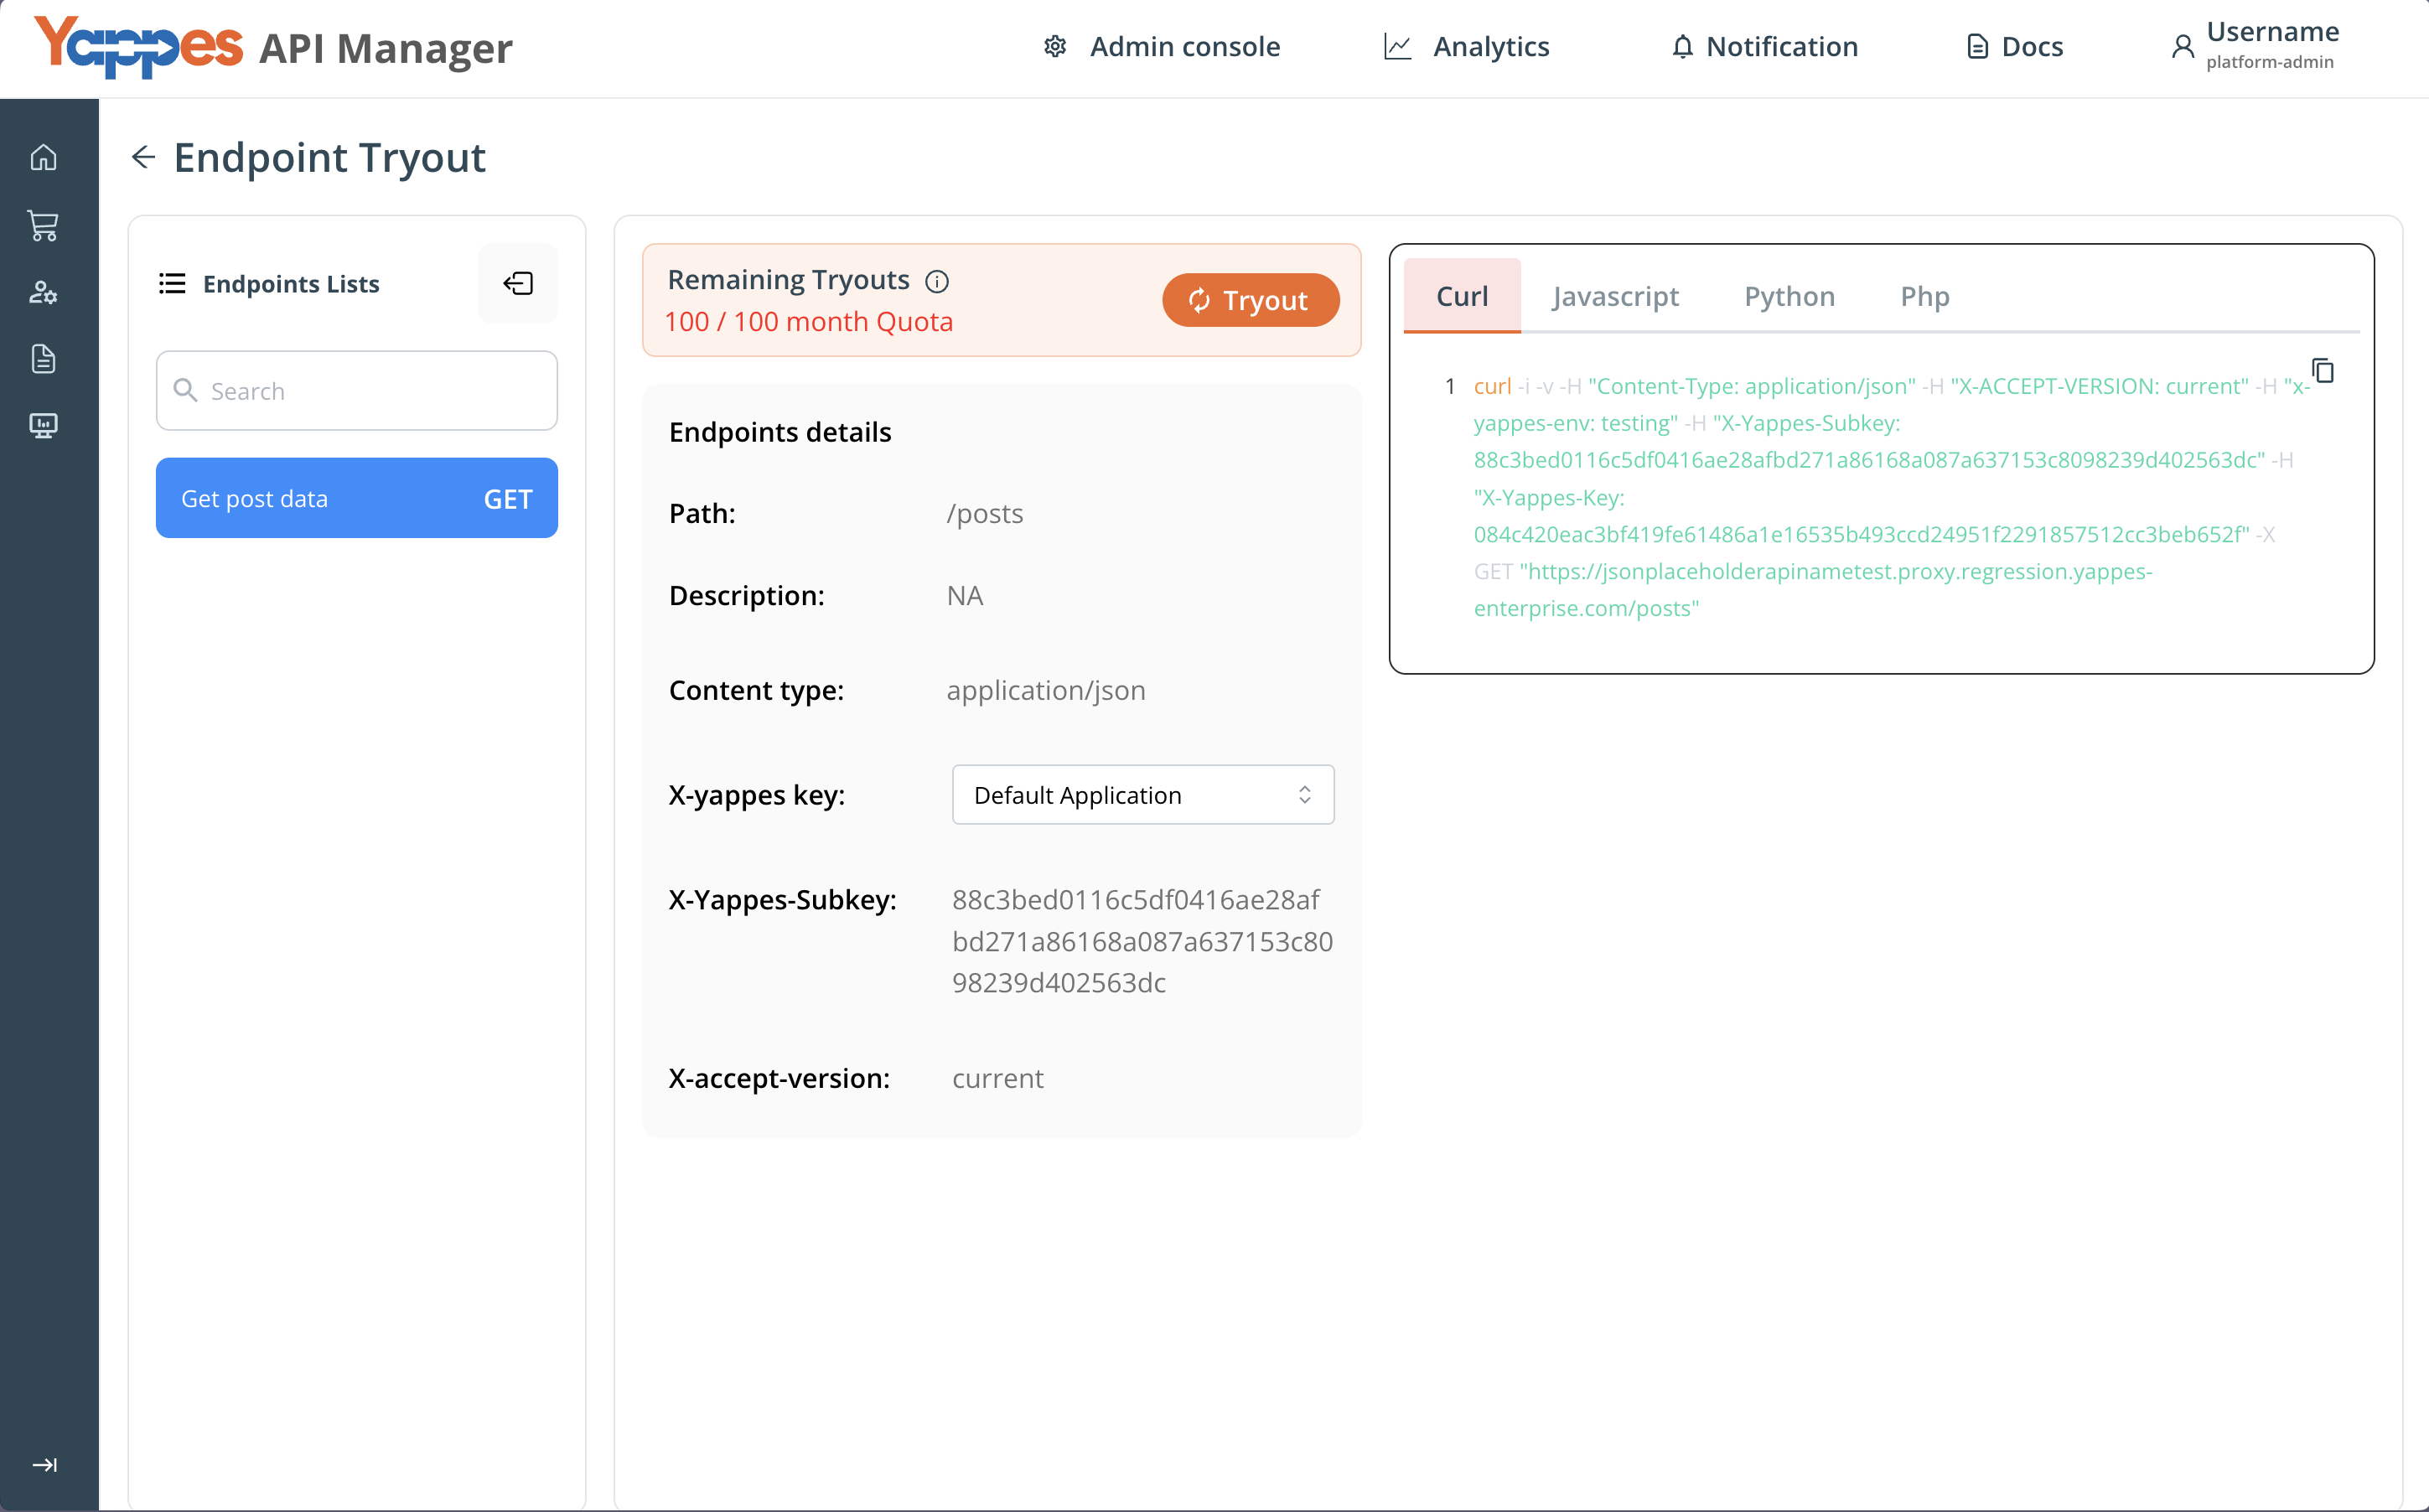
By default, the X-yappes key is set to Default Application. Therefore, if you’ve created the Application, switch to it before running the tryout operation.
- Go to the X-yappes key.
- Click the drop-down and select your Application.
- Then, click
Tryout operation.
Check the Response URL and Response; if correct, you can move to the next step. Click Back and then click Next to move on to the next step.

You can also click Save and Exit to continue later.
Step 3 - Set tryout quota; attach rate plans; add API monitor policies and define read me and license text
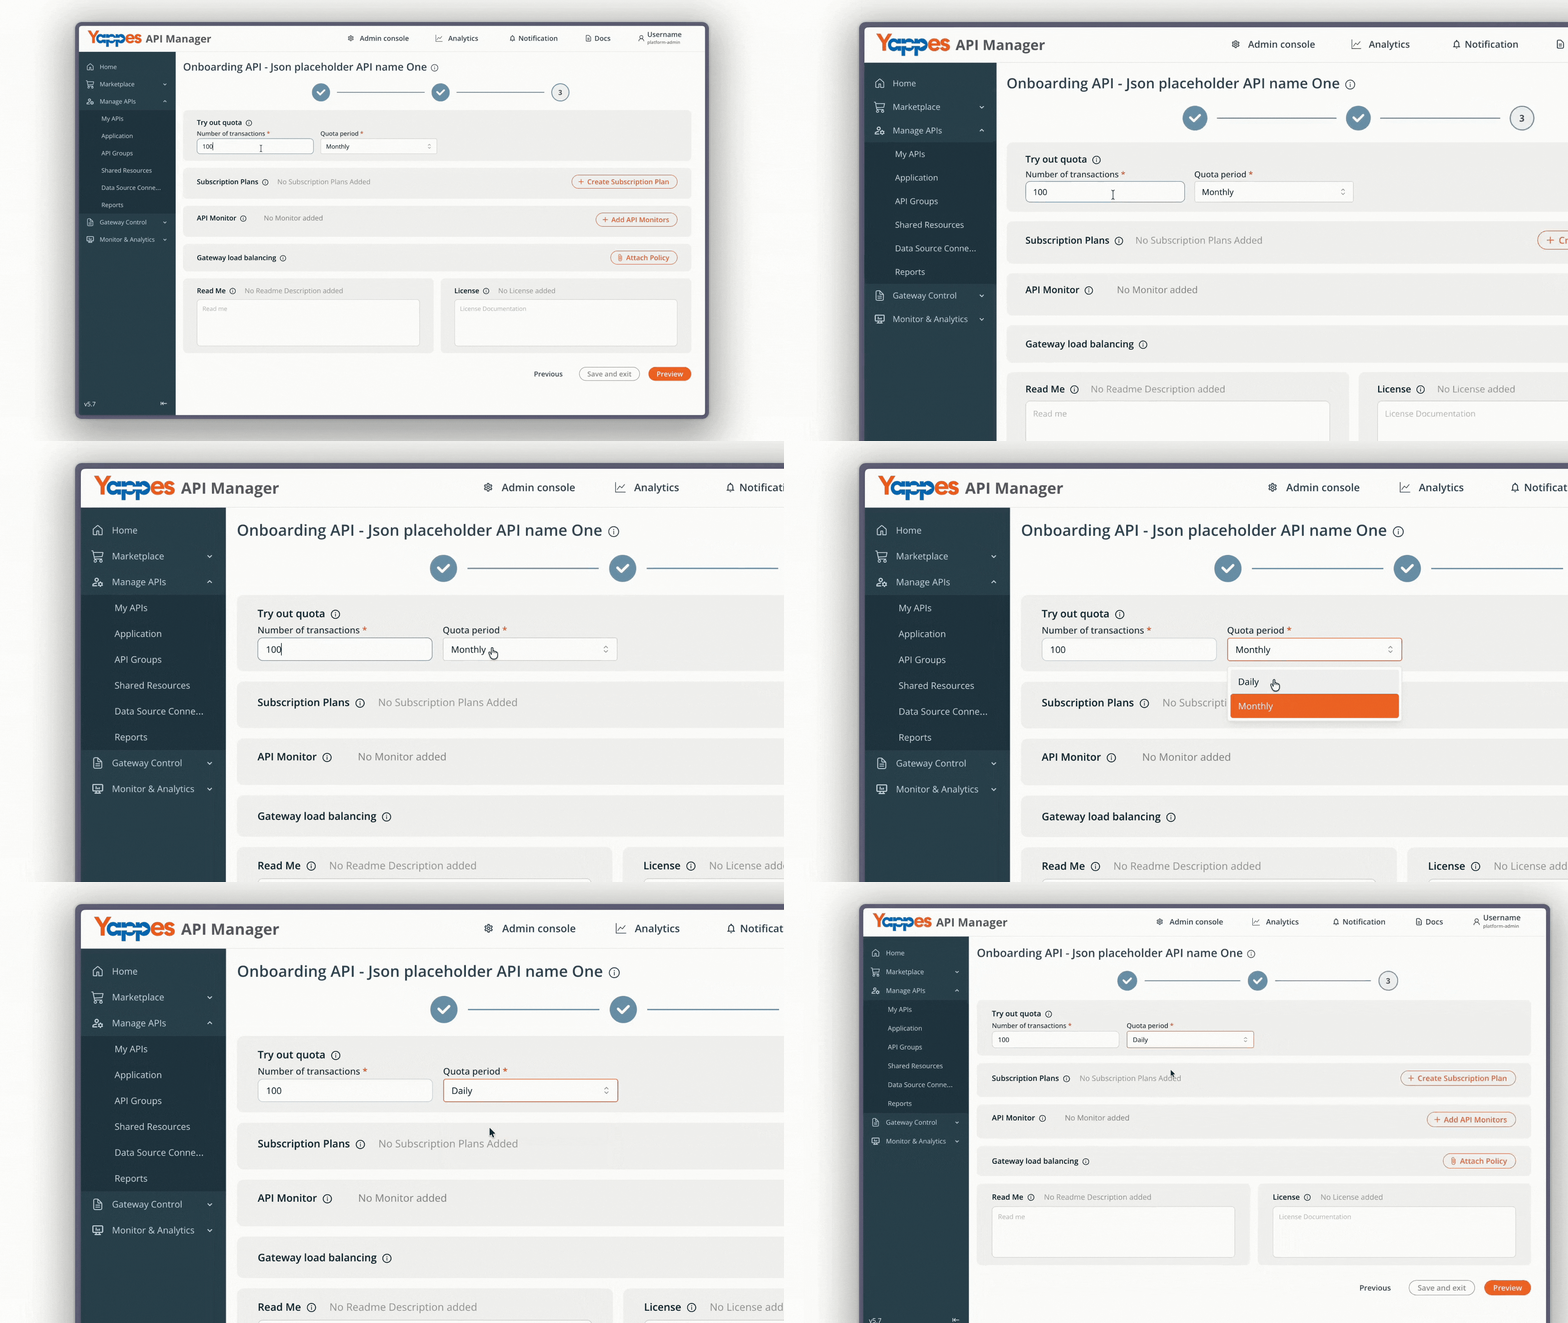
In this step, you can set the transaction threshold to tryout the API without a subscription.
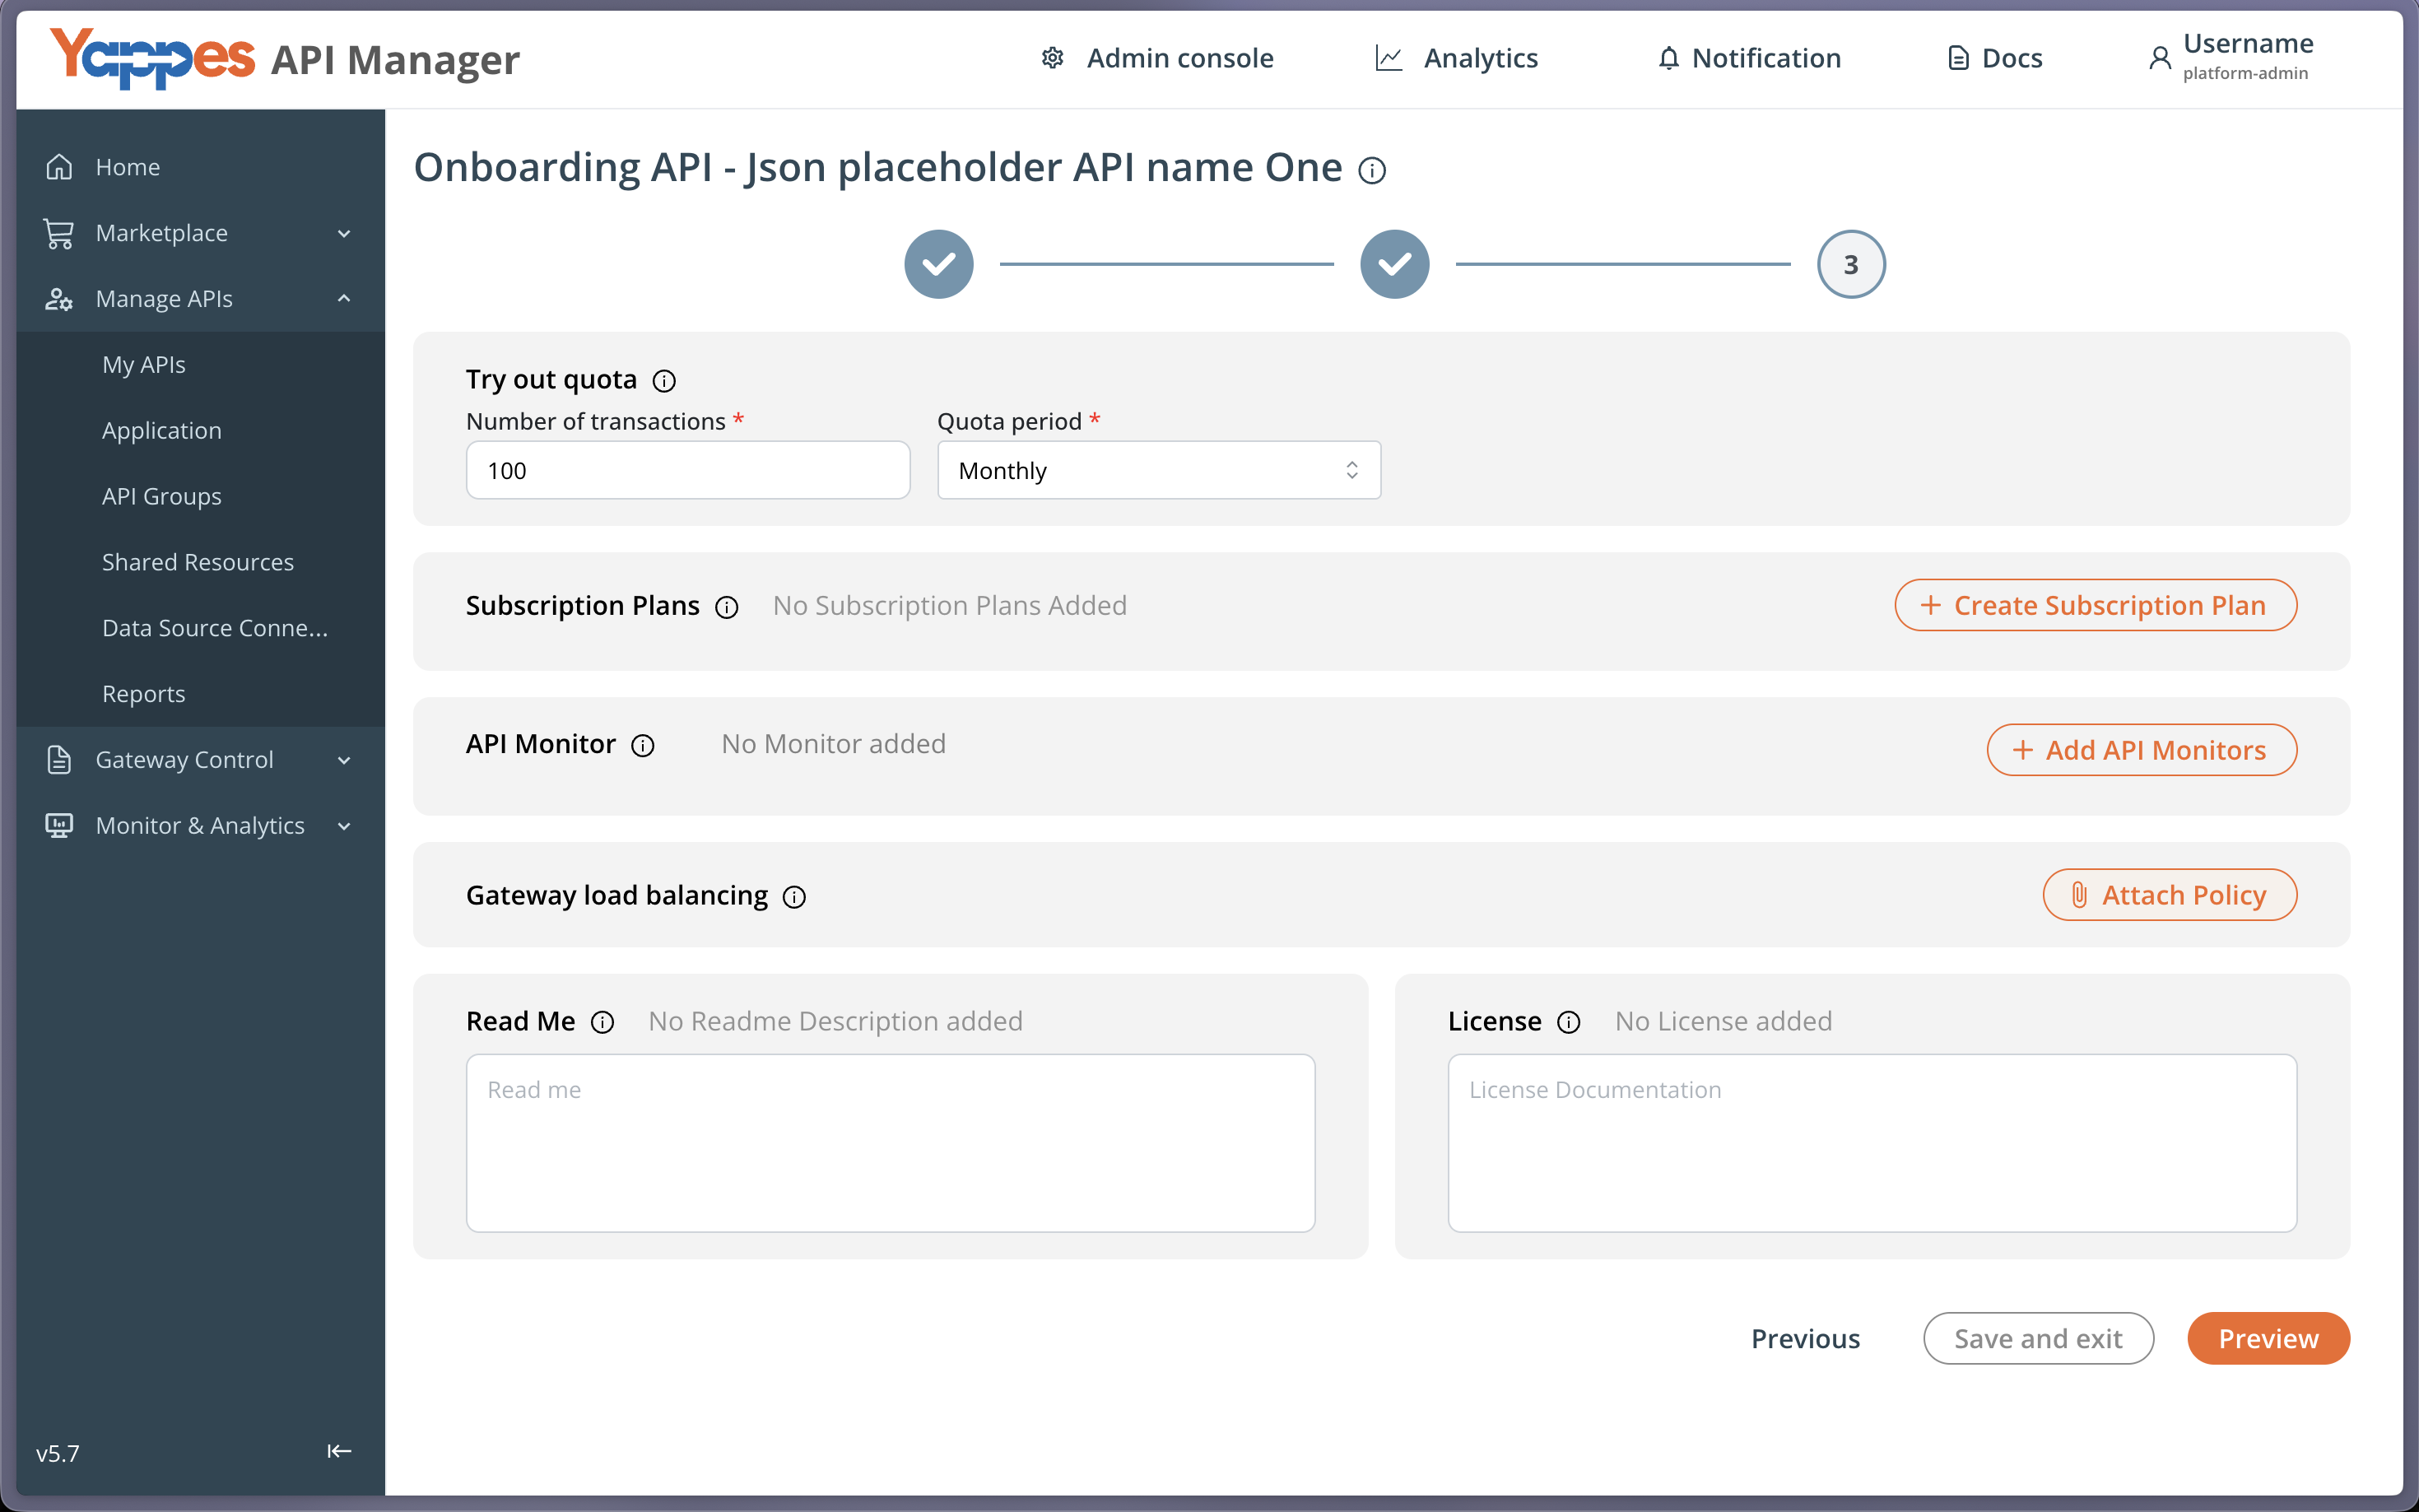
Setting up a tryout quota is essential as it allows consumers to test and understand different aspects of an API, such as functionality, performance and suitability before they subscribe to it. Furthermore, the API tryout quota helps you manage its usage by ensuring that the resources are allocated properly without overuse.
The quota you’d set here will be on a per-user basis.
With rate plans, you can monetize your APIs by defining transaction limits and optional pricing (initialization fee, recurring charges, and pay-as-you-go fees). Together with tryout quotas, rate plans help balance resource allocation, provide value-based access, generate revenue, and give API providers and consumers a clear view of usage and cost.
To set the tryout quota for the API, you need to:
- Go to the
Tryout quotasection and define values for:- Number of transactions
- Quota Period - Daily | Monthly
Then, to attach rate plans for the API:
- In Step 3, open the
Rate Planssection. - Click
Attach Rate Plan. - In the modal, choose one of the following:
Create New— define a new plan for this API. See How to Create a Rate Plan.Choose from existing— search and select plan(s) from the catalog, then clickAttach Plan.
- Attached plans appear as cards (up to three on the onboarding page).
- When more than three plans are attached, click
Edit or view all Plansto open the full API rate plans page (Create Rate Plan, per-cardEdit/Detach).
For attach and detach field details, see Attaching a Rate Plan and Detaching a Rate Plan.
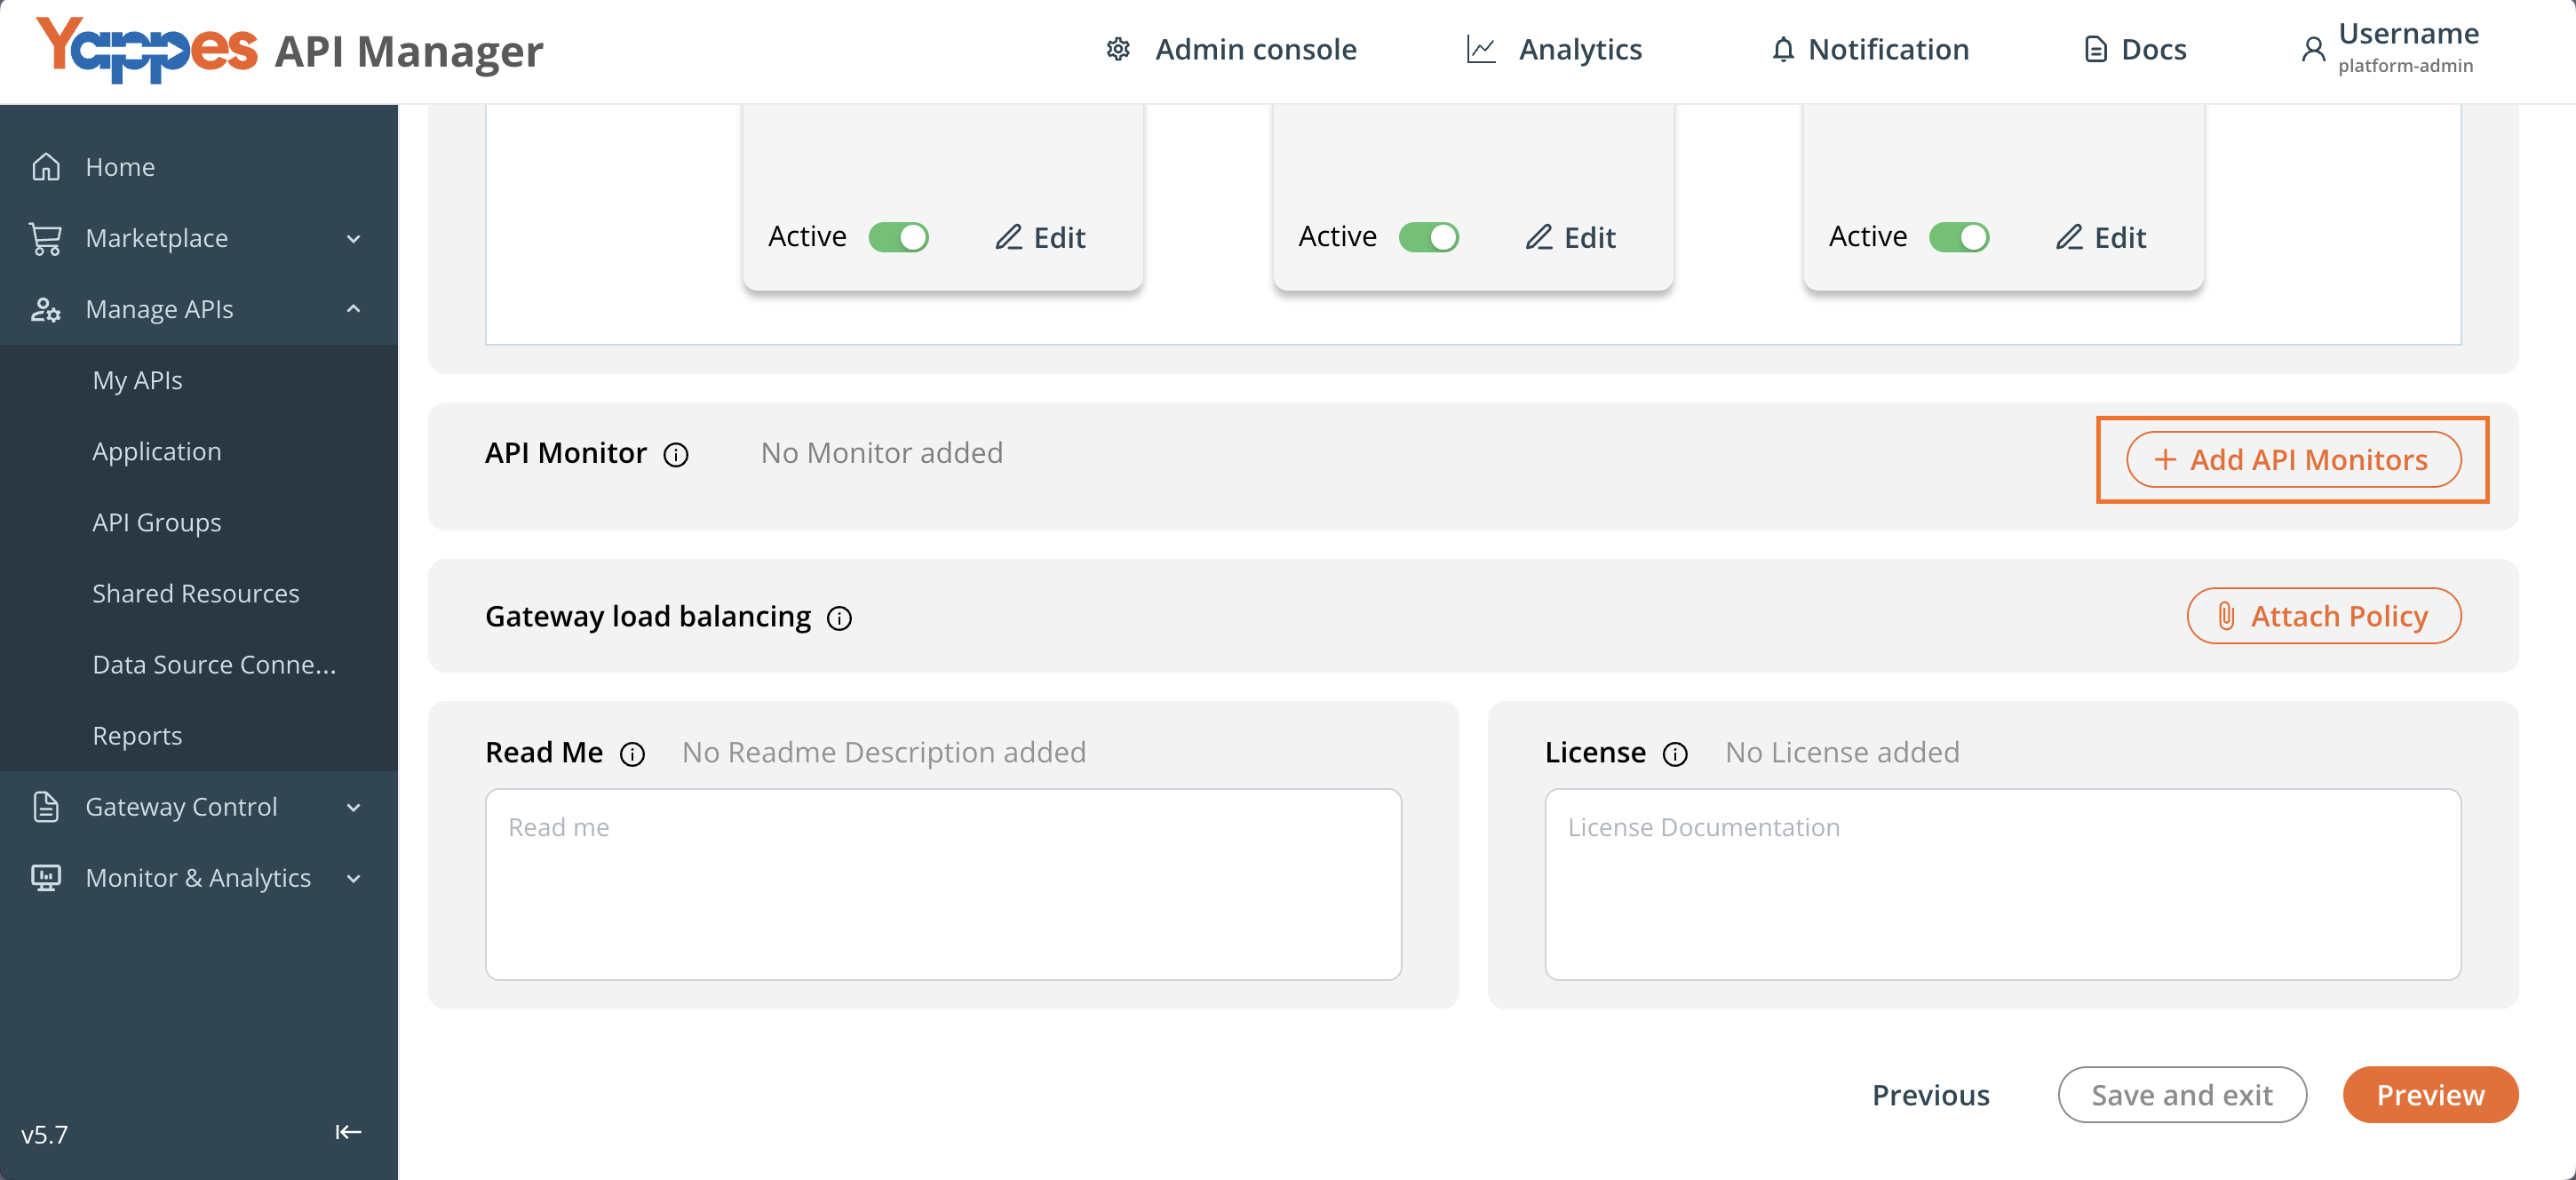
After the rate plans, you can add API monitors:
- Go to the API Monitor section and click Add API Monitors.
Attach Policies
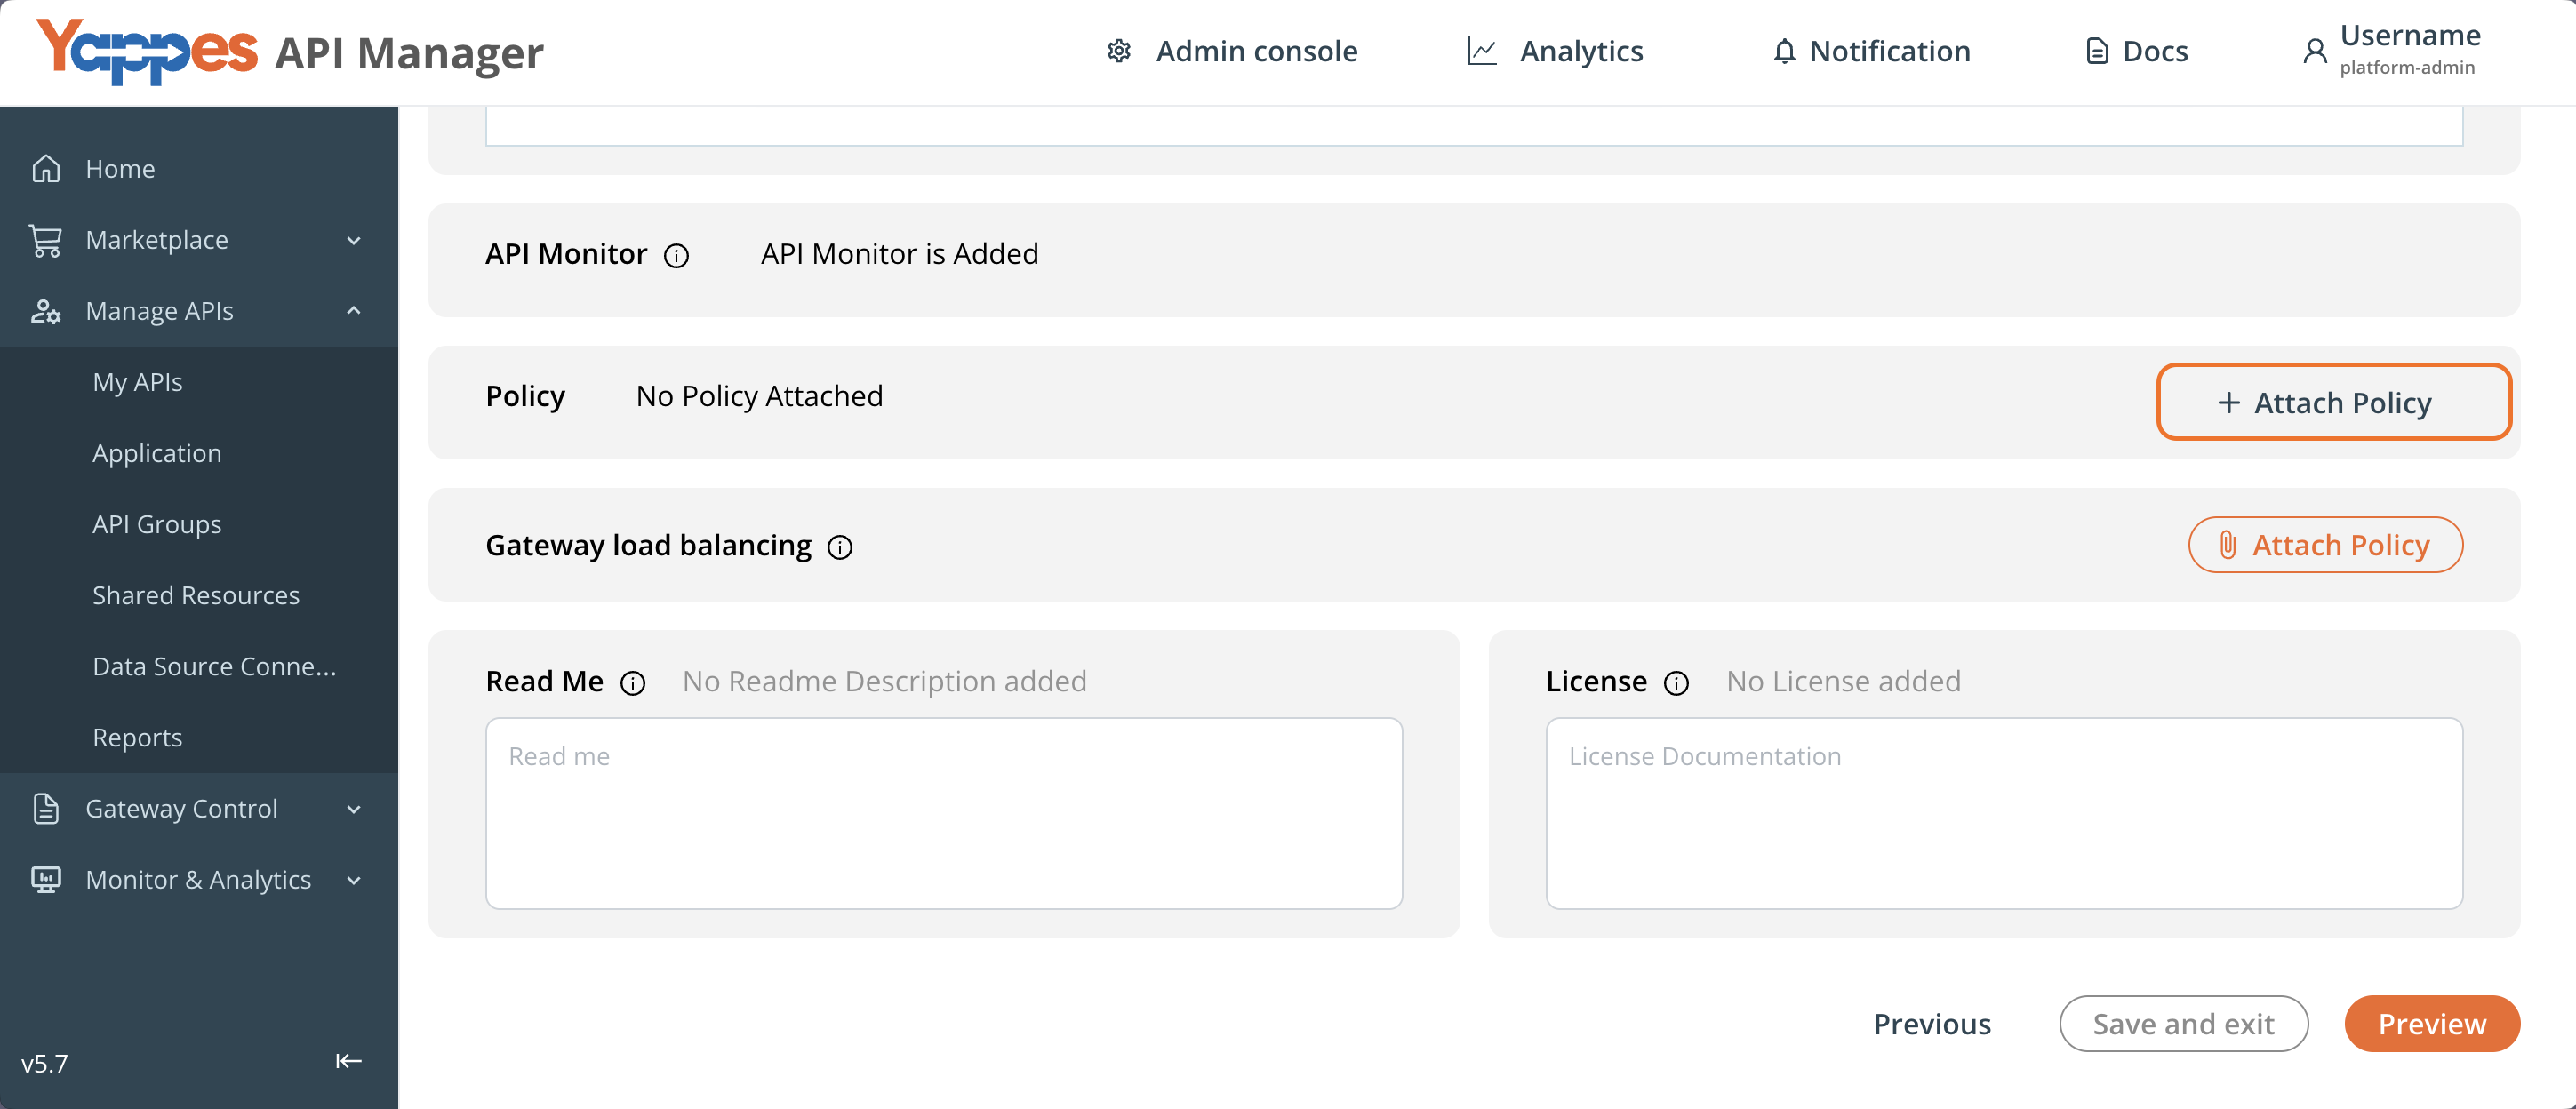
- You can attach gateway policies to your APIs using the
Attach Policydialog.
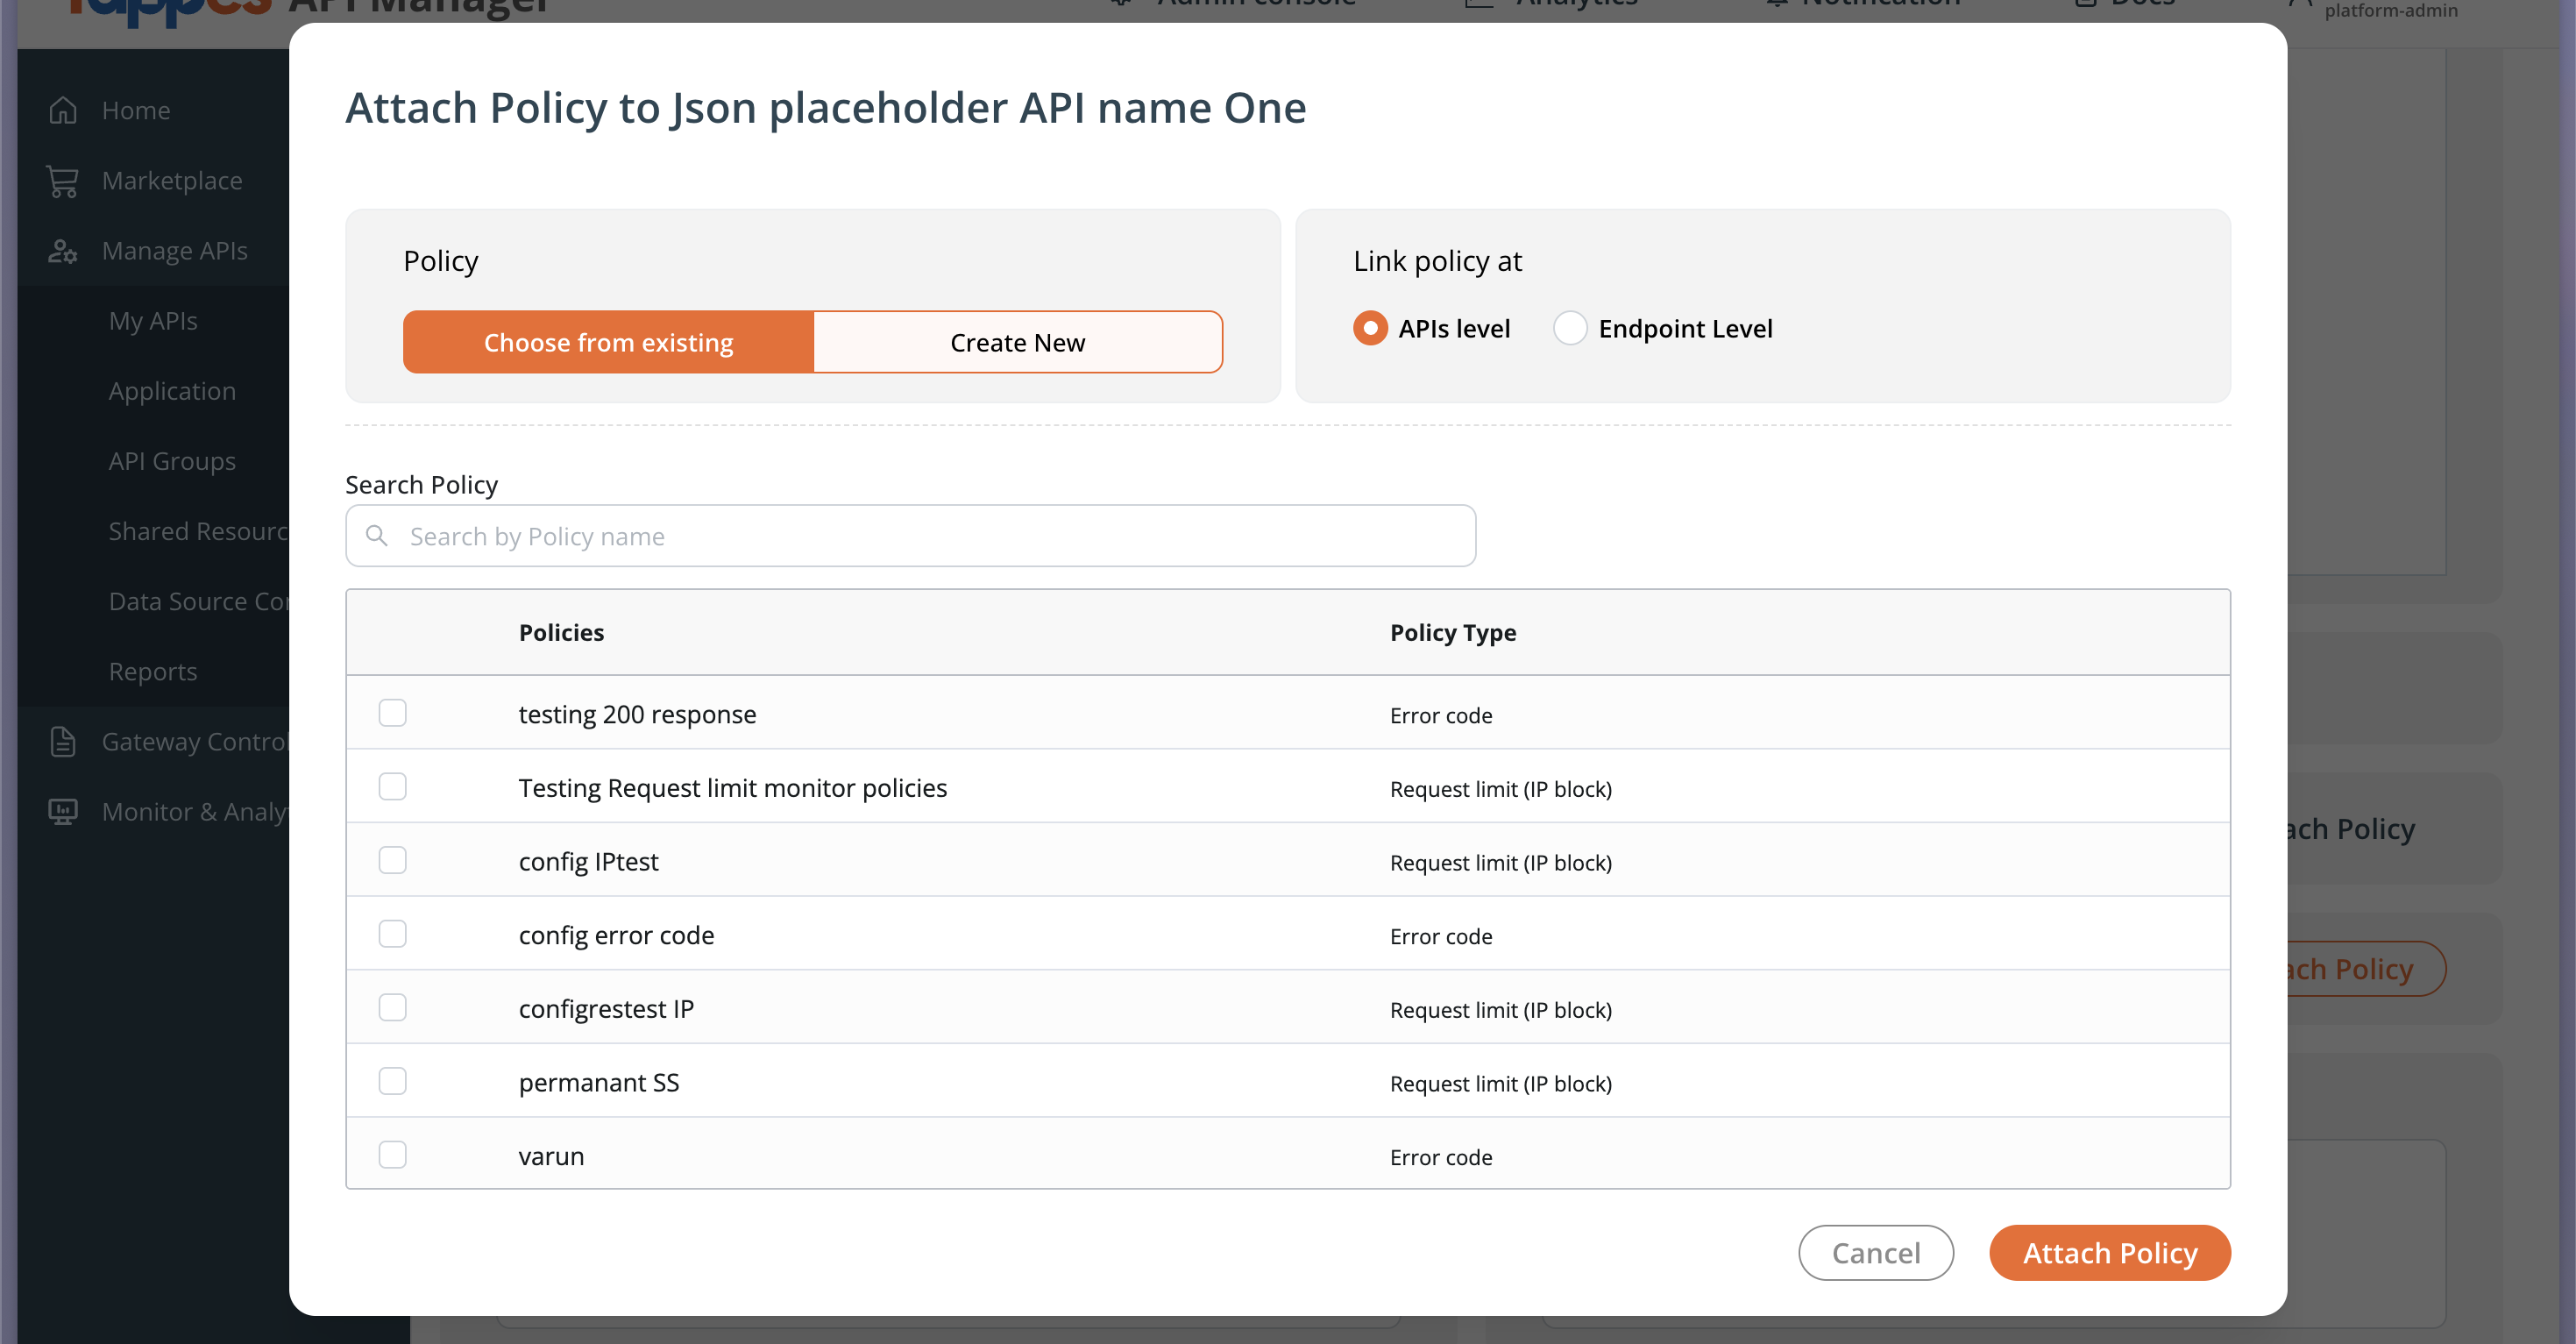
- Policies can be configured at both the
API level(applies to all endpoints) andEndpoint level(applies only to selected endpoints).
Choose from Existing
- In the
Policysection, selectChoose from Existing. - Use the
Search Policyfield to find existing policies by name. - The table lists all available policies along with their
Policy Type(e.g., Request Limit (IP Block), Error Code, etc.). - Select one or more policies that you want to attach.
- Click
Attach Policyto confirm your selection and attach the policies.
Create a New Policy
- In the
Policysection, selectCreate New. - This allows you to create a new gateway policy directly from the
Attach Policywindow. - You can choose to link the new policy at either the
API LevelorEndpoint Level, based on your requirement. - Configure the necessary policy details (such as control level, policy type, and configuration parameters).
- Once saved, the newly created policy is automatically attached to the API or endpoint.
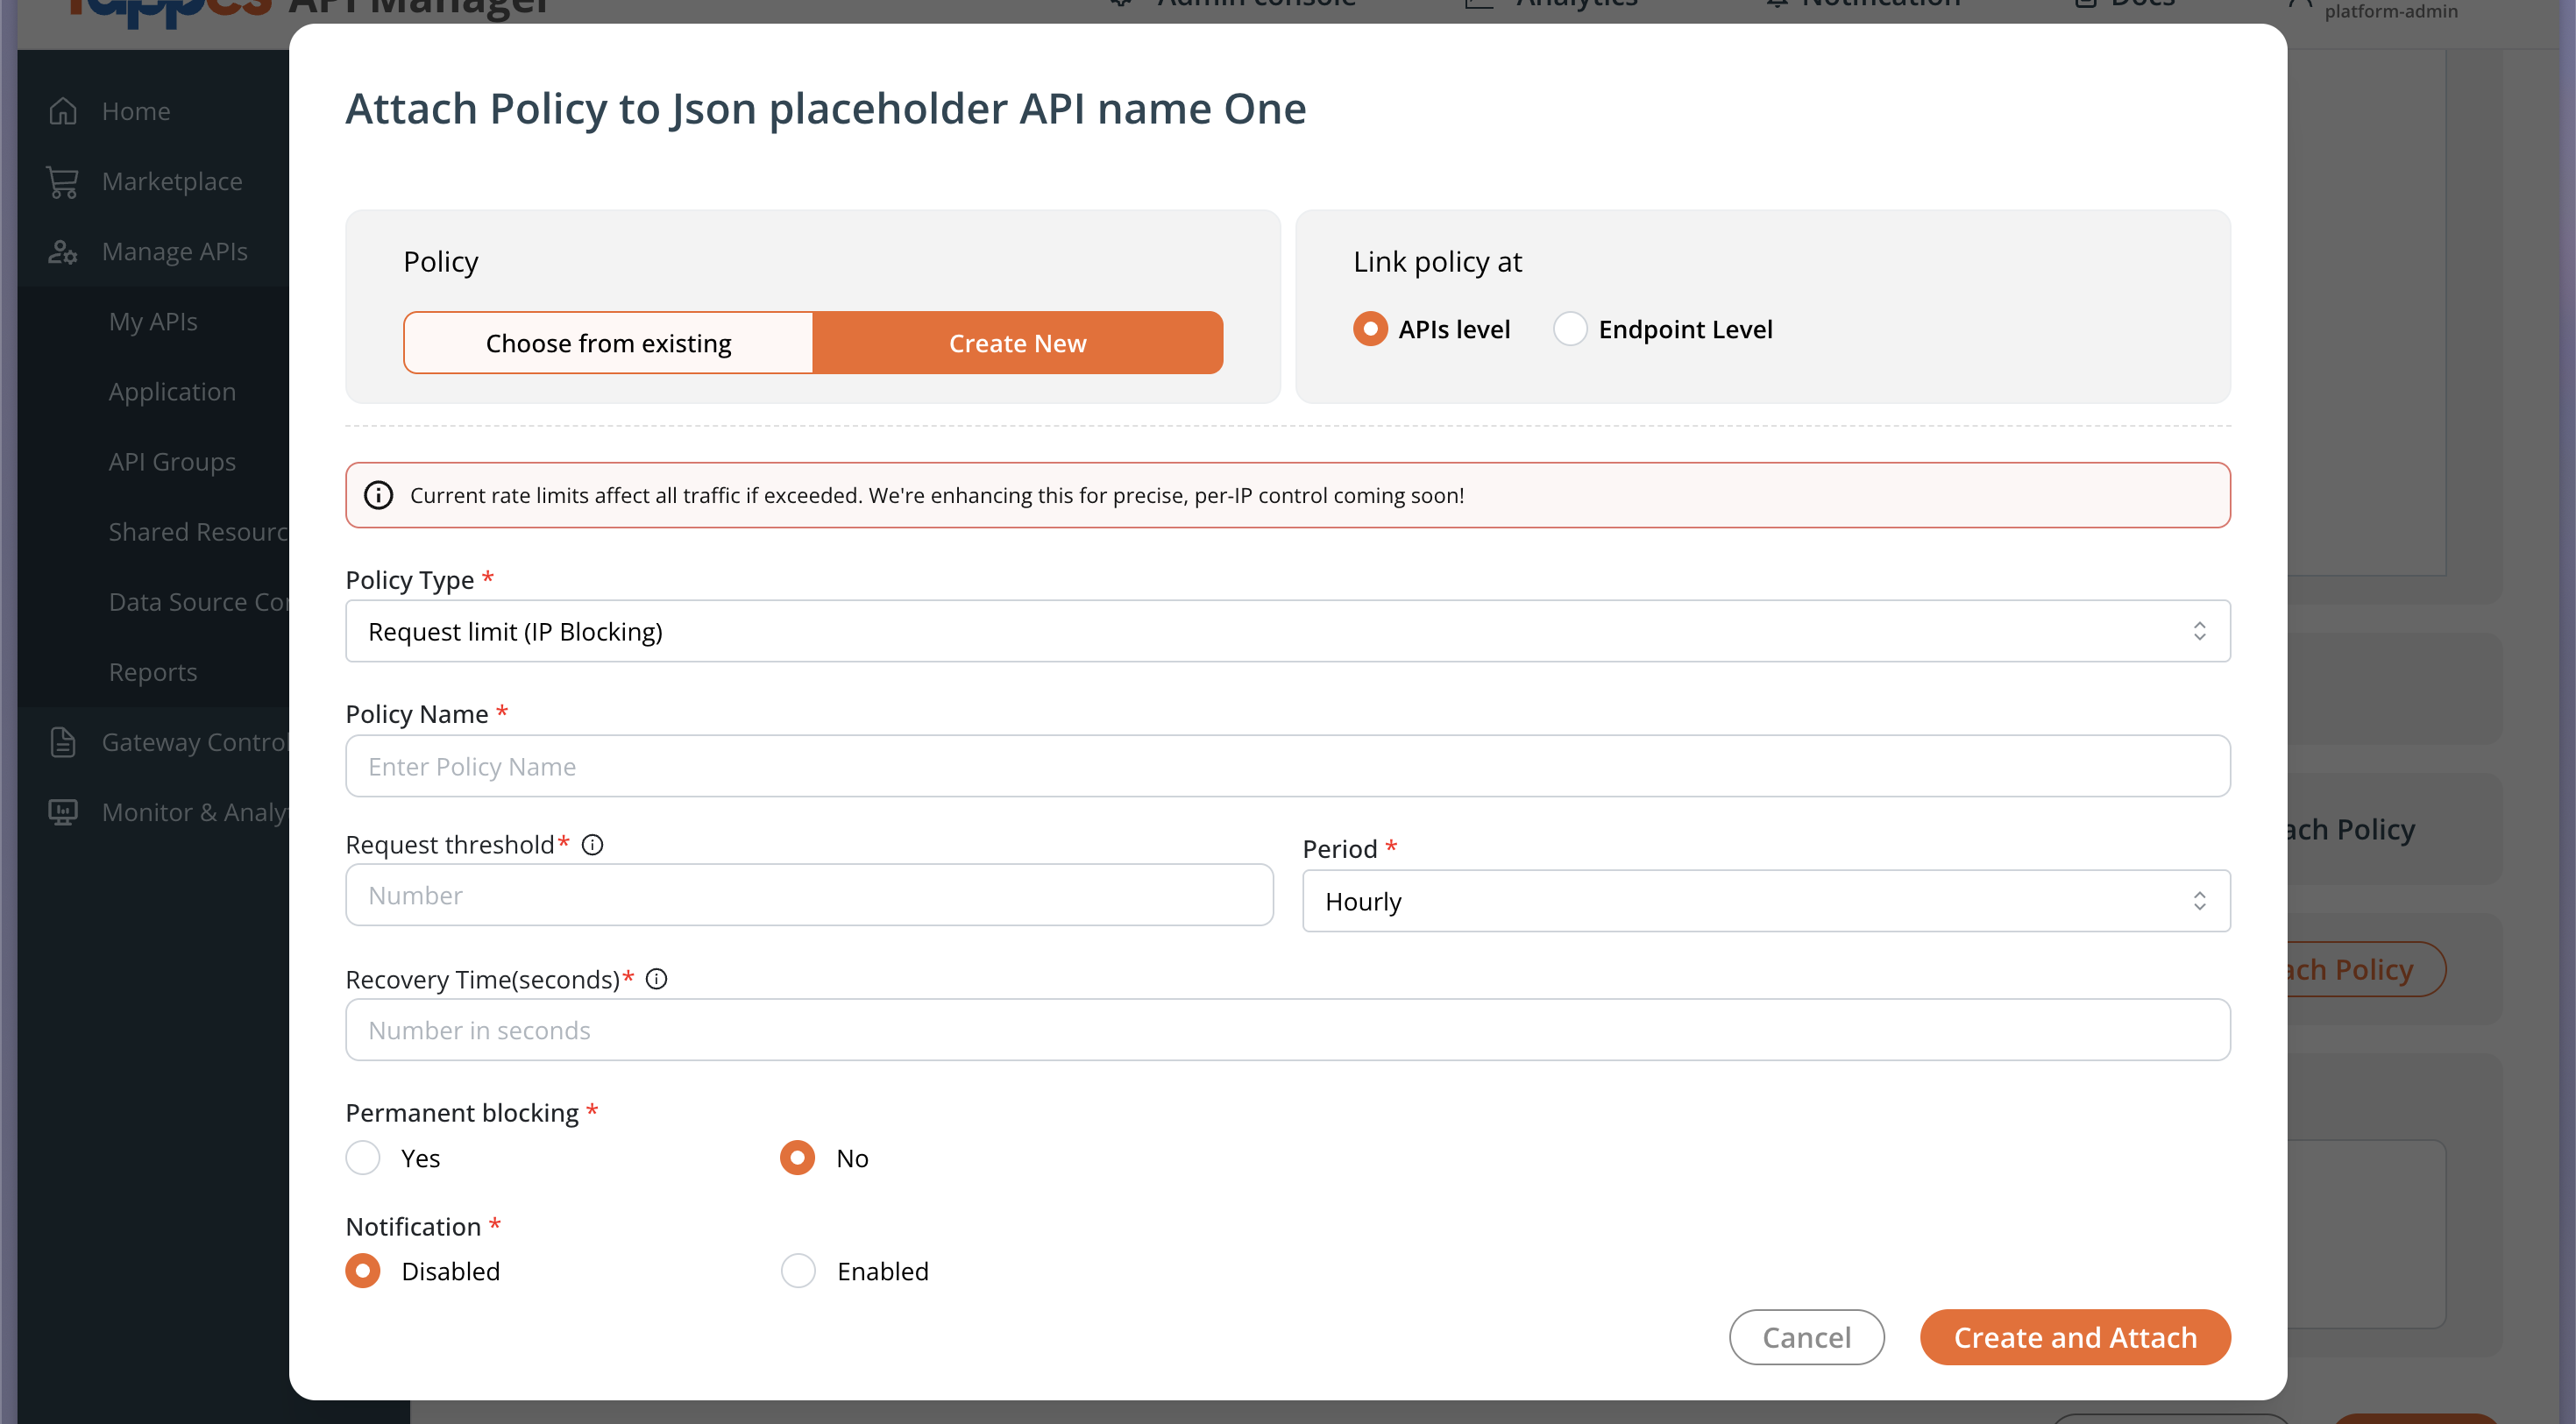 - Once you have added all of these, click
 Create and Attach.
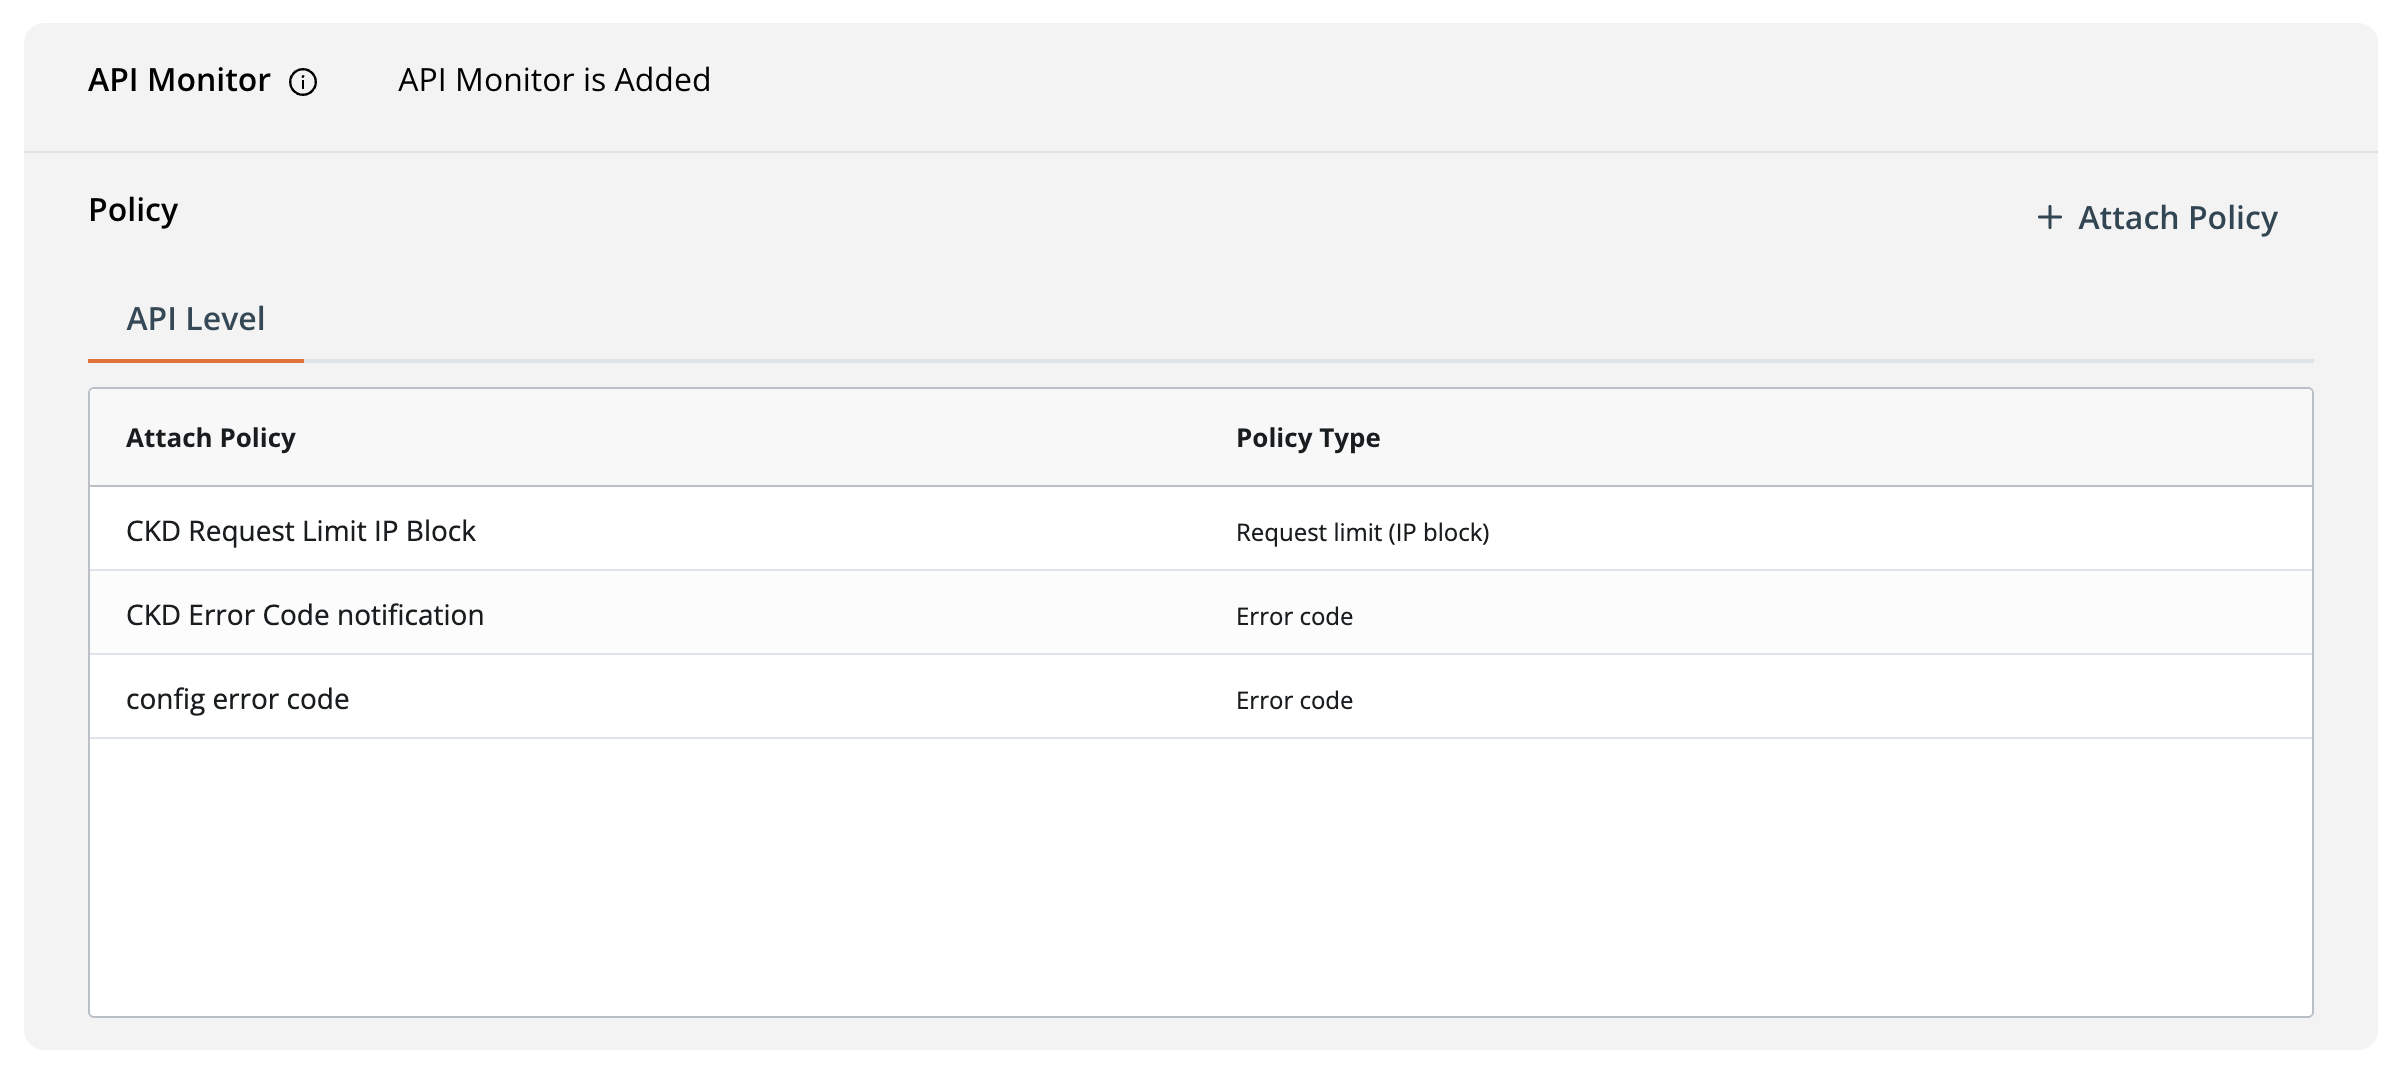 The added policy will appear in the policy list.
Info
For a detailed explanation of creating different monitor policies, visit Monitor & Analytics
Once you’ve attached the policy, you need to add a read me text and license. So for that:
- Go to the
Read Mesection and add your read me file text. - Then, go to the
Licensesection and add your license details.

Once you’ve added the information regarding Read Me and License, you need to review the details you’ve added. To do that:
- Click
Preview.
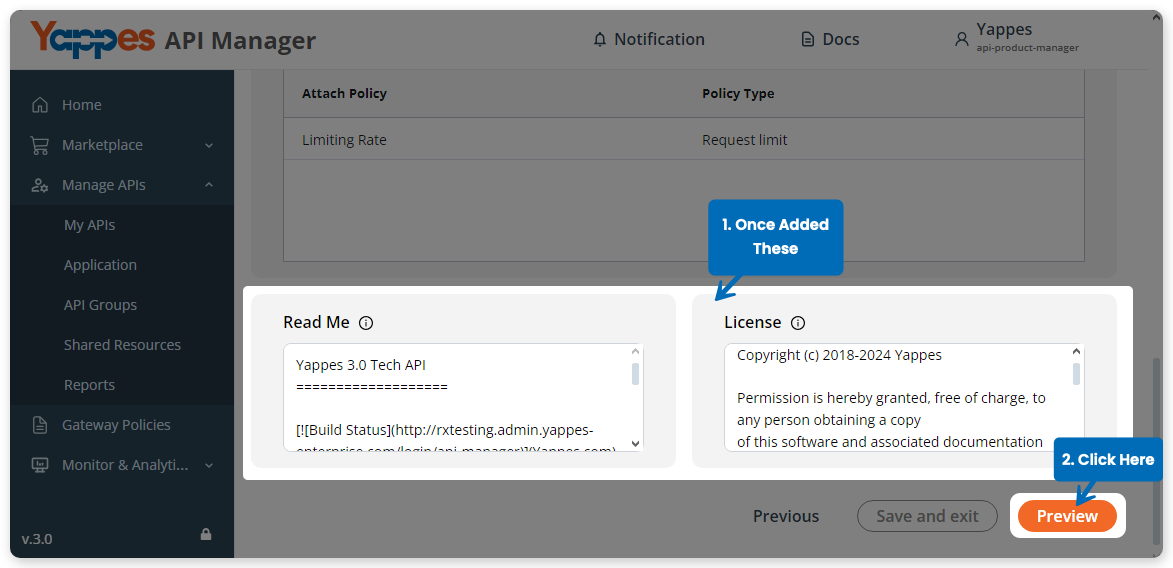
This will save all the details, and you can preview the API before publishing it.
Now, based on your user role and whether an approval workflow is attached to the API, you can save, publish, or submit for approval.
Direct publish
If no approval workflow is required, platform-admin or api-product-manager users can publish directly:
- Click
Finish and Publishon onboarding step three, orPublishfrom the My APIs list after onboarding.
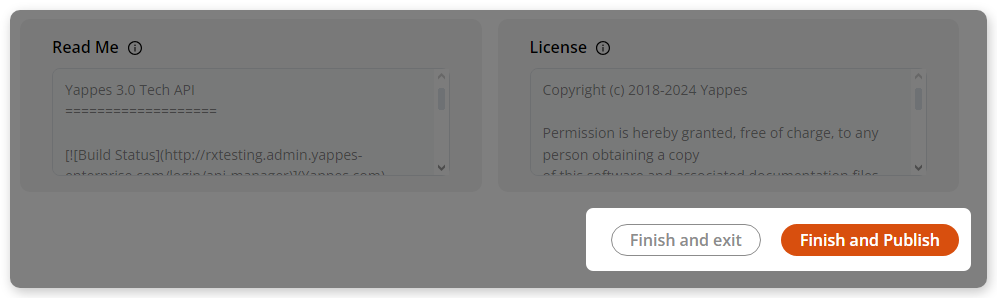
The published API appears in the My APIs list and in the marketplace API listing.
Submit for approval
If an approval Workflow is attached to the API, use Submit for approval instead of publishing directly. This is available when:
- A workflow is attached to the API.
- At least one endpoint change exists.
- A marketplace tag is present.
- The API is not already in a pending or scheduled approval state.
To submit from My APIs after onboarding:
- Return to
Manage APIs→My APIsand open the API. - Click
Submit for approval. - In the modal, select the change type:
Major,Minor, orPatch. - Click
Submit for approval.
After submission:
- The button changes to
Submitted & approval pending(disabled). - The My APIs grid status shows
Approval pending. - Approvers process the request in Pending Approvals.
- The API remains unpublished until approved; the requester can then publish from My APIs.
Save without publishing
- Click
Finish and ExitorSave and Exitto save progress without publishing.
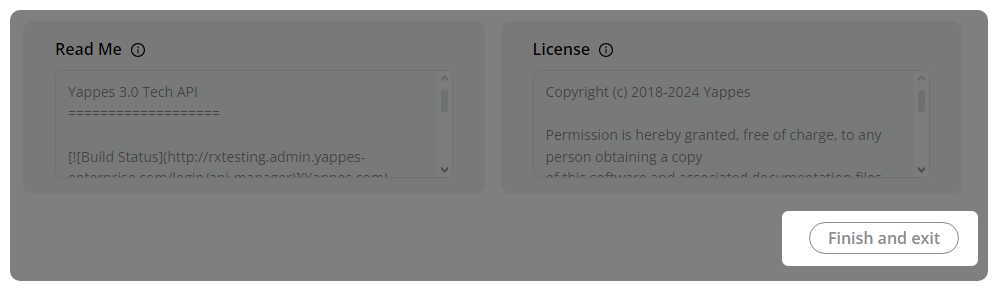
If you’re onboarding as an api-developer, you typically get Finish and Exit only; a product manager can publish or submit for approval later.
Simply click the available option, and you can see the API in the My APIs list as unpublished, like the following.
In order to publish this unpublished API, the product manager needs to edit the API and then publish it. By following the steps mentioned in the following article, the product manager can learn how to publish an API.
 Publish an API
That’s it; you’ve successfully onboarded the API. To perform other tasks on your API, follow the instructions mentioned in the following article.