API Authentication
Before subscribing to an API, developers or consumers can test it by utilizing the Tryout operation. The tryout operation operates on a specified tryout quota, so that, only limited resources come into use. If an API is publicly available, consumers can access the marketplace and run the tryout operation whenever needed. This can exhaust the limited quota for a particular API, hence, depriving other users of trying it out.
Therefore, in order to limit the usage and give access to only authorized users, API Authentication comes in. It allows product managers to apply a specific authorization on the API Endpoints which needs to be validated before running the Tryout operation.
Info
Yappes OAuth is a separate, platform-managed authentication model used for gateway-protected APIs with per-endpoint scopes and per-application client credentials. It is not covered on this page. See Yappes OAuth for the full end-to-end guide. The OAuth 2 type documented below configures an external/upstream token server for Tryout only.
If you need to apply the authorization, follow the below steps:
Note
Before you proceed, ensure, you’re a user with the platform-admin, api-product-manger or api-developer role.
Info
Fields with asterisk (*) are mandatory.
- Access
Manage API→My APIs→ click for the API you need to apply the authorization.
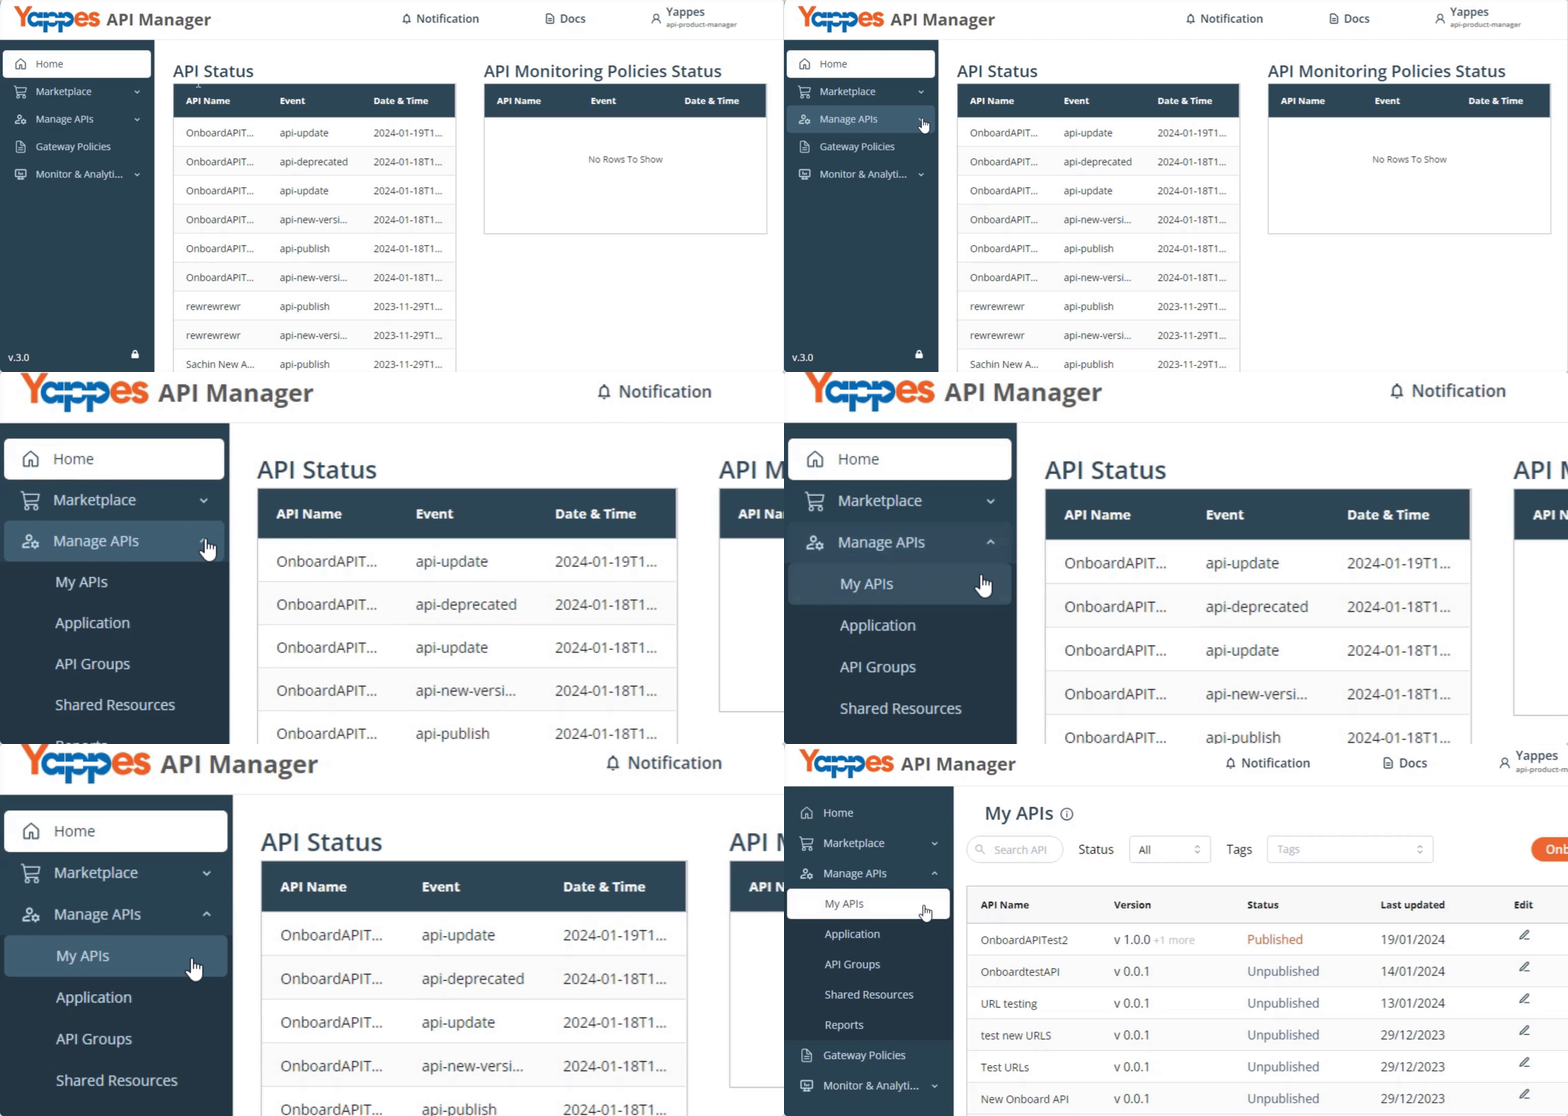
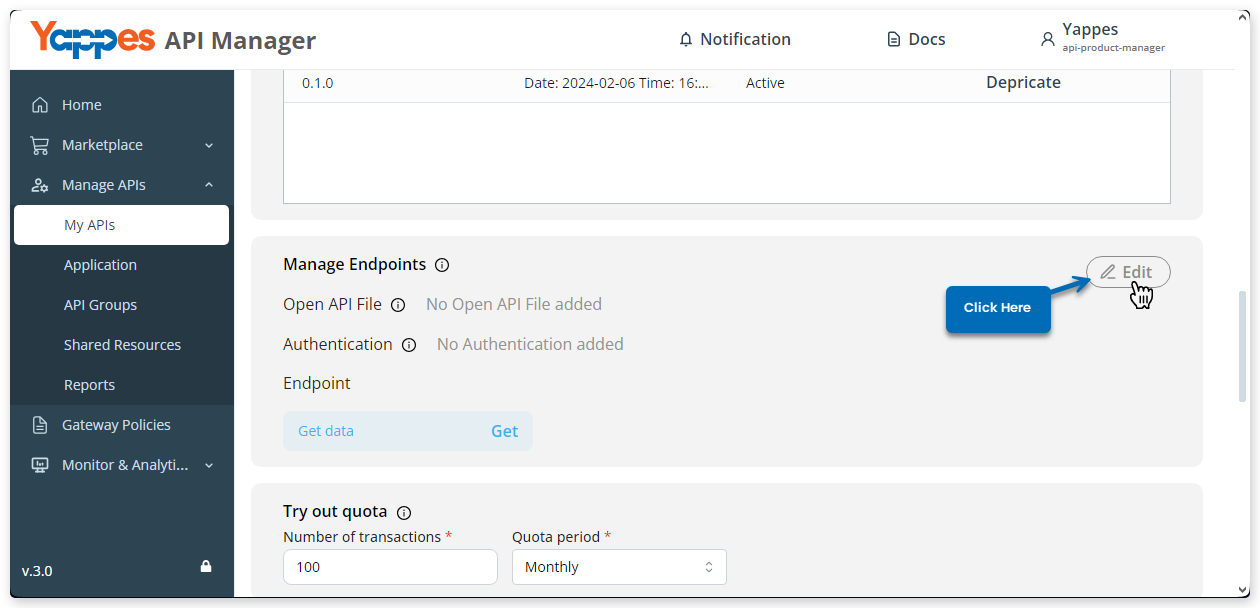
- Scroll down to
Manage Endpoints, and click Edit.
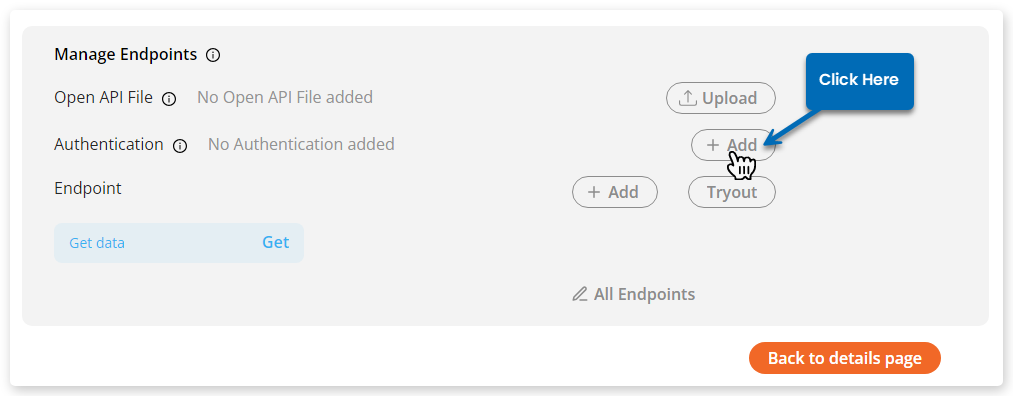
- Click Add for Authentication
- In the popup shown:
- Select the
Authentication type
- Select the
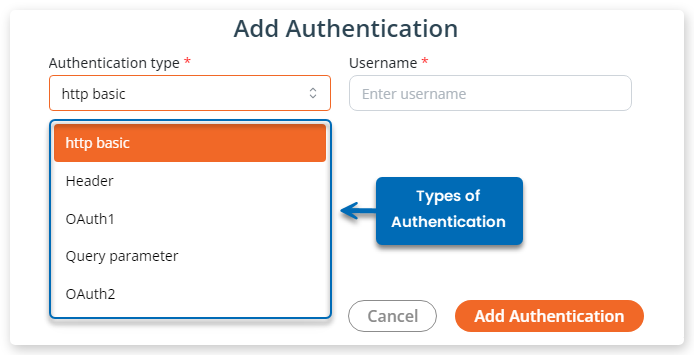
At Yappes, you can apply six types of authentication on the API and they are as follows:
HTTP Basic Authentication
The first authentication type avaialble is HTTP Basic. If you select it, then you need to:
- Enter the
Username. - Then,
Password.
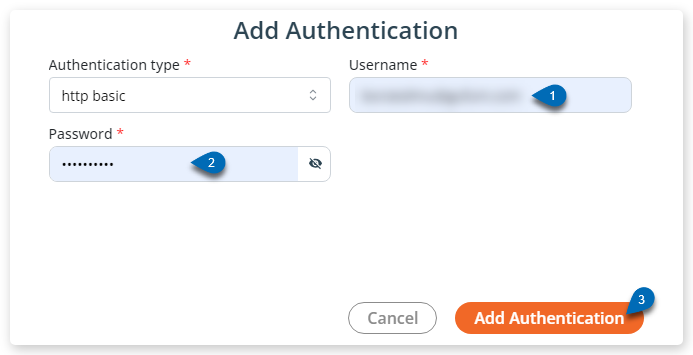
- Click,
Add Authentication
When the user runs the tryout operation, they need to enter these credentials to validate the authorization and run the operation.
Header Authentication
The second authentication type available is Header. Simply select it, and then:
- Enter the
Header Name. - Then, the
Header Value
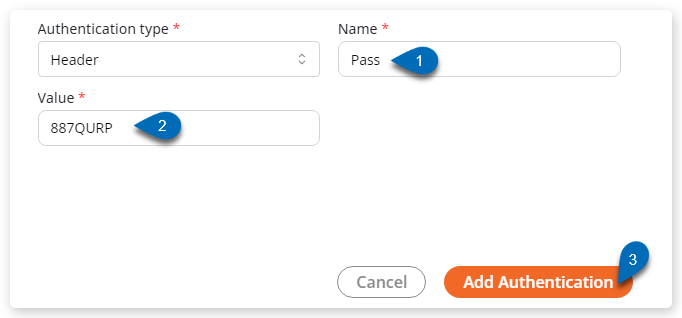
- Click,
Add Authentication
Through Header authentication, you add the authentication credentials in the headers of the API request. This allows the server to identify and authorize the user making the request. Once it is enabled, the API will require the appropriate headers with valid credentials to authorize access.
OAuth 1 Authentication
The third authentication type available is OAuth 1. The OAuth 1 authentication at Yappes provides a secure way to authorize user access to an API. It involves the use of access tokens and secret keys to verify the identity of the requesting user. Once it is enabled, the API will require users to provide valid access tokens and secret keys in order to access the resources.
To enable the OAuth 1 authentication, follow the below steps:
- First, select
OAUTH1as Authentication Type - Then, enter the
Consumer key Consumer secret- Select the
Signature method: HMAC-SHA1 | PLAINTEXT - Enter the
Time stamp - Then define the
Nonceparameter VersionRealmTime Request token URLAuthorize token URLAccess token URL
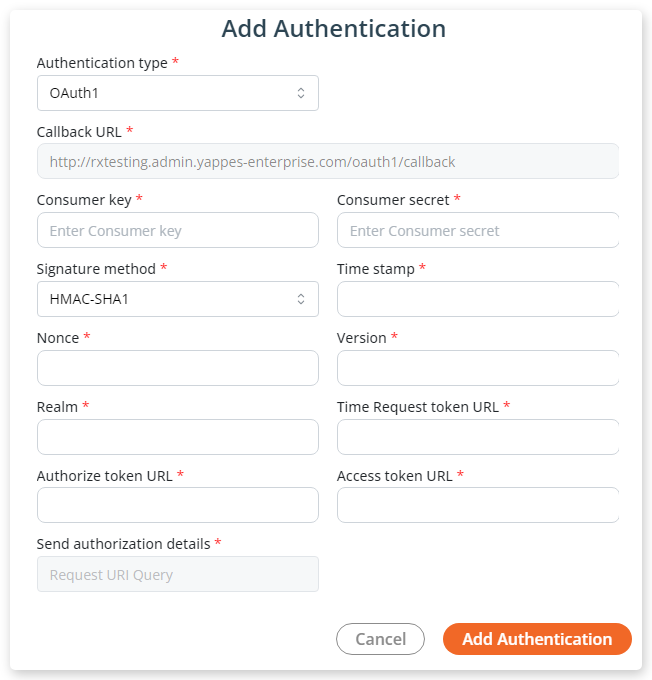
- Once added all the details, click
Add Authentication
Query Parameters Authentication
The fourth authentication type available is Query Parameter. If you select it, then you need to:
- Enter the
Query Parameter Name - Then, add its
Value
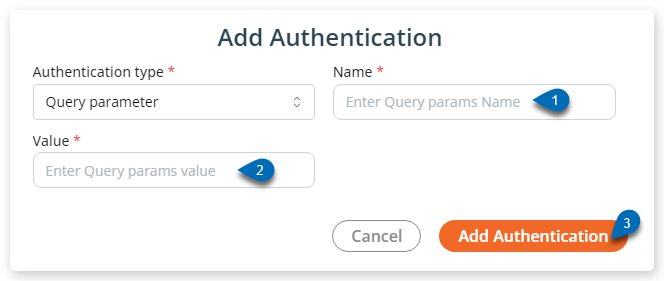
- Click,
Add Authentication
The Query Parameters authentication is a simple method of authentication where the authentication credentials are passed as query parameters in the API request. This allows the server to validate the credentials and authorize access to the requested resources. Once it is enabled, the API will require the appropriate query parameters with valid credentials to authorize access.
OAuth 2 Authentication
The fifth authentication type available is OAuth2. Unlike OAuth 1, the OAuth 2 authentication allows users to grant limited access to their resources. At Yappes, you can enable the OAuth 2 authentication based on Client Credentials or Authorization Code that involves Access token URL, Authentication URL and Scope, providing a secure and standardized way for developers to authenticate and authorize API access.
To enable it, first, select the Authentication Type as OAuth 2, then:
- First, select its
Grant Type: Client Credentials | Authorization Code
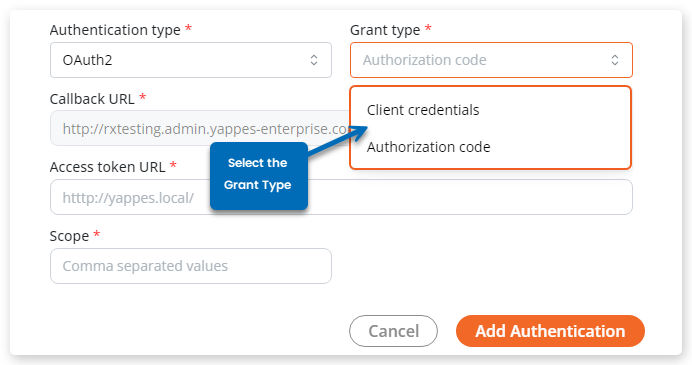
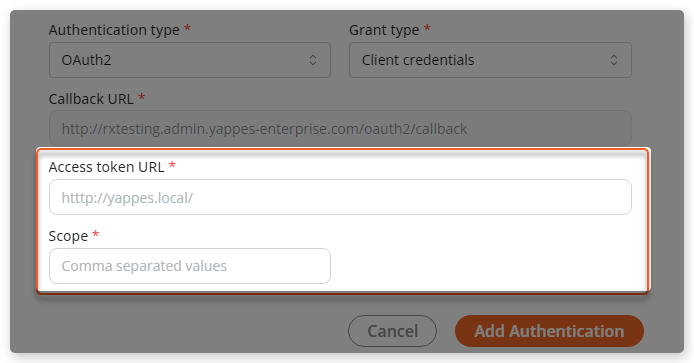
- If you select Client Crendentials, then:
- Enter the
Access token URL - Then,
Scope
- Enter the
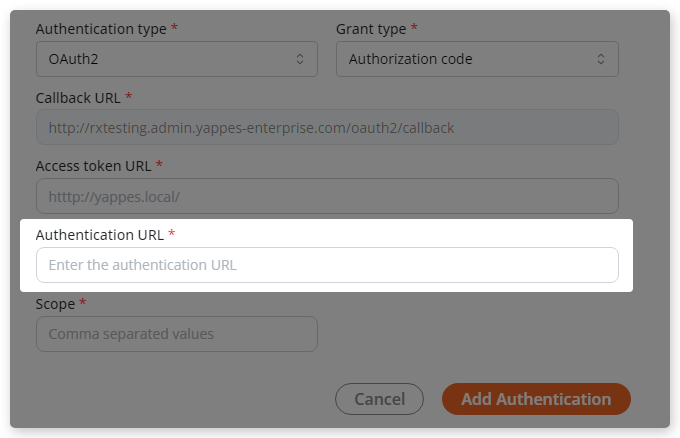
- If you select Authorization Code, you need to additionally add the
Authentication URL
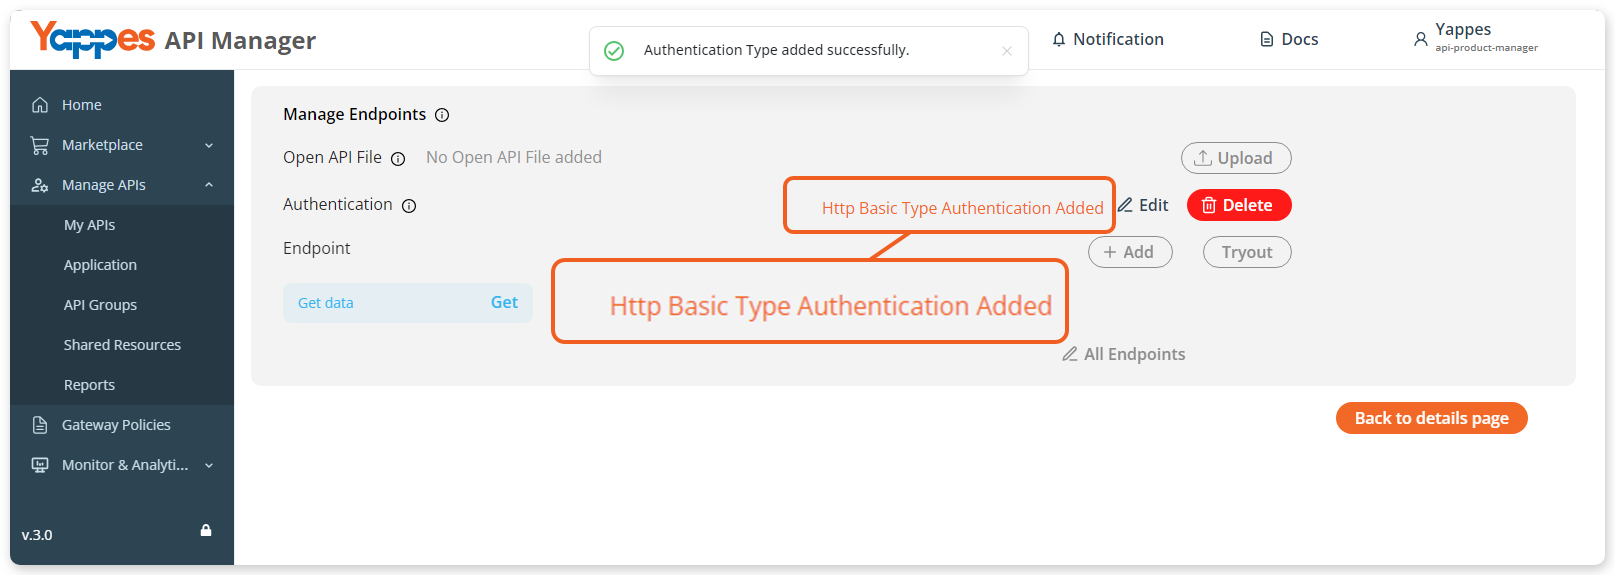
- Once you've added info in all the fields, click
Add Authentication.
This will add the authentication in the API for the Tryout operation.
Yappes OAuth
Yappes OAuth uses the platform OAuth server configured in the Admin Console. API providers select it during onboarding, define scopes per endpoint, and consumers receive client credentials after subscription. Unlike the OAuth 2 type above, Yappes OAuth enforces access at the gateway for subscribed APIs — not just during Tryout.
For setup steps across admin, provider, consumer, and approver roles, see Yappes OAuth.