Utilizing a shared resource (create, edit and delete)
In this guide, you’ll learn how to create, edit and delete a Shared Resource. Follow the below sections.
Note
Before you proceed with the instructions mentioned in the following sections, ensure you’re a user with the platform-admin, api-product-manager or api-developer role.
Creating a shared resource
To create a shared resource for your API in the Yappes API Manager, you need to:
- First, access the
Manage APIs→ selectShared Resources.
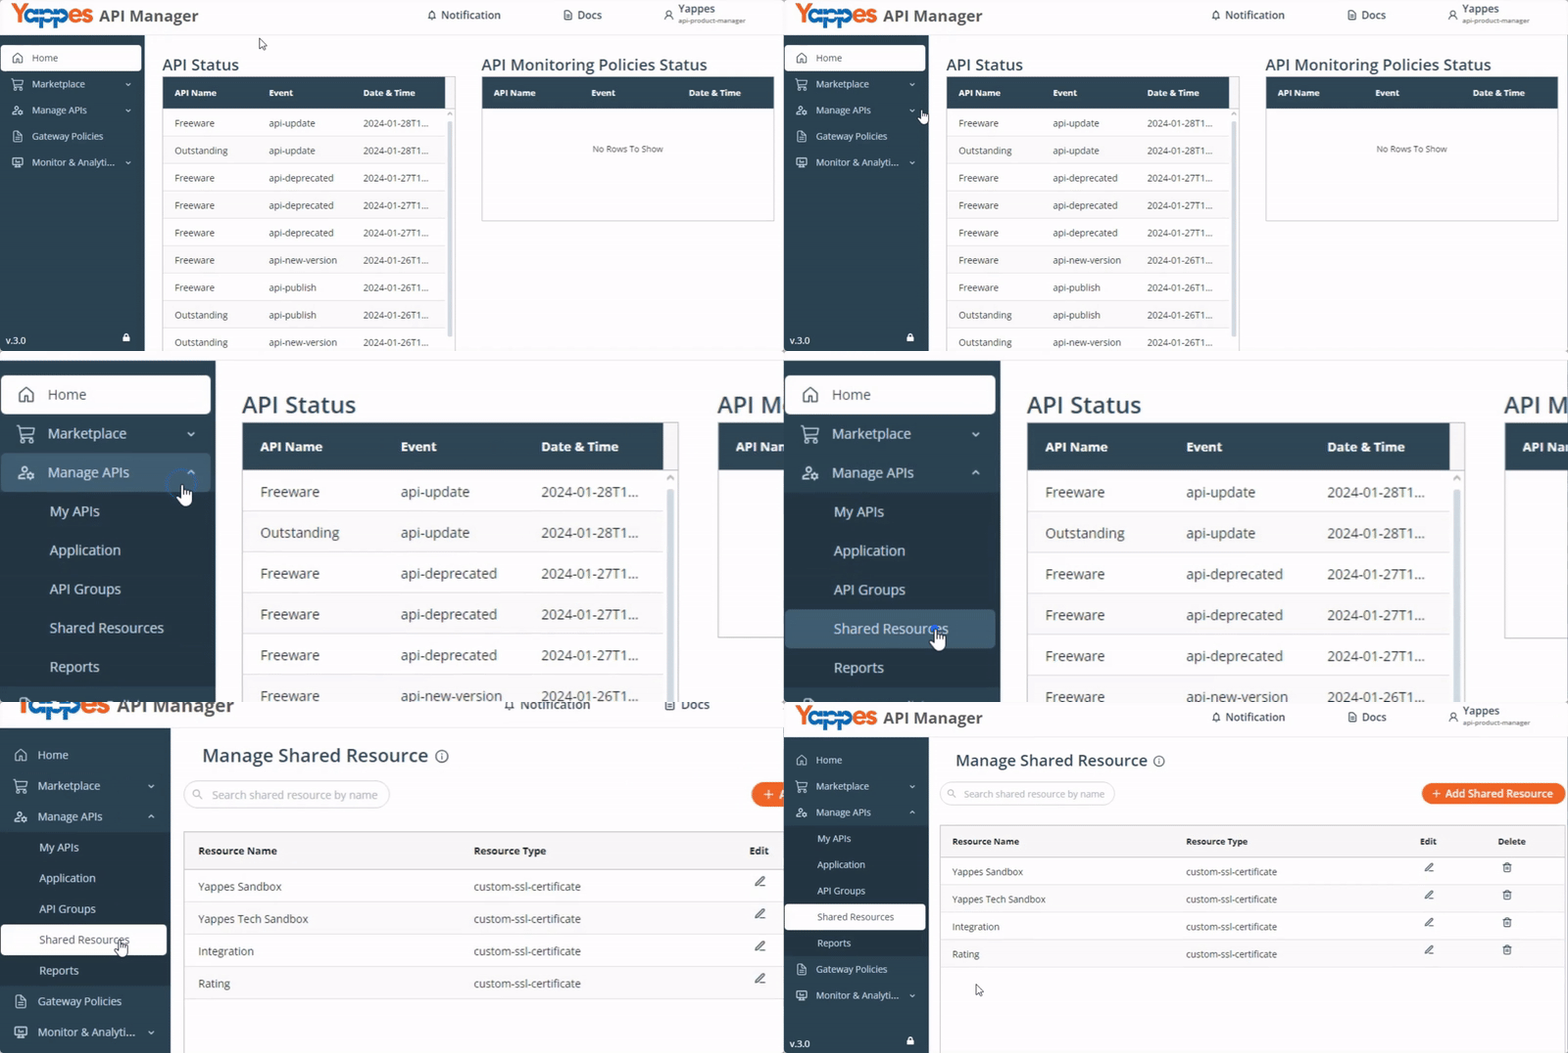
- Then, click on the Add Shared Resource.
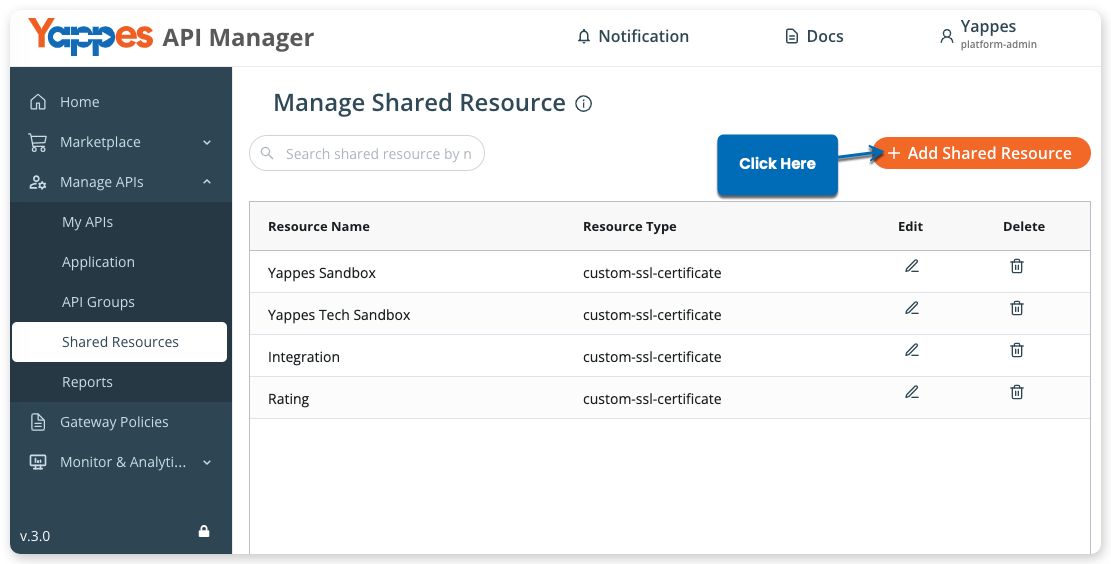
-
In the popup shown, add the values as needed.
- First, enter the
Resource Name - Then, Description
-
For
Resource Type, choose one of the available options:custom-ssl-certificatecustom-security-key
-
Enter Passphrase
- Click the
Select Filebutton and upload the certificate file - .pem, .key, .crt, or .ca only.
- First, enter the
Info
Fields with asterisk (*) are mandatory.
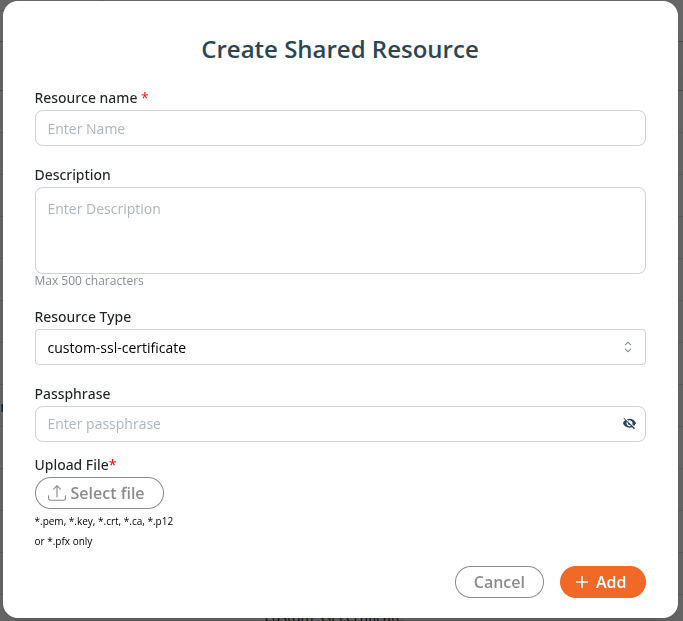
- Once you’re done with all of these, click Add.
This will create a shared resource ready to be utilized in an API you have onboarded. The certificate file can have a structure like the following example.
Editing a shared resource
If you need to edit a shared resource, then simply:
- Go to
Manage APIs→Shared Resources.
- Click the for the resource you need to edit.
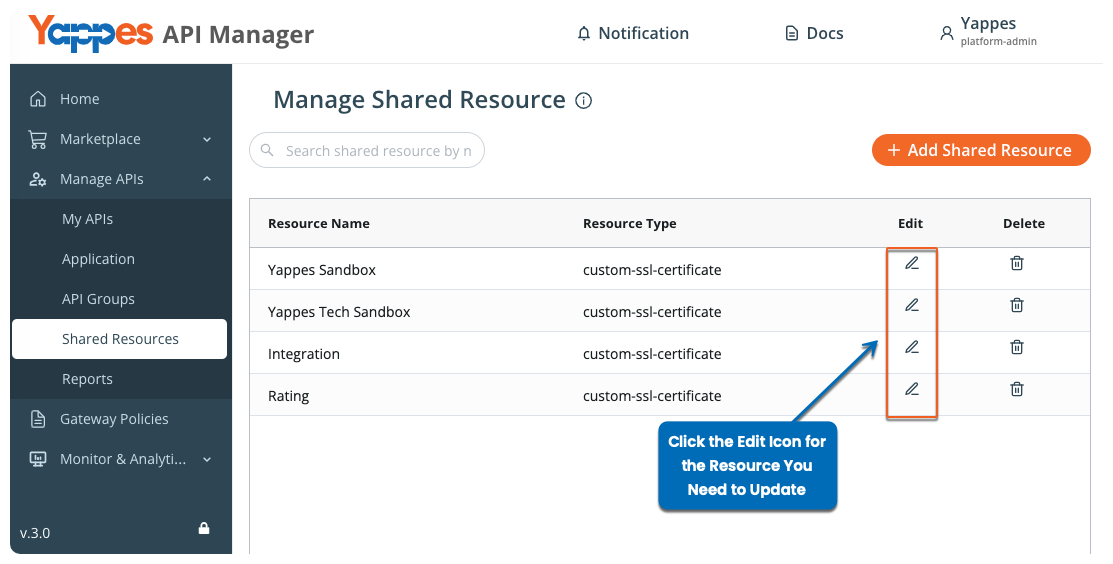
-
Then, in the popup shown, update the required details.
- You can modify the
Resource Name,Description,Passphrase, and the uploaded file. - The
Resource Typecannot be modified after creation.
- You can modify the

- Once you’ve made all the changes, click
Update.
Deleting a shared resource
To begin with, you need to access the Shared Resources of Manage APIs. Then, follow the below steps:
- Click on the for the resource you need to delete.

- In the popup shown, click
Deleteto confirm the action.